How to send SMS from Oracle
Here you can see how to send SMS text messages from Oracle Express with your Ozeki SMS Gateway, which you have probably already downloaded and installed. This tutorial shows you a solution on how to configure Ozeki SMS Gateway to detect and send outgoing messages from your database to any mobile phone. You can find a detailed configuration instruction on this page with screenshots that will help you.
Ozeki SMS Gateway is a powerful SMS gateway software that allows two-way SMS message communication from mobile phones to PC and vice versa. The messages can be stored on a database, such as an Oracle Server.
In this tutorial, you will create an 'ozekimessagein' and 'ozekimessageout' table, but you could give them any name you would like. The only thing is that you need to keep in mind the table names. Ozeki SMS gateway will use SQL queries on the 'ozekimessageout' table to send message.
You can connect Ozeki SMS Gateway to the GSM network in two way:
- A hardware solution: Mobile phone or GSM modem connection to PC
- A software solution: IP SMS Service Provider over the internet (SMPP, CIMD, UCP/EMI)
Here you can read how to configure Ozeki SMS Gateway with browser GUI.
Step 1 - Configure the Oracle database
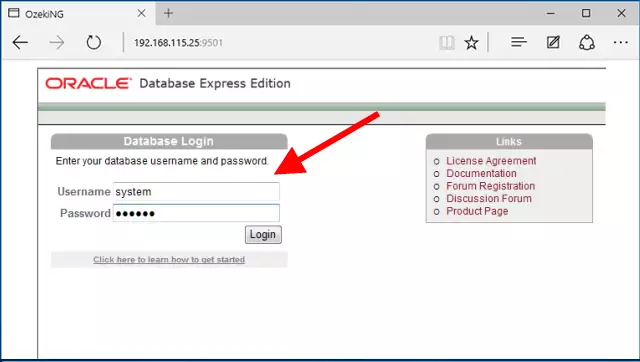
The first step of this guide is to configure an Oracle database. For that, first, you need to install Oracle to your computer and log into the server's web interface (Figure 1).
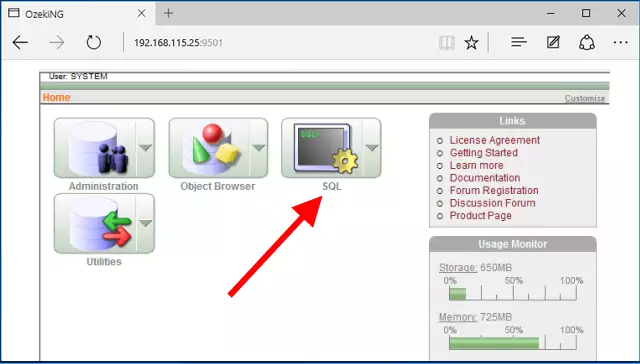
In the main menu of the Oracle Database Express application, you need to select the SQL option the configure the Oracle database, so just click on its icon as you can see it in Figure 2.
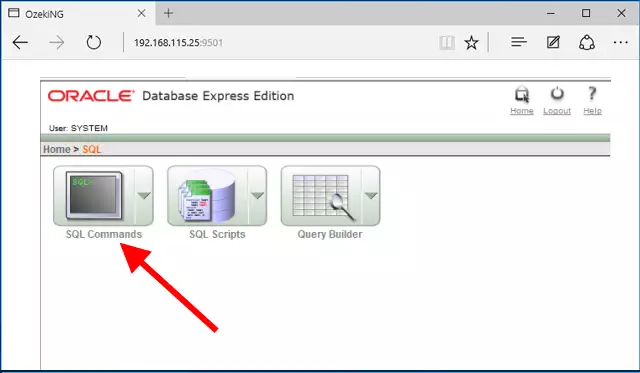
Next, you need to click on the 'SQL Commands' as Figure 3 demonstrates it to be able to execute SQL commands in your Oracle database.
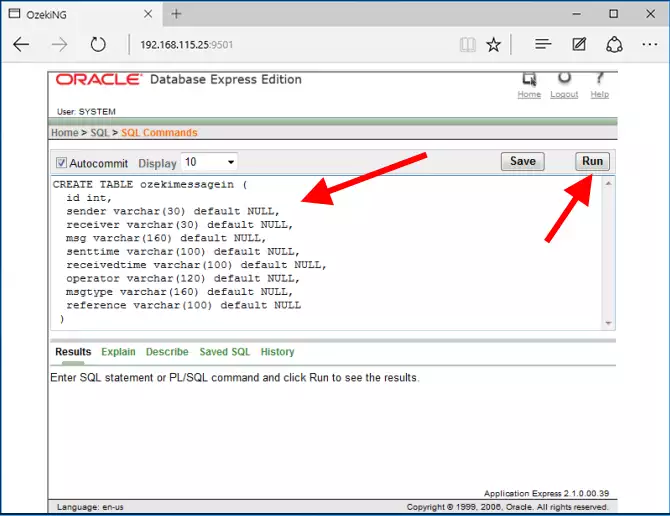
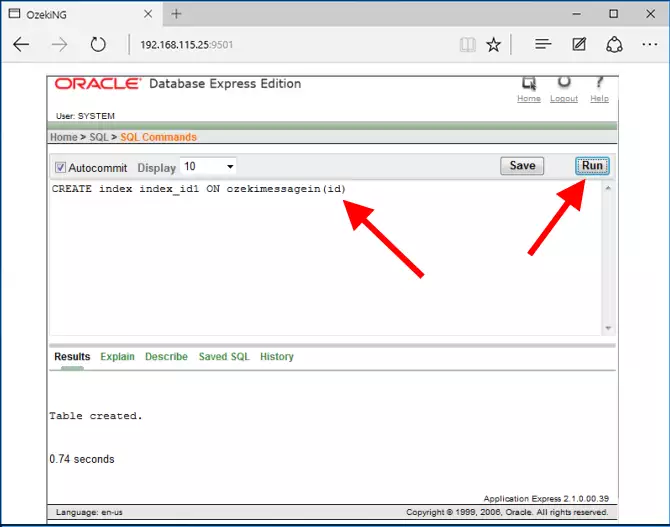
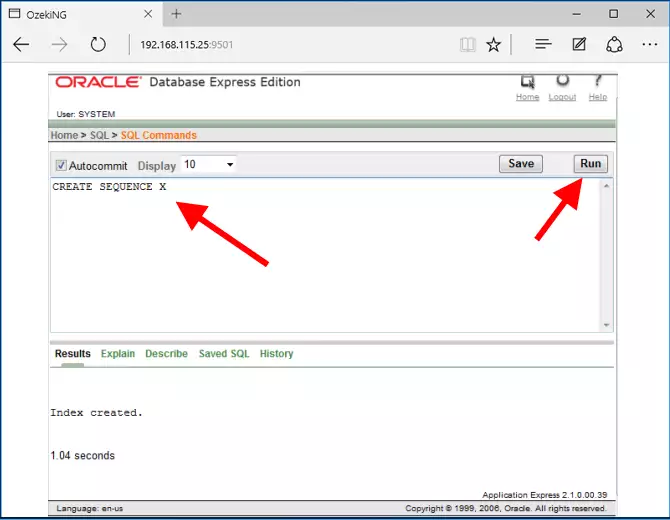
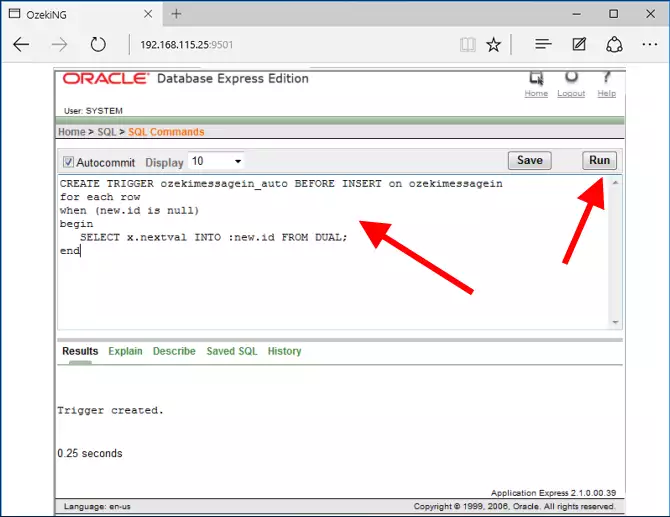
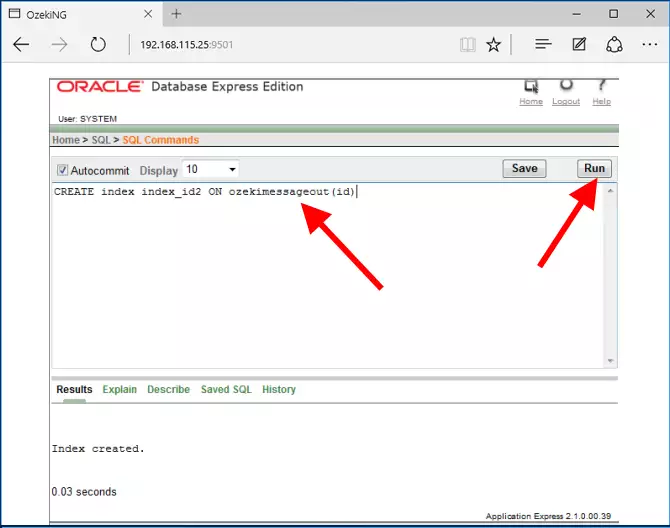
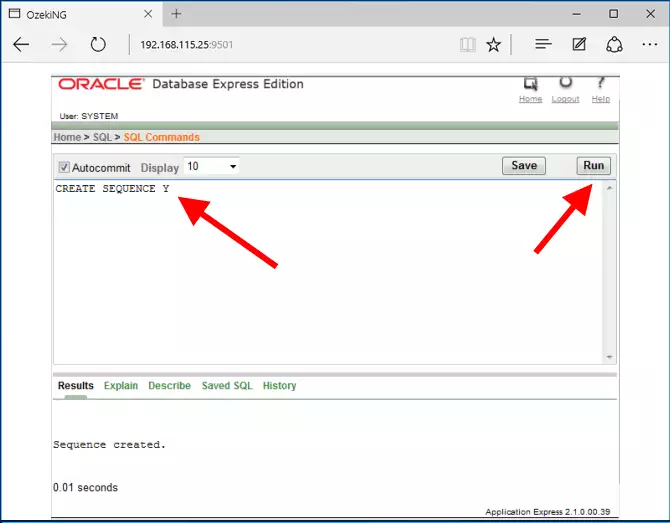
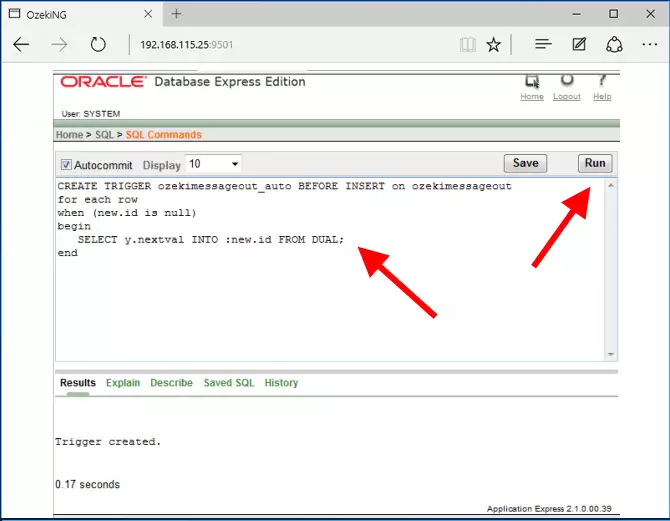
Please copy-paste the following SQL statements to create the table layouts (Figure 4-11).
CREATE TABLE ozekimessagein (
id int,
sender varchar(255) default NULL,
receiver varchar(255) default NULL,
msg varchar(160) default NULL,
senttime varchar(100) default NULL,
receivedtime varchar(100) default NULL,
operator varchar(120) default NULL,
msgtype varchar(160) default NULL,
reference varchar(100) default NULL
)
CREATE INDEX index_id1
ON ozekimessagein(id)
CREATE SEQUENCE X
CREATE TRIGGER ozekimessagein_auto
BEFORE INSERT on ozekimessagein
for each row
when (new.id is null)
begin
  SELECT x.nextval INTO :new.id FROM DUAL;
end
CREATE TABLE ozekimessageout (
id int,
sender varchar(255) default NULL,
receiver varchar(255) default NULL,
msg varchar(160) default NULL,
senttime varchar(100) default NULL,
receivedtime varchar(100) default NULL,
operator varchar(120) default NULL,
msgtype varchar(160) default NULL,
reference varchar(100) default NULL,
status varchar(20) default NULL,
errormsg varchar(250) default NULL
)

CREATE INDEX index_id2
ON ozekimessageout(id)!
CREATE SEQUENCE Y
CREATE TRIGGER ozekimessageout_auto
BEFORE INSERT on ozekimessageout
for each row
when (new.id is null)
begin
  SELECT y.nextval INTO :new.id FROM DUAL;
end
Congratulations! You have finished creating your database structure.
Step 2 - Create the Oracle database connection
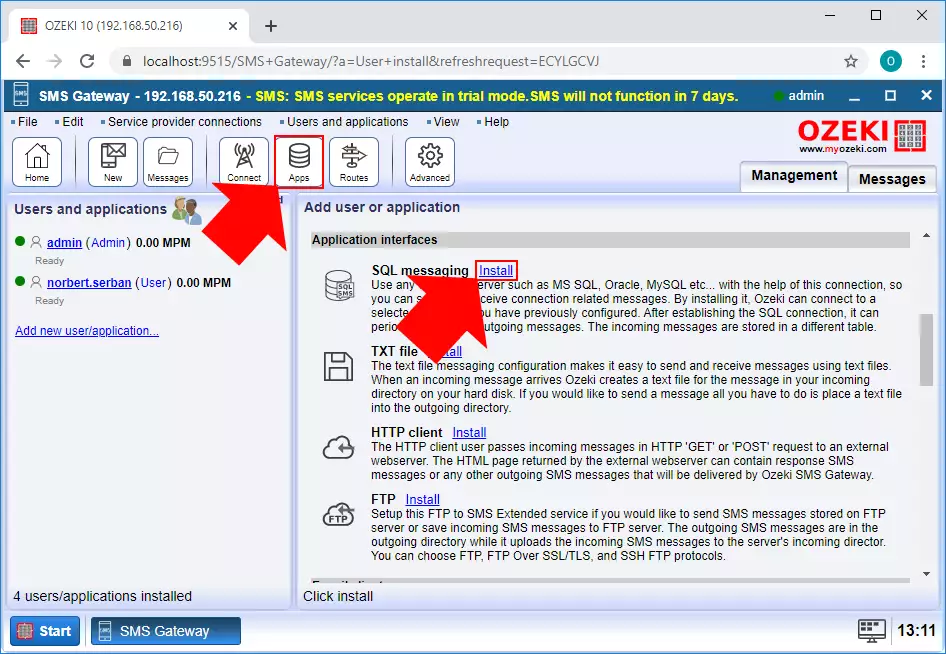
The next step of the guide is to create the Oracle database connection which can connect to the database and handle its tables. For that, open SMS Gateway and first, select the Apps menu from the toolbar. In this menu, you need to scroll down to the 'Application interfaces' section, and here, like in Figure 12, just click on the install button of 'SQL messaging'.
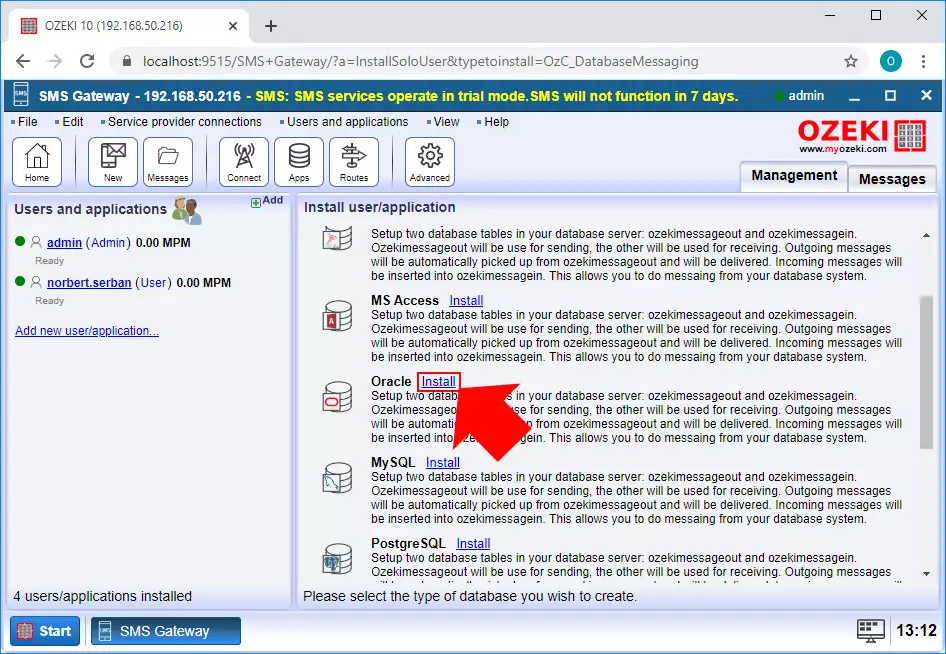
The 'SQL messaging' menu contains all types of database connections available in SMS Gateway. Now, to be able to connect to your Oracle database and its tables, just click on the Install button of the Oracle database connection as you can see it in Figure 13.
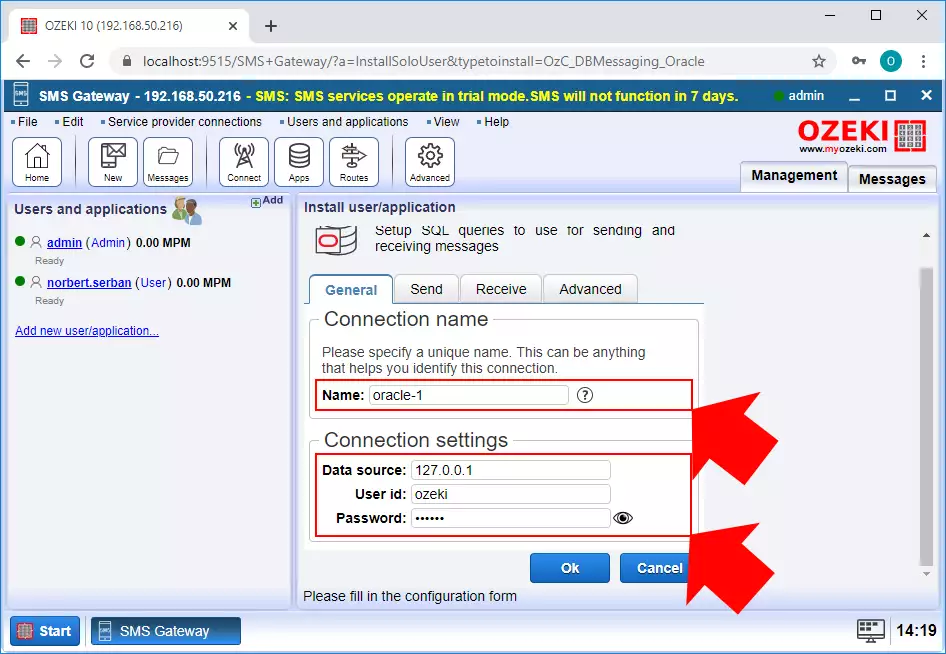
Next, you need to provide some details to be able to connect to the database successfully. First, just give a name to the connection. After that, as in Figure 14, provide the details of the Oracle database. The 'Data source' id the IP address of the place where you installed the database. If it is on the same computer you can type '127.0.0.1' in this field. The 'User id' and 'Password' fields should represent your Oracle database user account. If you finished, you can just click OK.
Step 3 - Send a test SMS
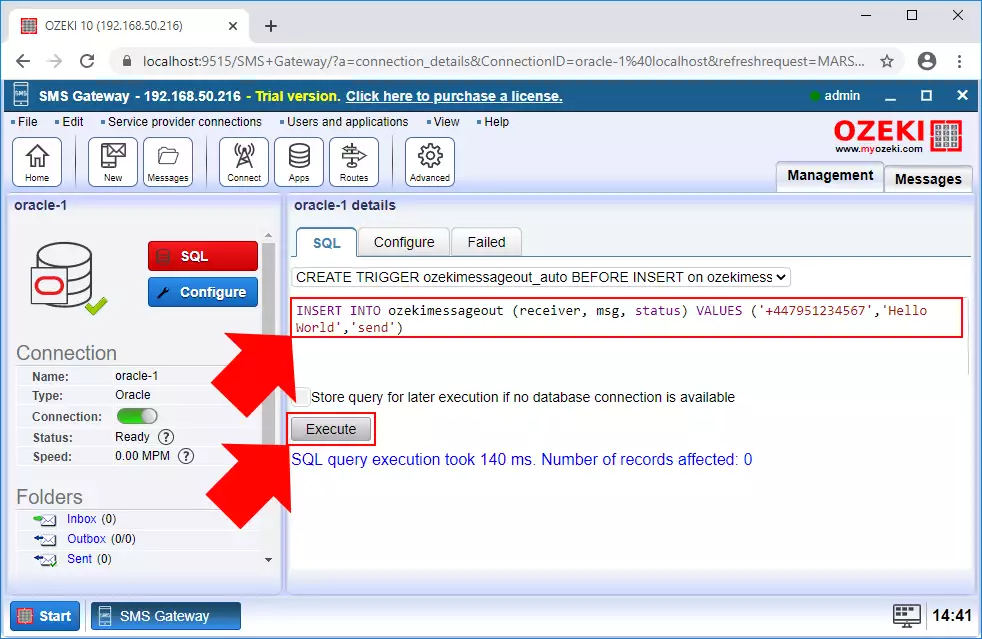
To test the database connection and the database itself, just open the created Oracle database connection. Here, you can see the SQL tab (Figure 15) where you can write the SQL commands that you want to execute. So, just copy-paste the SQL command below, write a valid phone number as a value and click 'Execute' to test the connection.
INSERT INTO ozekimessageout
(receiver, msg, status)
VALUES
('+36205460691','Hello','send')
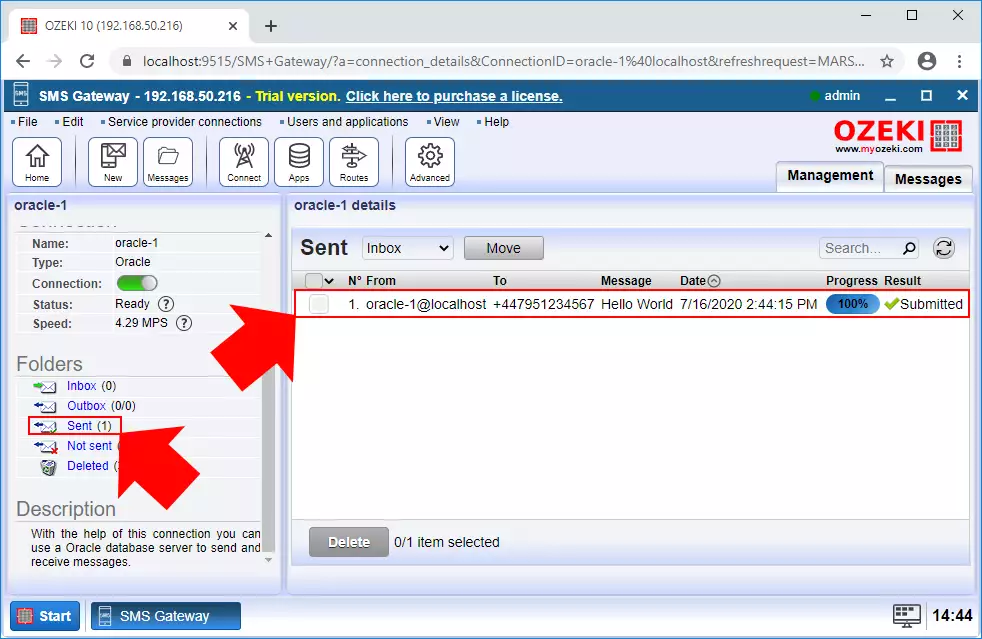
The Oracle database connection is capable of reading the rows of the create tables, and if it detects a new message, it sends the message to the phone number that you provided as a value. Then, the message stored in the Sent folder of the connection as you can see it in Figure 16.
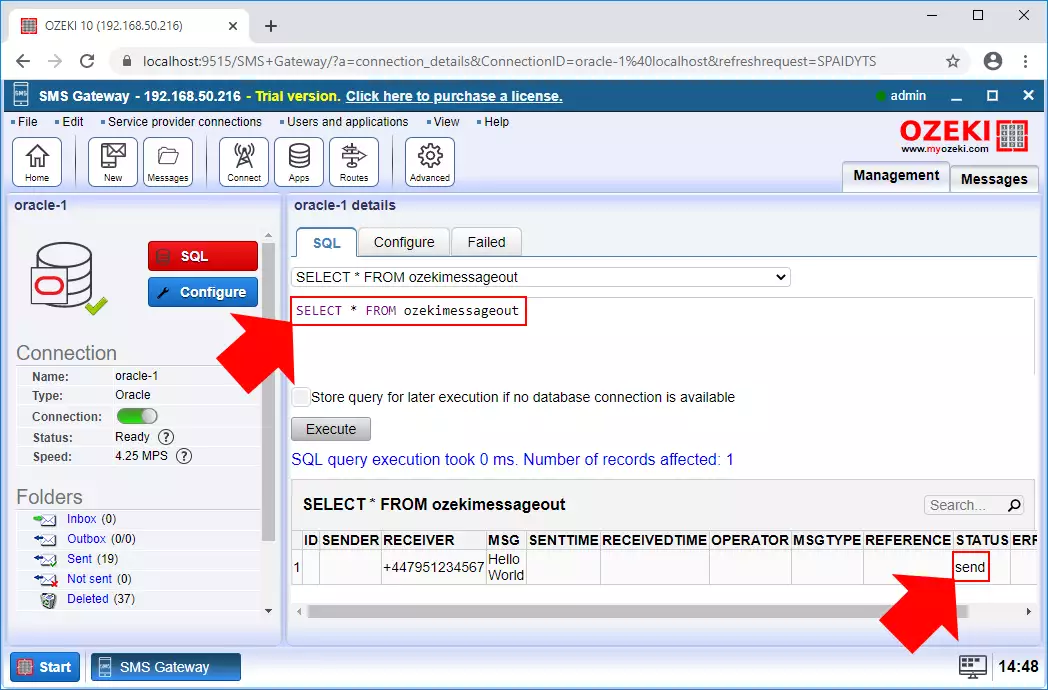
You can check every message in the 'ozekimessageout' table by executing the SQL query below. This command lists every message with all its details like the phone number of the recipient, the message and the status of the message as Figure 17 demonstrates it.
SELECT * FROM ozekimessageout
More information

 Sign in