How create an SMS user account
This chapter explains how to install and configure a standard user for SMS messaging using the graphical user interface of the Ozeki SMS Gateway software.
Standard SMS User Client

How create an SMS user account (Simple commands)
To create an SMS user account:
- Launch Ozeki SMS Gateway
- Add new user in Ozeki SMS Gateway
- Install Standard user
- Provide unique username and password
- Enter the recipient phone number
- Type the SMS message text
- Send the test SMS message by click on Ok
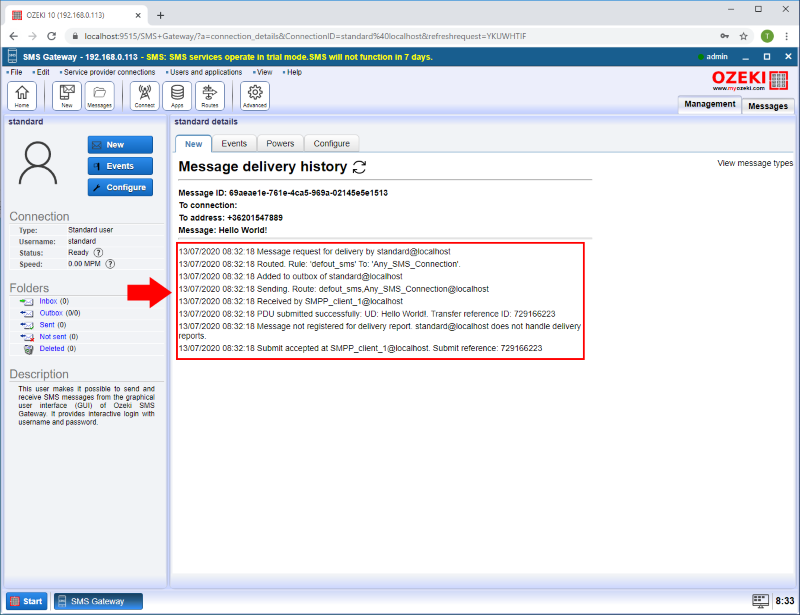
- Check the status of the message in Message delivery history
The process of creating an SMS user account (video tutorial)
In this following short, 40 seconds long video you can learn how to create an SMS user account in Ozeki SMS Gateway. It will expain you all the essential steps, you have to make, so it won't cause any problems to complete the process. It starts by adding a new user in the Ozeki SMS Gateway and configuring the user account, by adding the necessary information. It will show you the method of sending an SMS message to your recipient. The Ozeki SMS Gateway's user-friendly interface provides that, if you follow the steps given in this video tutorial, you will be able to create an SMS user account in a simple way, when you needed.
Step 1 - Add new user or application
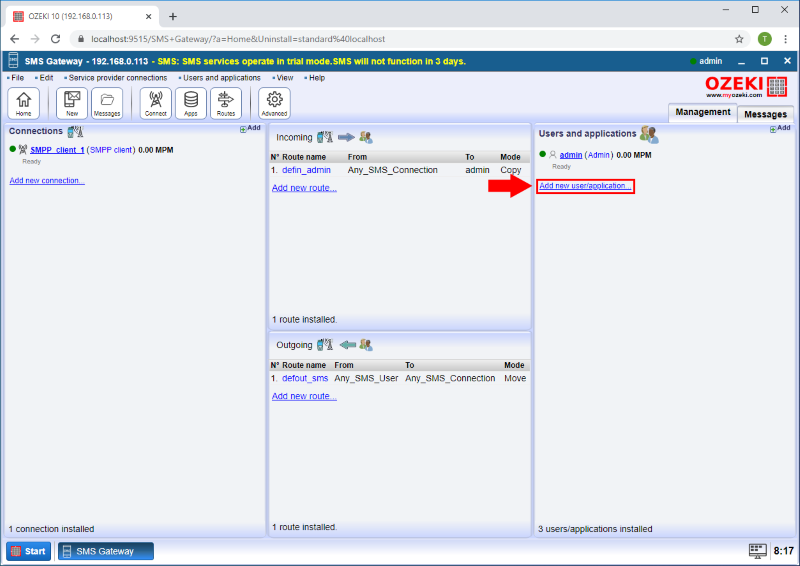
To start installing and configuring a standard user, click the Add new user/application... link on the right of the Management Console (Figure 2).
Step 2 - Install Standard user
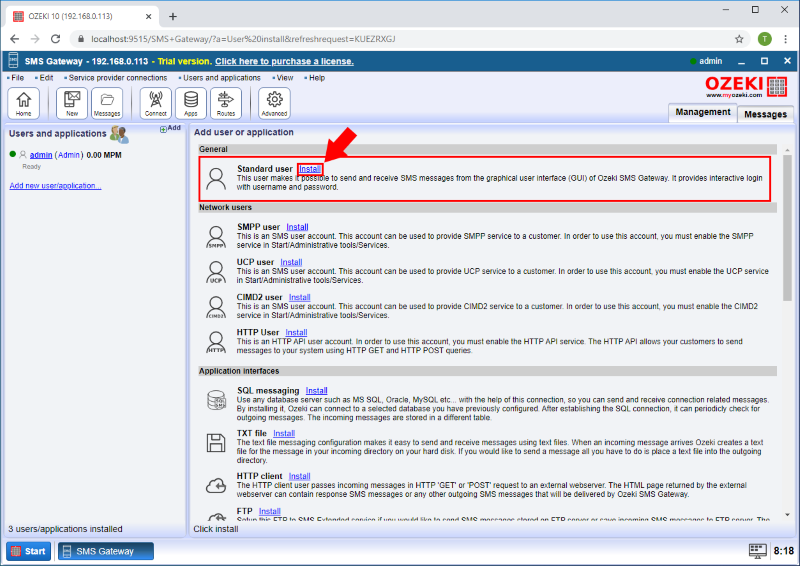
An interface will open consisting of two panels. The left side panel contains the already installed users and applications. The right side panel contains the users and applications you can install with a brief description next to them. Search the Standard User and click the blue 'install' button next to it (Figure 3).
Step 3 - Configure username and password
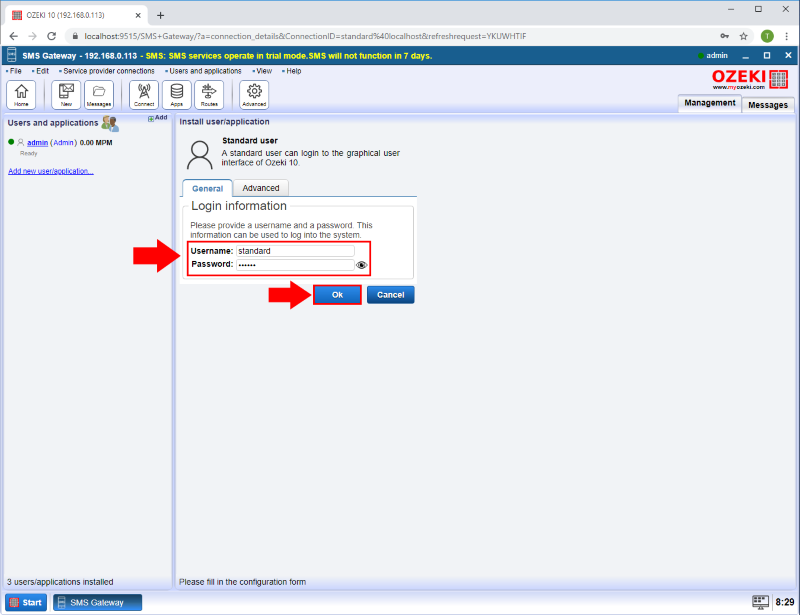
Clicking the Install link will bring up the Standard user installation panel. Here, you need to enter a unique username in the Username field and a password in the Password filed (Figure 4).
Step 4 - Send test message
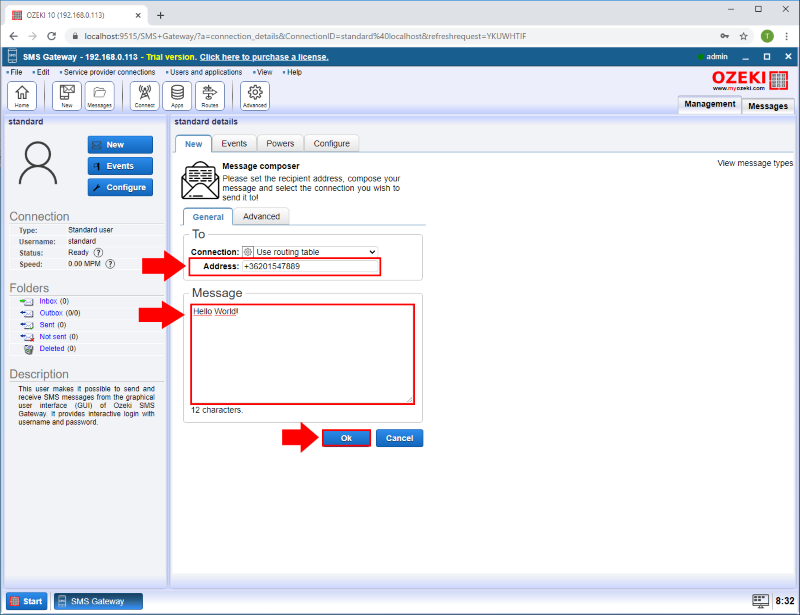
From the Standard user GUI you can send SMS message. Provide the recipient address, the message and click on the OK button (Figure 5).
Step 5 - Message sent
After the message is sent you can see the result of the sending in the message delivery history (Figure 6).

 Sign in