How to create table structure in Access 365
Before you start to configure your database connection in Ozeki 10 SMS Gateway, you need to create two database tables in the Microsoft Access 365: "ozekimessagein" and "ozekimessageout". From this guide you can learn how these tables should be created. This guide is aimed at beginners. The process will take about 10 minutes to perform. Don’t waste any more time. Let’s create the databases now.
What is Access 365?
Access 365 is a widely used information management tool. It’s most frequent usage is information storage, report and analysis making.
What is a table in Access?
A table is an object in a database. It is used to store data. A table has records (rows) and fields (columns).
How to create table structures in Access 365?
Int this video, you will learn about the process of creating tables. It will start with a blank database and will end with two finished tables. You will learn how to create tables and how to configure it. The video is only a little longer than 2 minutes and very detailed. You will have no problem following this step-by-step tutorial. This guide is for beginners, you don't need and previous knowledge of the topic to complete the process.
Create the first table
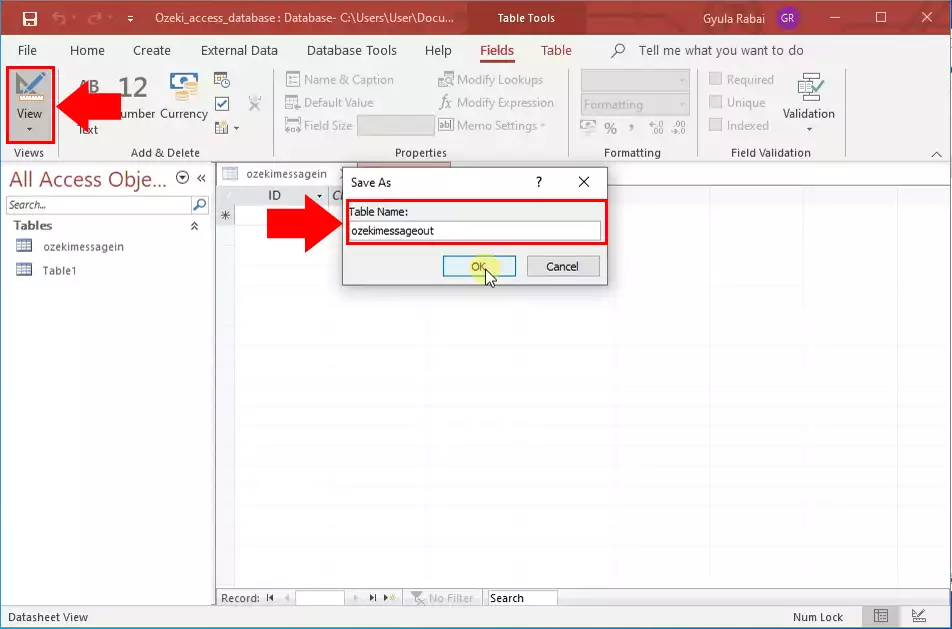
After opening a blank database file, click the View button in the upper left corner to switch to the Design view of the table. A window will appear where you need to enter the name of the table. In this case, it will be ‘ozekimessagein’ (Figure 1). After this step, you will be able to design the ‘ozekimessagein’ table.
Enter the field names
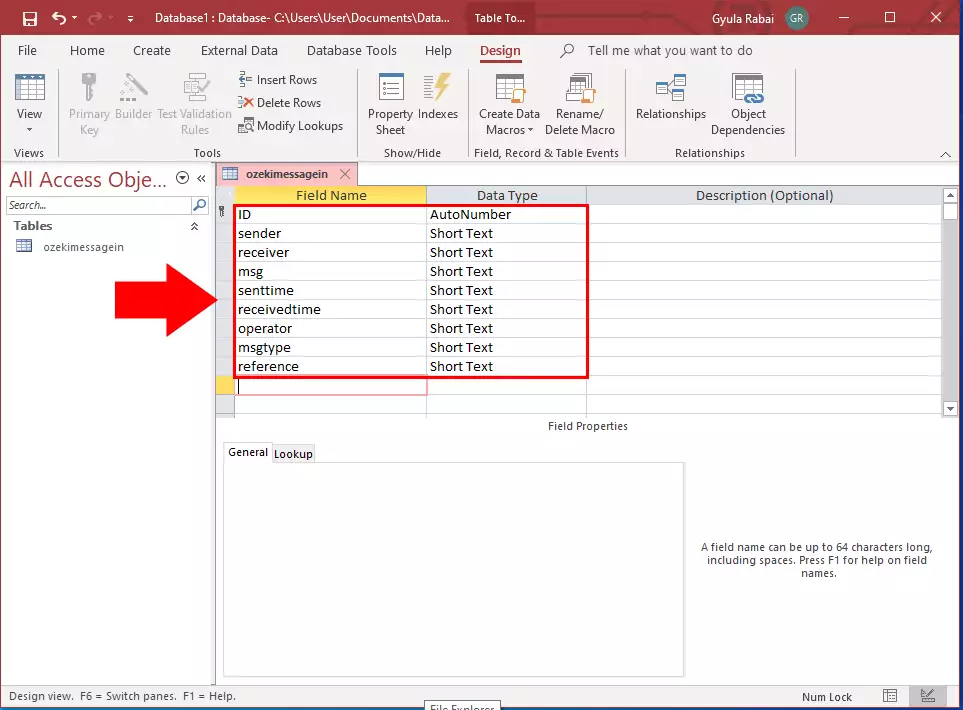
Now, modify the new blank table. Complete the field names column as seen on Figure 2. Make sure to complete it precisely so the Ozeki SMS Gateway can work with it. The first row in the column should be the ID with the AutoNumber data type. Every other datatype will be Short Text from here. The second row should be named sender, then receiver, msg, senttime, receivedtime, operator, msgtype and reference. Be sure to not make any typing mistake.
Save the table
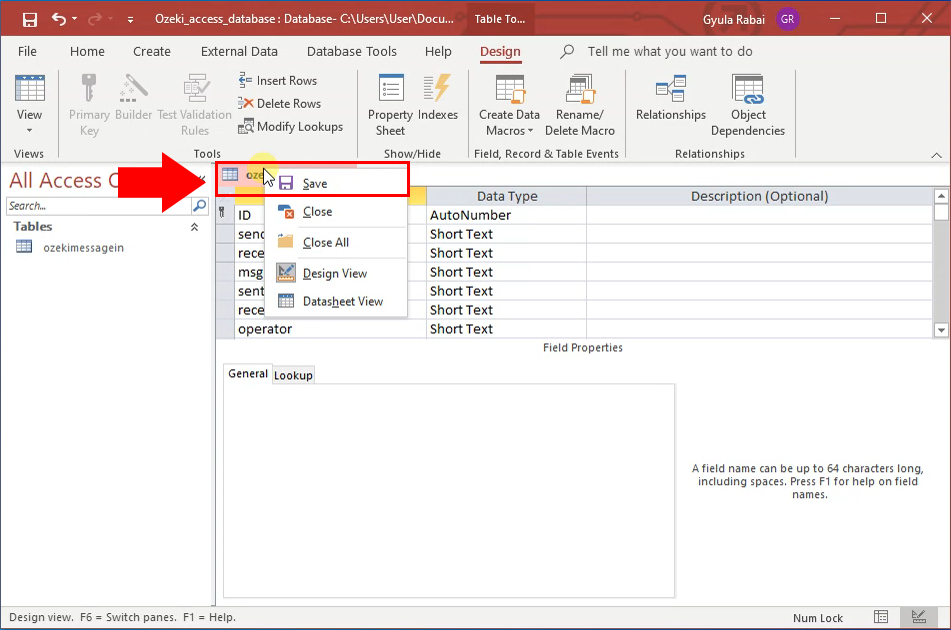
Now you have this table finished. All you have to do is save the settings of the table. You can save the table settings by right-clicking on the table name as you can see in the Figure 3. This way the table will be stored on your computer and you can start using it with the Ozeki SMS Gateway.
Create the second table
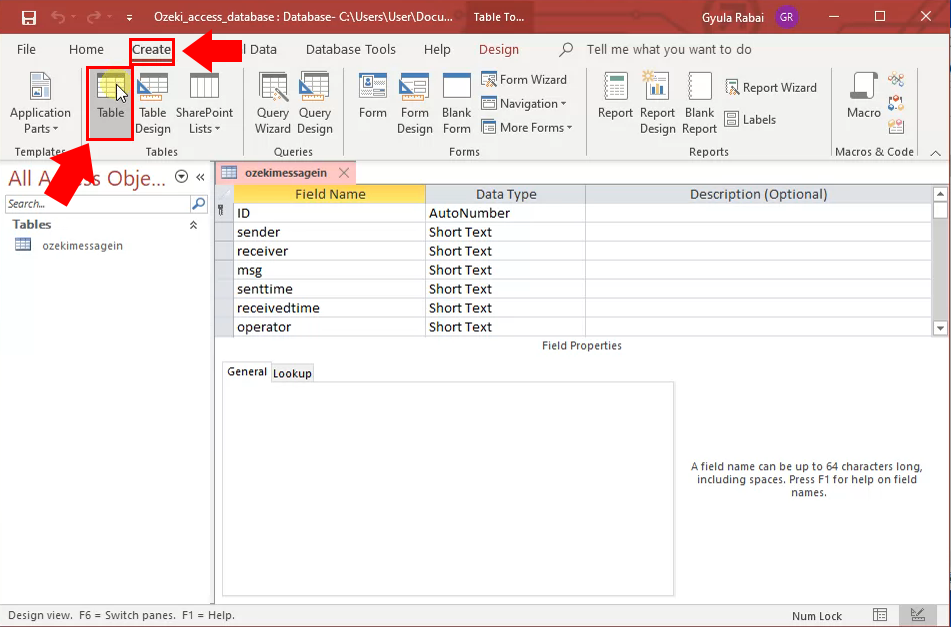
You need a second table for the message you wish to send. This table will be used as an outgoing messages tabel. Create a new table by opening the Create tab page (Figure 4). There, you will find the Table button. Click it to open the table creator. There you will be able to modify the new table.
Name the second table
Click the View button in the upper left corner to switch to the Design view of the table. A window will appear where you need to enter the name of the table. In this case, it will be ozekimessageout (Figure 5). Click the OK button if you finished. This way the table will be stored on your computer and you can start working with it.

Enter the second table field names
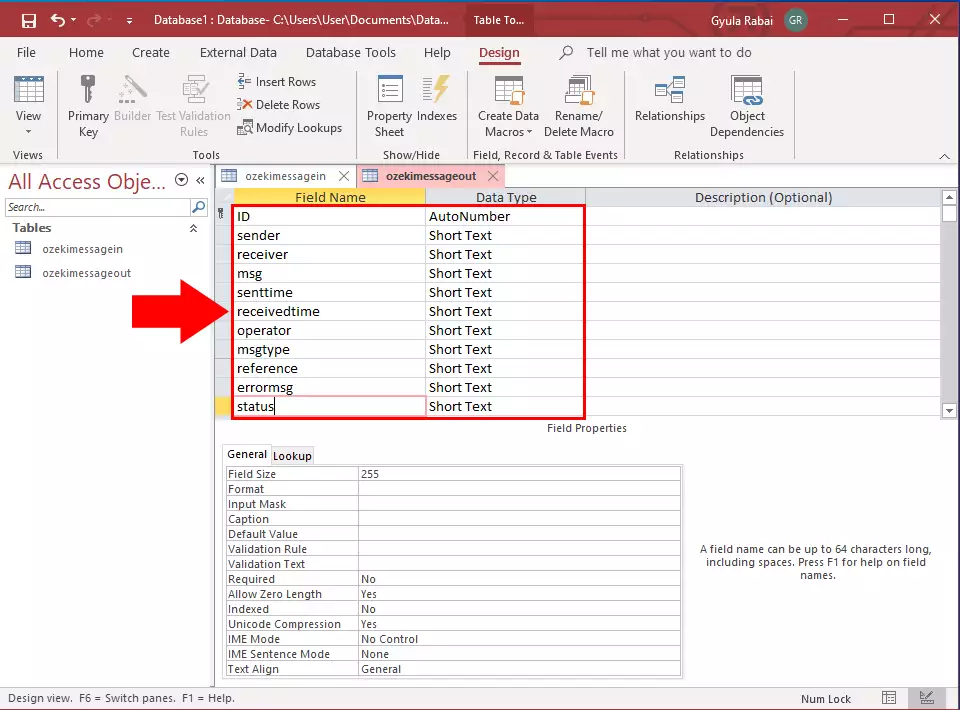
Here, you need to enter the Field Names similarly to the other table. ID with AutoNumber data type and sender, receiver, msg, senttime, receivedtime, operator, msgtype,reference with Short Text data type. The only difference here is that you should add a new row called status with the Short Text data type (Figure 6). This way, the table will be suitable to use as the ozekimessageout table.
Save the final database
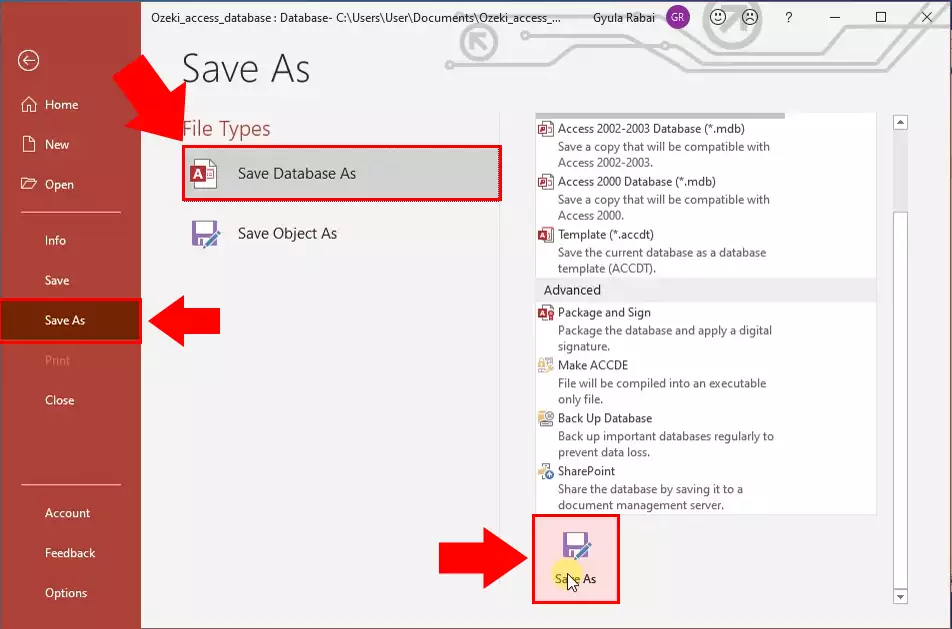
Now you are finished with the database. You can now save the database and start working with it. To do so, open the File tab page and find the Save As button located on the left-side panel. Click it and you will see a Save Database As button. Click it to save the database to a custom directory. Choose a directory and save the database. Now you are finished with the tutorial.
Conclusion
Congratulations, you are finished with this tutorial about creating tables in Acces 365. We did our very best to make it simple and to walk you through all the details as painlessly as possible. Now you are capable of creating tables with the correct data type.
Worth noting, that if you wish to use the database for messaging, the best solution is to use it with the Ozeki Sms Gateway, which is a very powerful gateway software capable of sending up to 1000 SMS per second. You can also track your SMS traffic and the cost of it. If you wish to know more about the Ozeki SMS Gateway application, visit the ozeki-sms-gateway.com page where you can learn about the full potential of the gateway.
I hope this guide will be useful to all the readers and especially to beginners.
More information
- Send and receive SMS in ms access 2013
- How to setup Microsoft Access 365
- How to create SMS tables in Access 365
- How to send SMS from Microsoft Access 365

 Sign in