How to set a Sender ID for a user as Admin
Effective communication is a key feature in successful businesses. Setting up your Sender ID as an Admin in your Ozeki SMS Gateway is a powerful way to build trust and truly stand out with your audience. In this guide, we will walk you through the step-by-step process of setting a Sender ID as Admin. Follow the given instructions to level up your SMS communication through the Ozeki SMS Gateway.
What is a Sender ID?
It refers to a unique identifier associated with the sender of a message or communication. The purpose of a Sender ID is to help recipients identify who is sending them a message. In SMS messaging, the Sender ID is often a numeric or alphanumeric string that appears as the sender's name or number on the recipient's mobile device. For example, when you receive an SMS, you might see "John Doe" or "12345" as the sender ID. Some SMS services allow businesses and organizations to customize the Sender ID to display their brand name or a recognizable identifier.
How to set a Sender ID for a user as Admin (Easy steps)
To set a Sender ID for a user as Admin
- Access your Ozeki SMS Gateway account
- Open Standard user
- Create new Power
- Choose the Sender ID power option
- Set Sender ID for the user
- Log out the system
- Login as the Standard user
- Open SMS Messenger
- Compose your SMS message
- Send the SMS message
- Check the sent message details
How to set a single Sender ID (video tutorial)
In the following quick video, you'll learn how to set a single Sender ID in Ozeki SMS Gateway and discover the benefits of SMS messaging. Setting a Sender ID is essential to make sure that your recipients can recognize your messages. By the end of the video, you will have a clear insight into the process, so you can easily continue it by following the instructions.
To begin the process, load your Ozeki SMS Gateway account and open Ozeki home page. If you do not have an Ozeki account, then download the Ozeki SMS Gateway from the Ozeki website and create one. After downloading, you need to unzip it and run the installer in the zip package. Under the Users and applications menu, click on the Standard user.
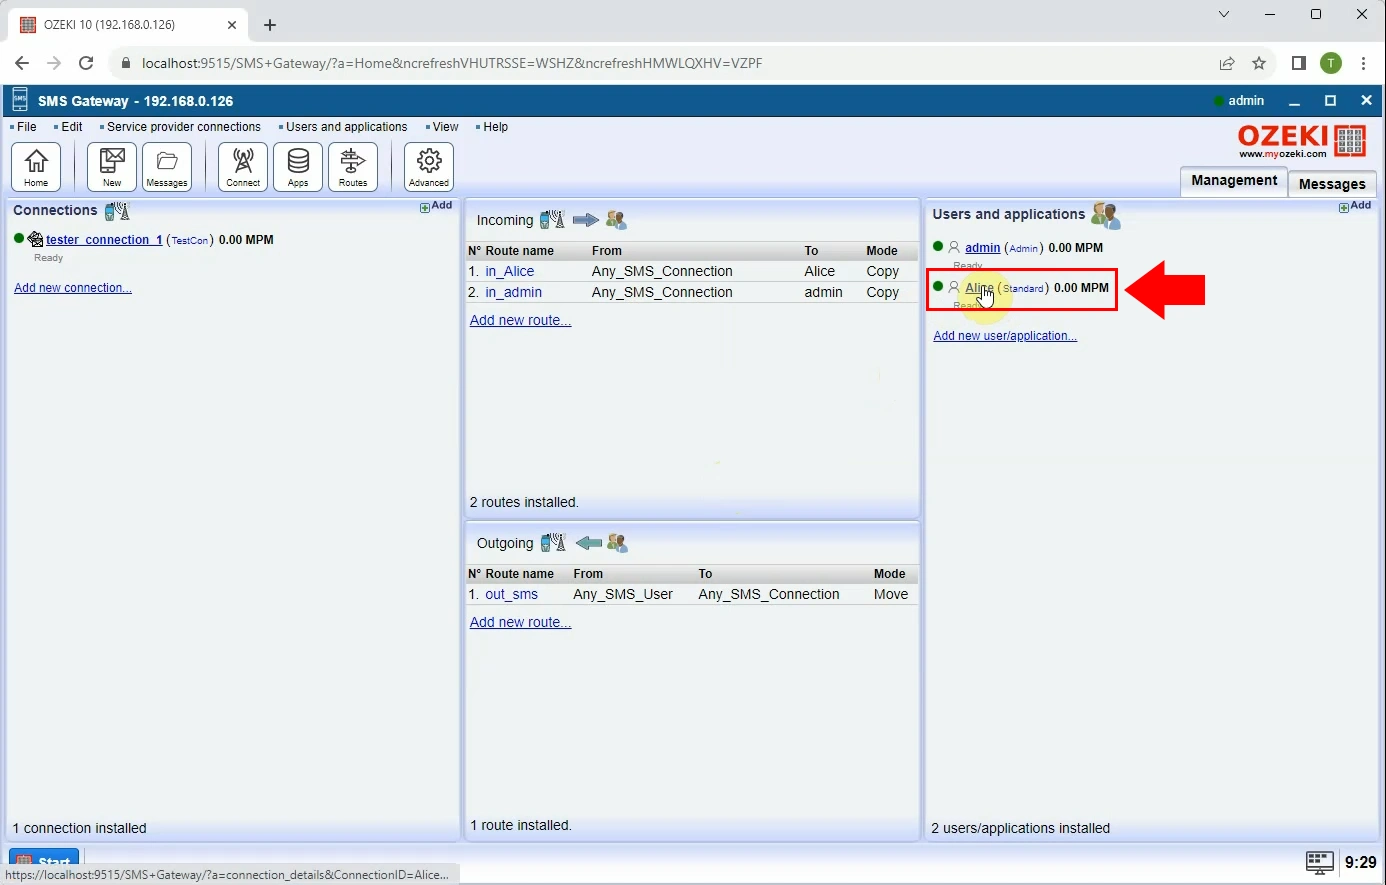
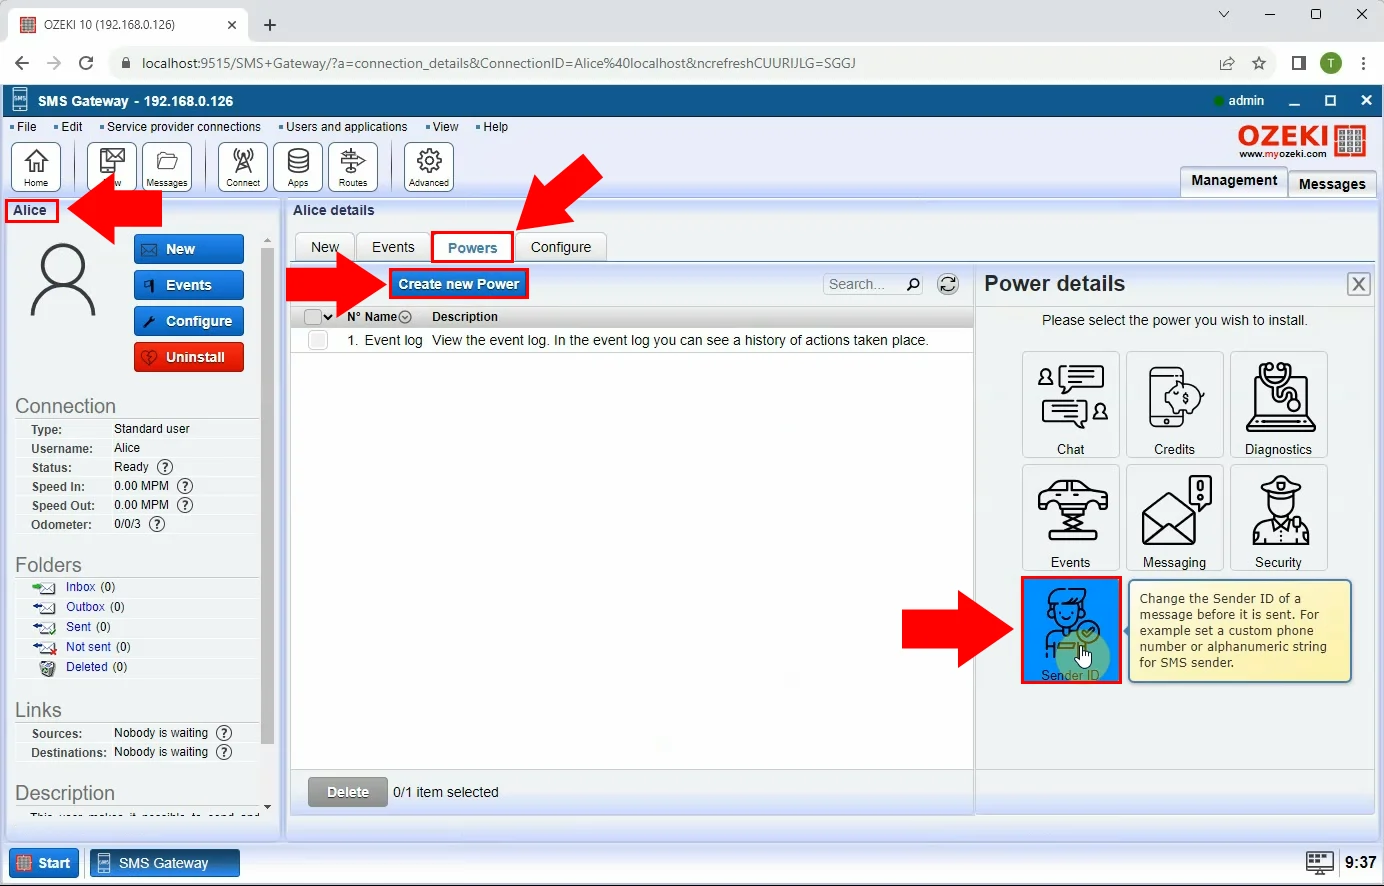
Clicking on the Standard user will bring on to a details page where you can make modifications and setups. Choose the "Power" tab from the panel, then click on the "Create new Power" button, highlighted in blue. After that opt for the "Sender ID" power option to install. It will allow you to change the Sender ID of a message before delivery.
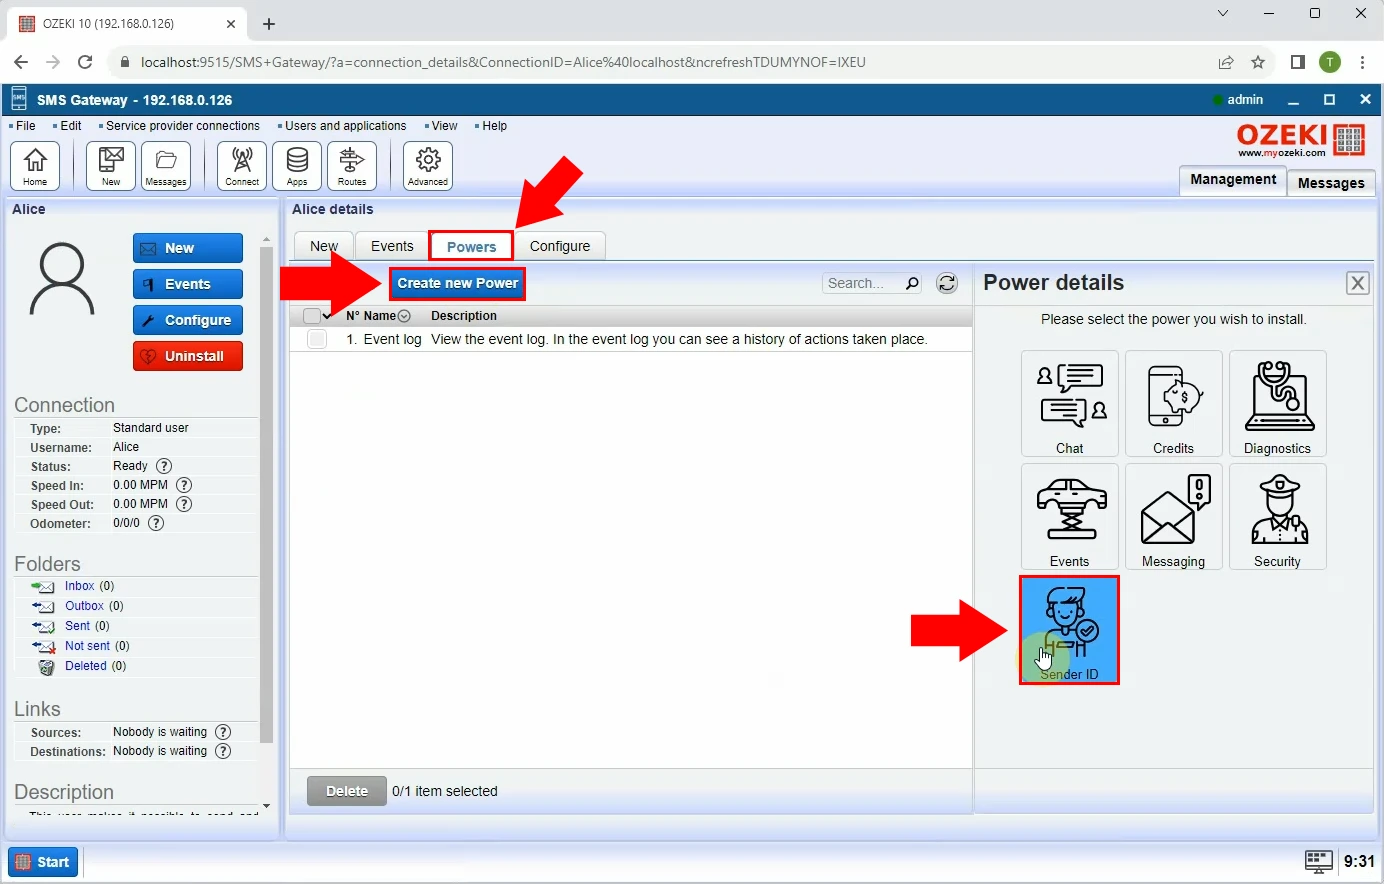
Now, you need to add general details to secure the sender's address for outgoing messages. This can be a phone number for SMS, an e-mail address, or any other address you wish to use as the default message sender. You can add multiple addresses. In this case, the system will choose one automatically. If you are done with entering the details, click on the "Ok" button at the bottom.
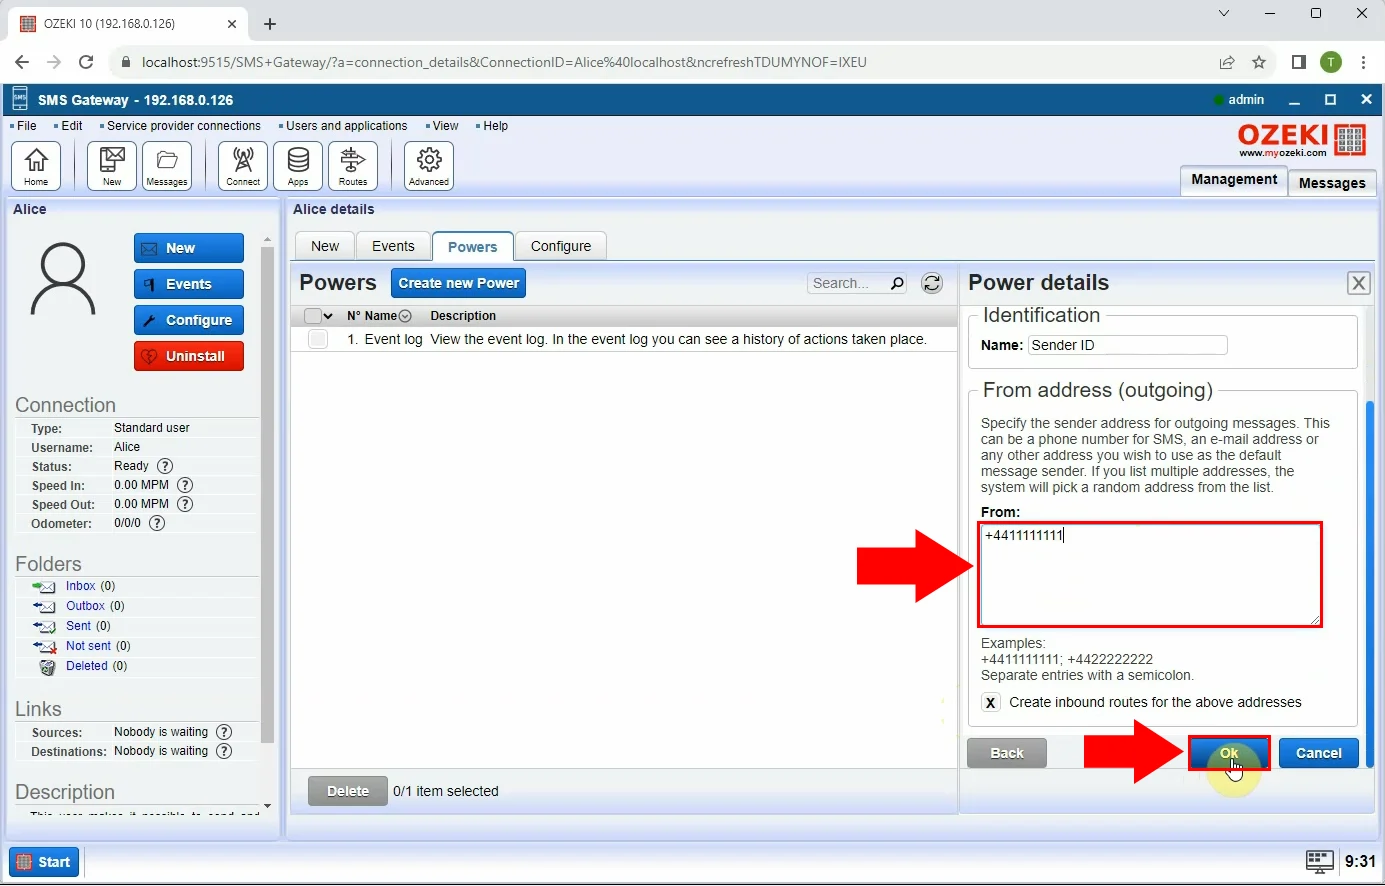
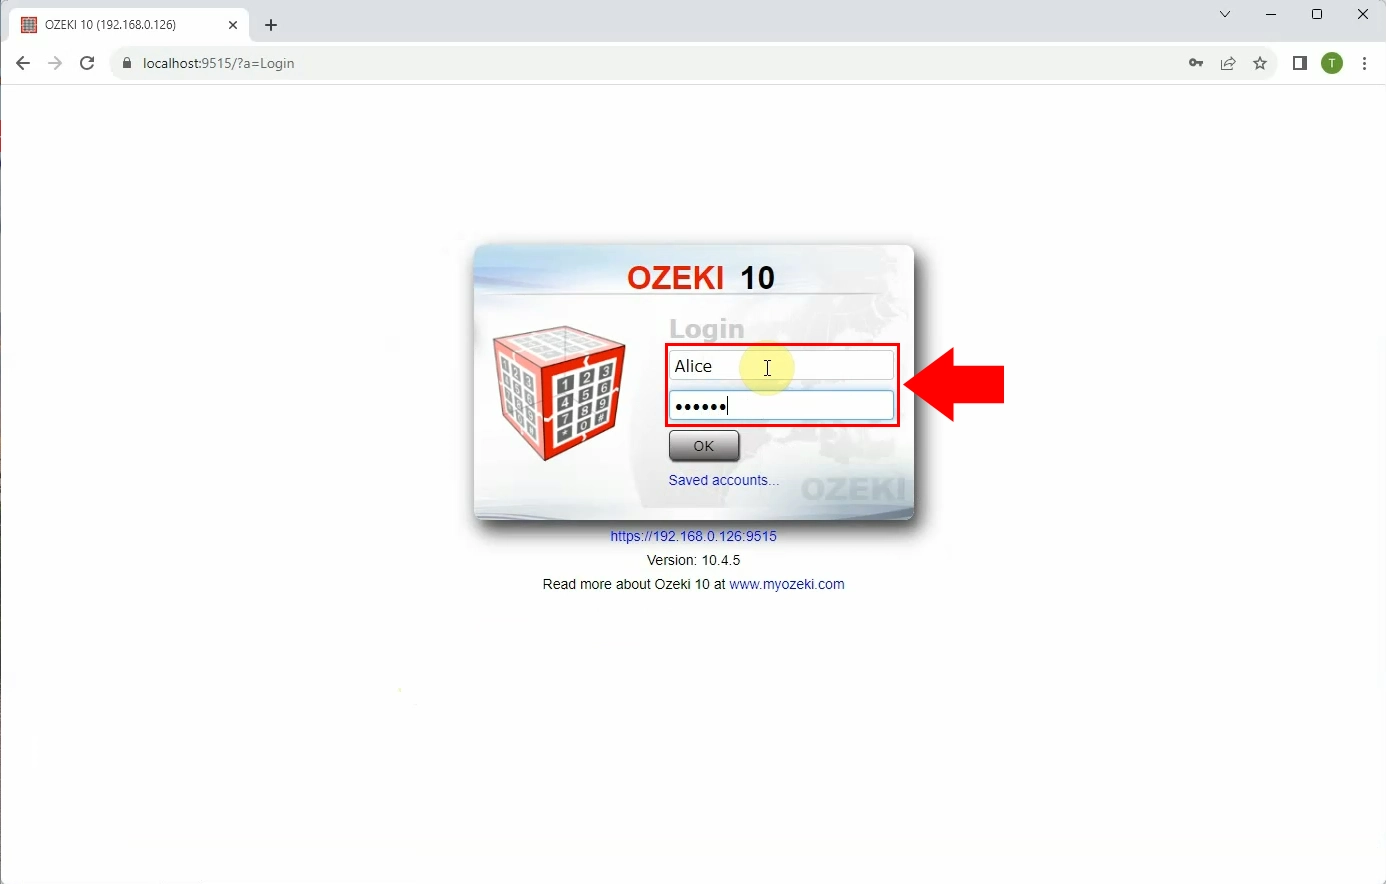
Close the Ozeki Home page, then Log out from Ozeki SMS Gateway. To log out, click on the Ozeki Start menu in the bottom left corner of the page. After that, log into Ozeki SMS Gateway as the Standard user that was set up previously. Enter the username and password to access the account.
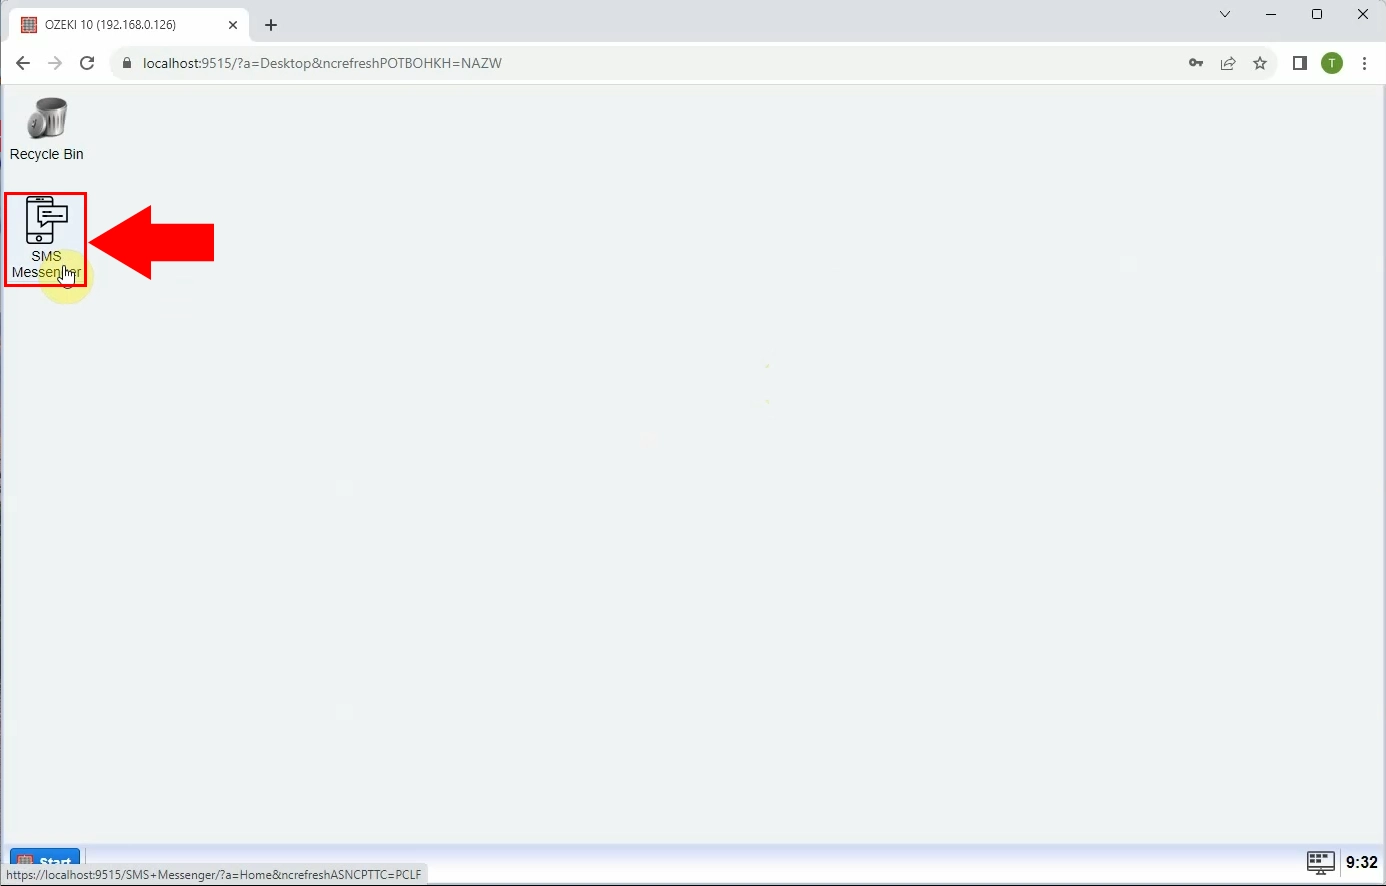
Open the Ozeki "SMS Messenger" menu.
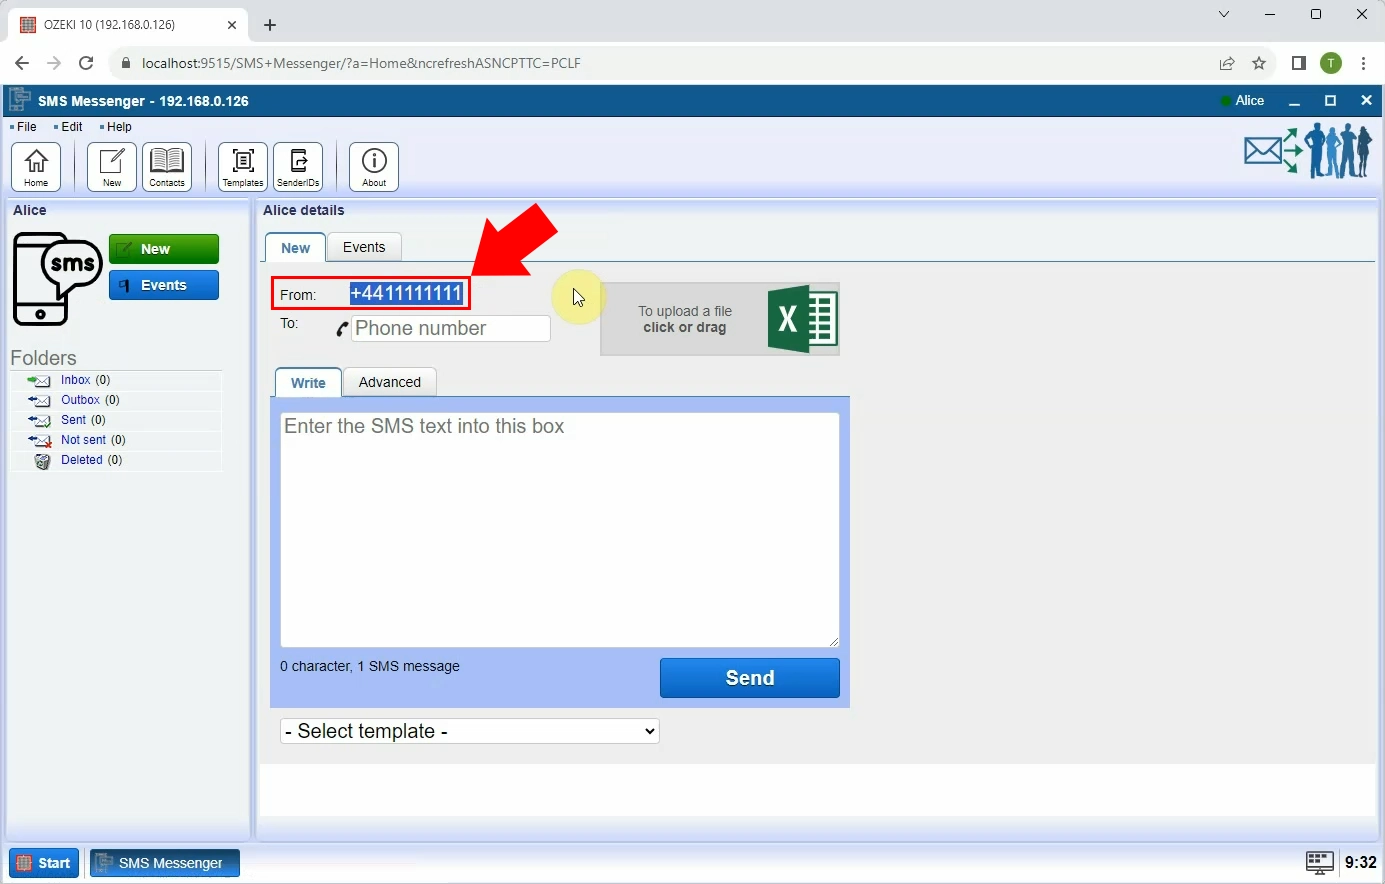
In the SMS Messenger menu, you can see the Sender ID name has been set up by the system automatically. After that you make sure that the name of the Sender ID is correct, start composing the SMS message in composer.
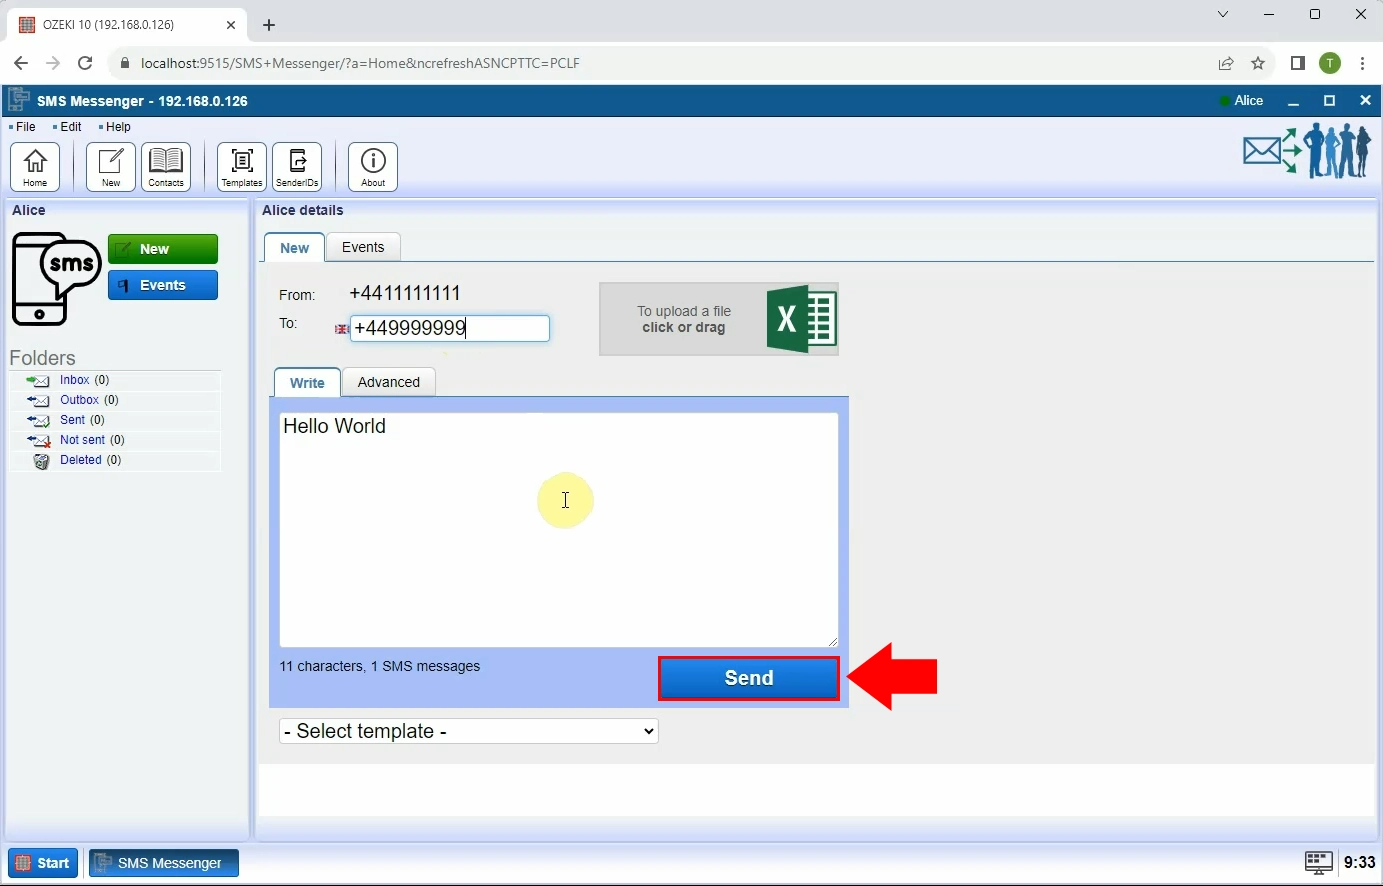
Enter the recipient's phone number into the "To" box, then start writing the SMS.
To create an SMS message, start writing the text into the "Write" field. Under
the message box, there is a counter that counts the number of the used characters
and messages. When you are done editing the SMS message, you can send it
by clicking on the "Send" button.
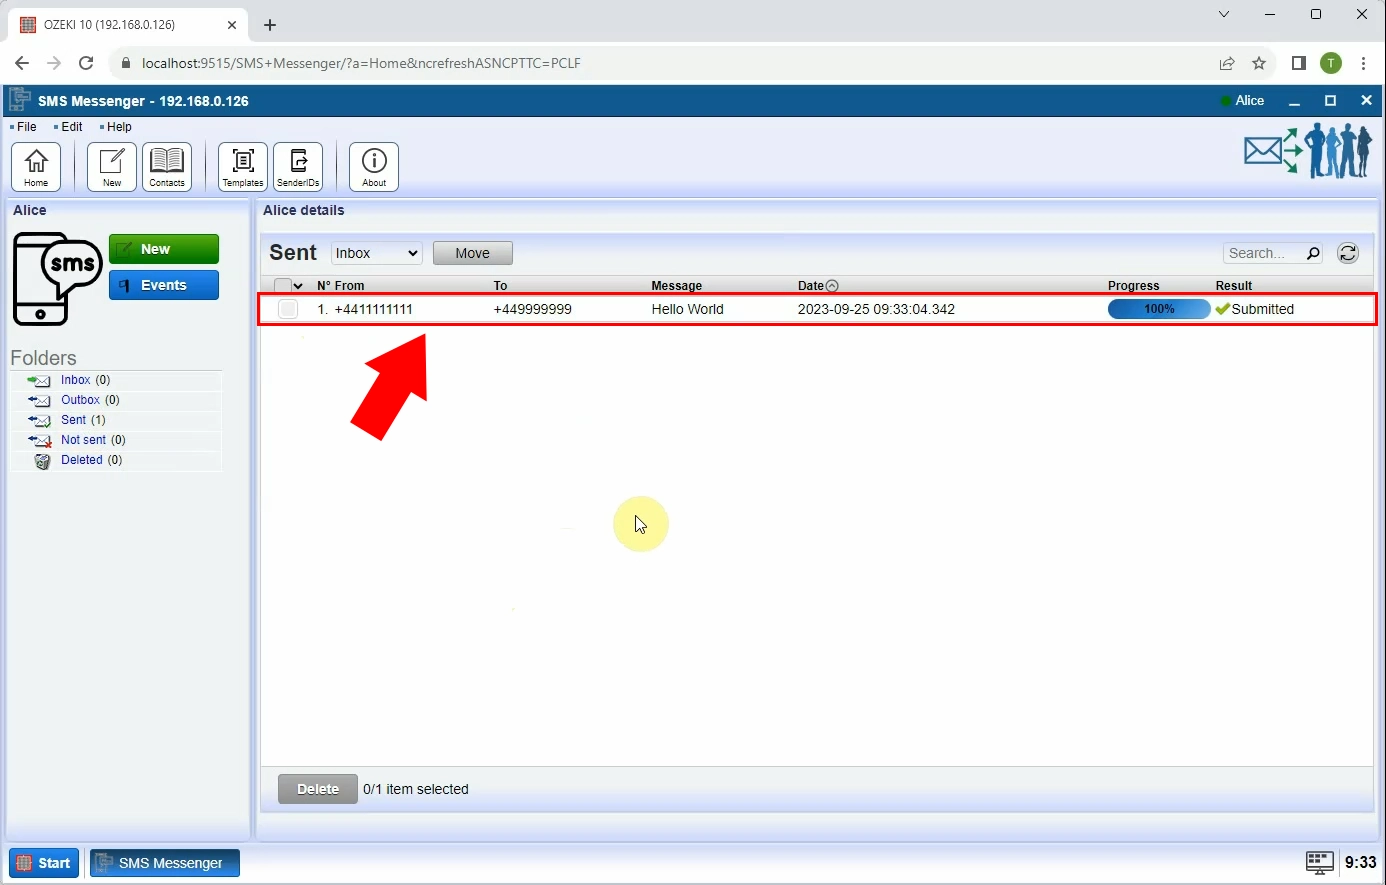
As you click on the "Send" button, the message will appear in the "Sent" folder. When the message is sent, you will see a "Submitted" notification as a result. On the details page, you can see all the important data about your message. You can see the Sender ID, the recipient address, the message itself, the date of the delivery, and a percentage of the status of the process.
How to set multiple Sender IDs (Video tutorial)
You could see how to set a single Sender ID previously; now, you can see the setup process for multiple Sender IDs. Follow the given instructions to be able to send an SMS message from different Sender IDs at the same time. If you acquire the knowledge that is essential for completing the process, you can send messages in the future without any obstacles.
Access your Ozeki account then open Standard user under the Users and applications menu. Bring up the details page and complete the necessary steps. Choose the "Power" tab from the panel, then click on the "Create new Power" button, highlighted in blue. After that opt for the "Sender ID" power option to install.
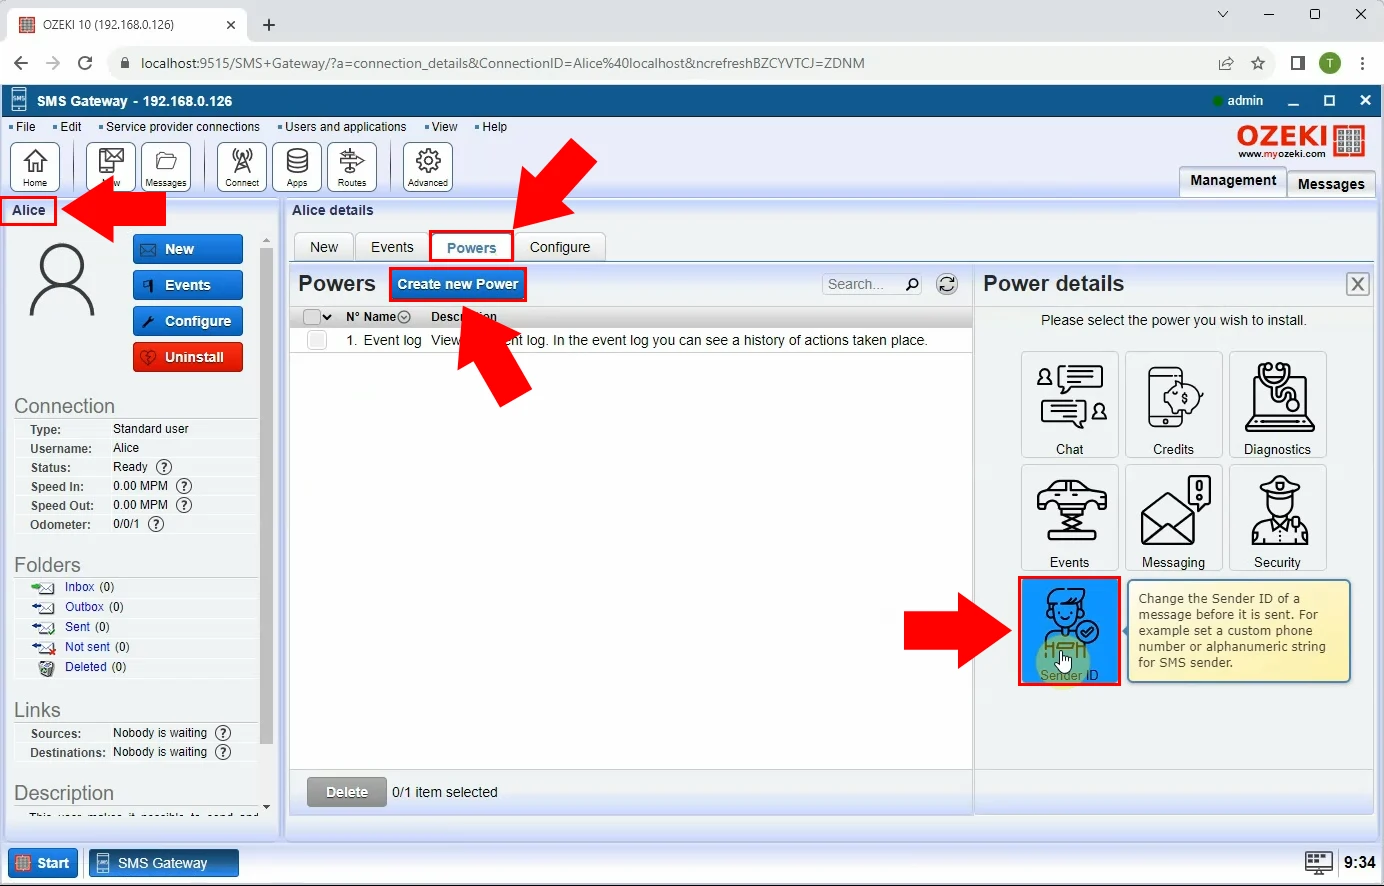
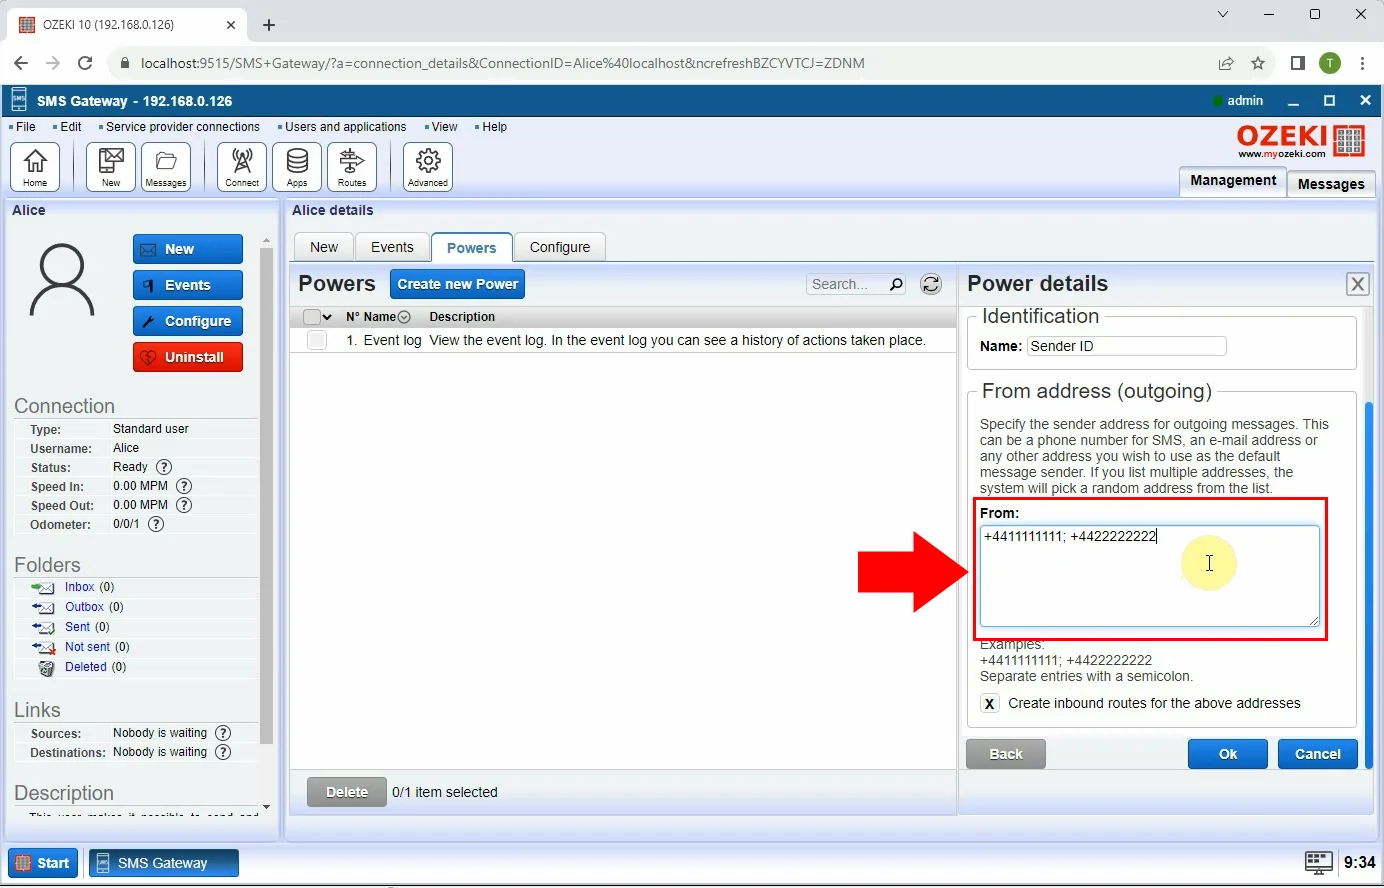
Enter the Sender ID addresses into the appropriate box, then save them with the "Ok" button on the bottom.
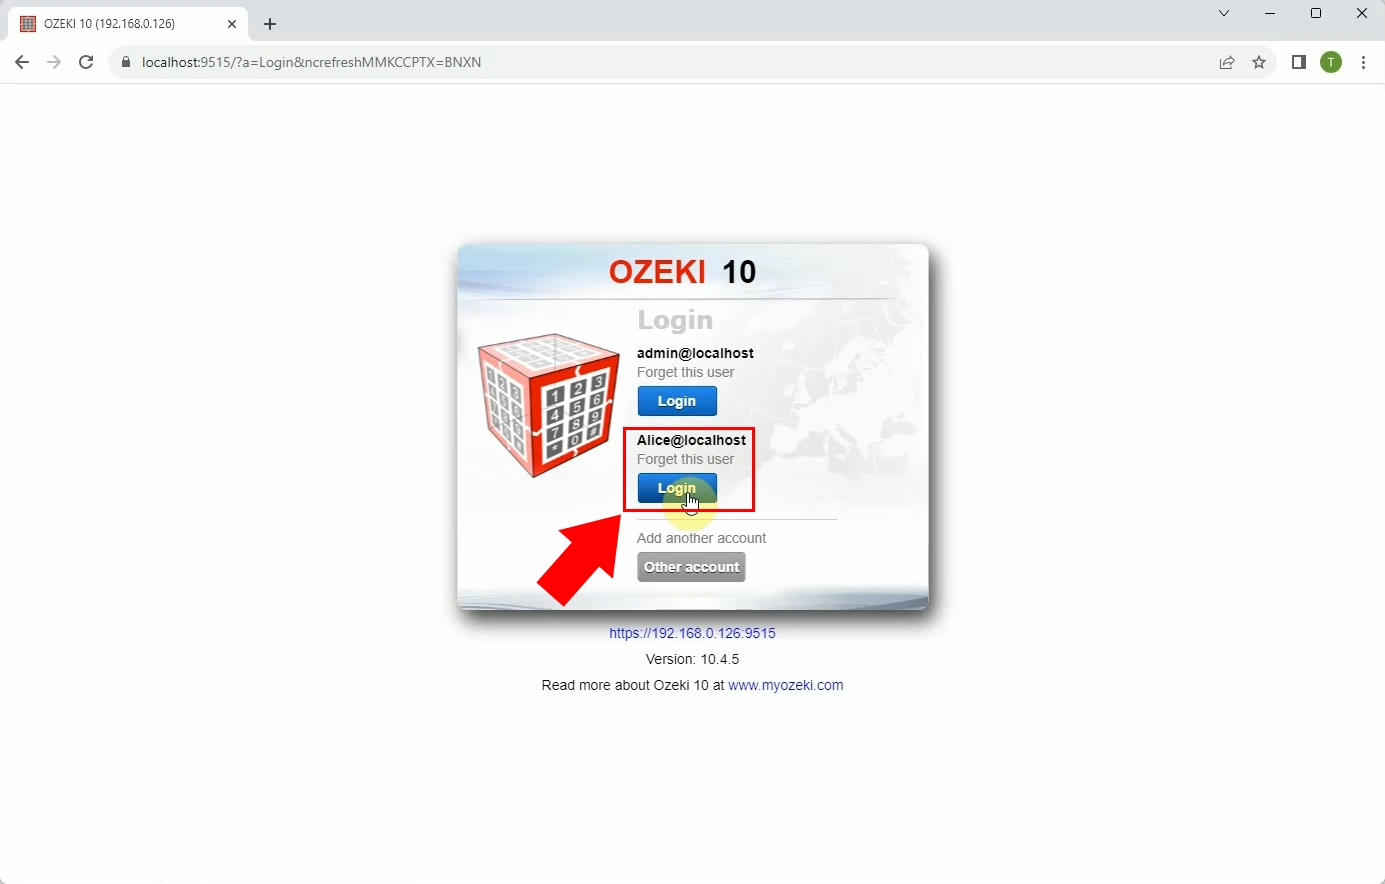
Close the Ozeki Home page, then Log out from Ozeki SMS Gateway. To log out, click on the Ozeki Start menu in the bottom left corner of the page. After that, log into Ozeki SMS Gateway as the Standard user that was set up previously. Enter the username and password to access the account.
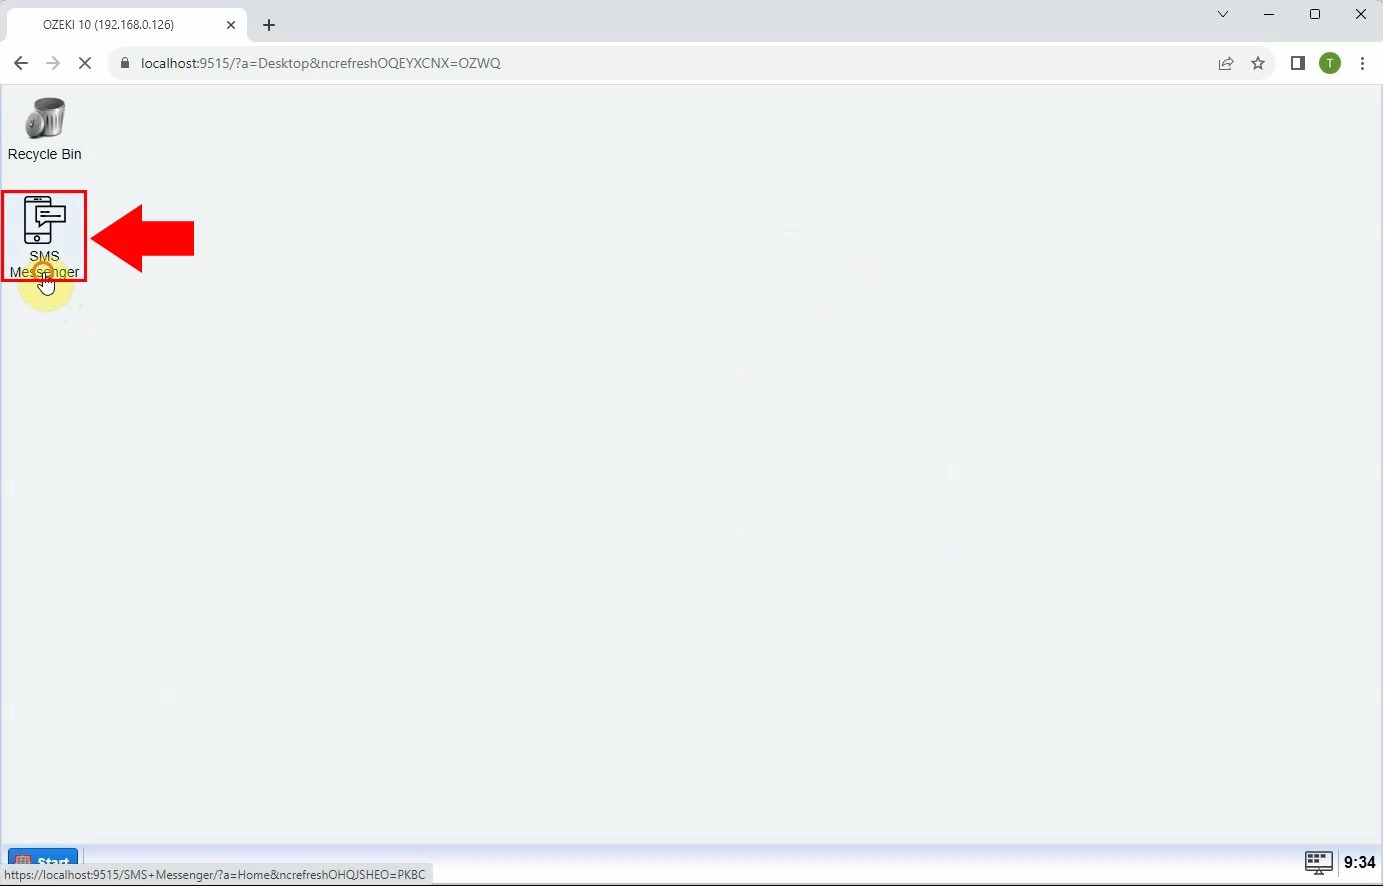
Open the Ozeki "SMS Messenger" menu.
Within the SMS Messenger menu, you'll notice that the Sender IDs have been automatically set by the system. You can choose which Sender ID you want to use, but also you can change them. Once you've confirmed that the Sender ID is accurate, you can begin composing your SMS message using the composer.
Enter the recipient's
phone number into the "To" box, then start writing the SMS. To create an SMS message,
start writing the text into the "Write" field. When you are done editing the
SMS message, you can send it by clicking on the "Send" button.
Switch the Sender ID to another by clicking on it in the drop-down list of IDs,
and start composing another message. Enter the recipient address and type the
SMS message, then send it in the same way as before.
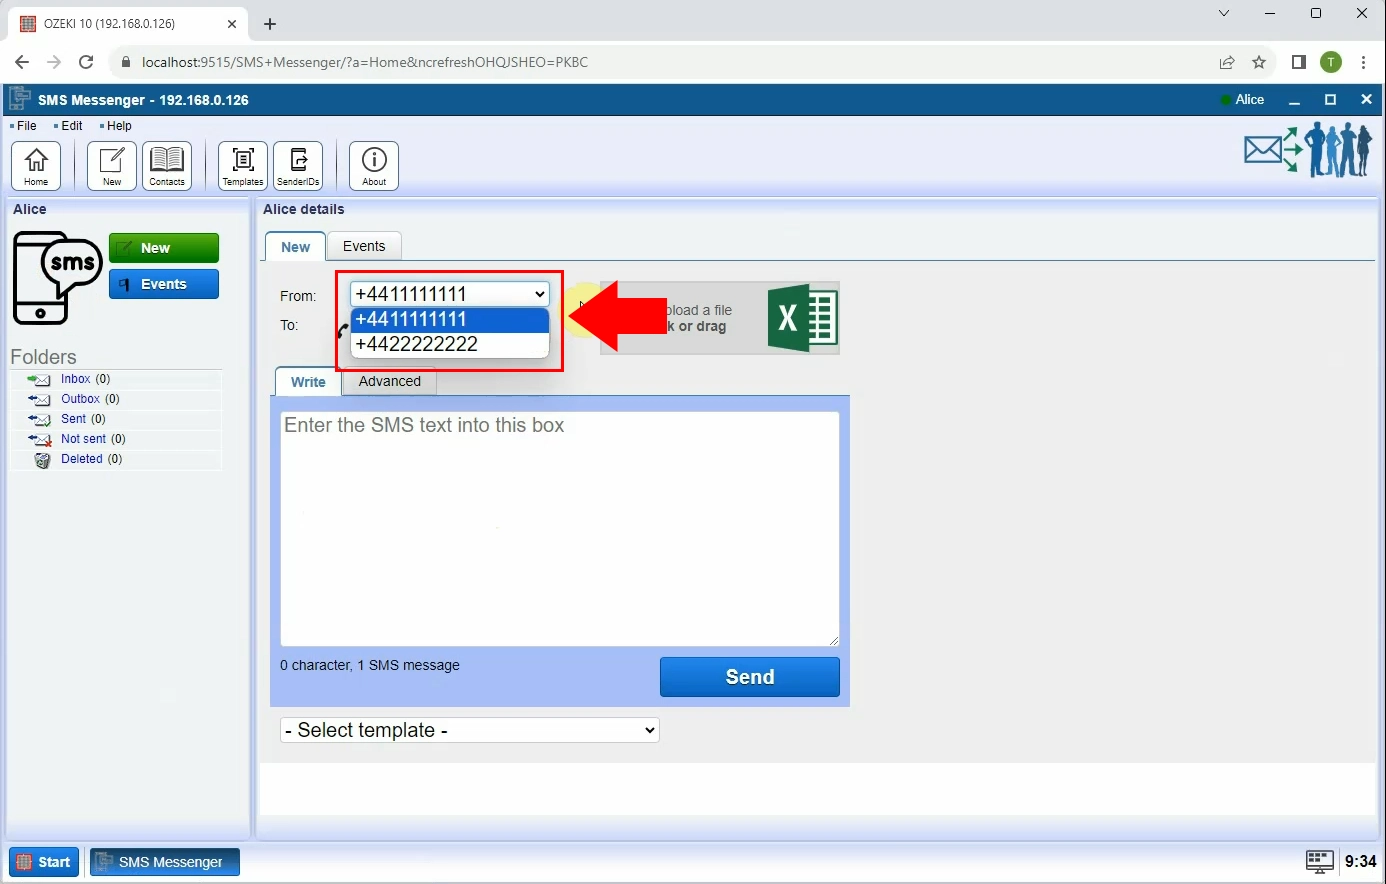
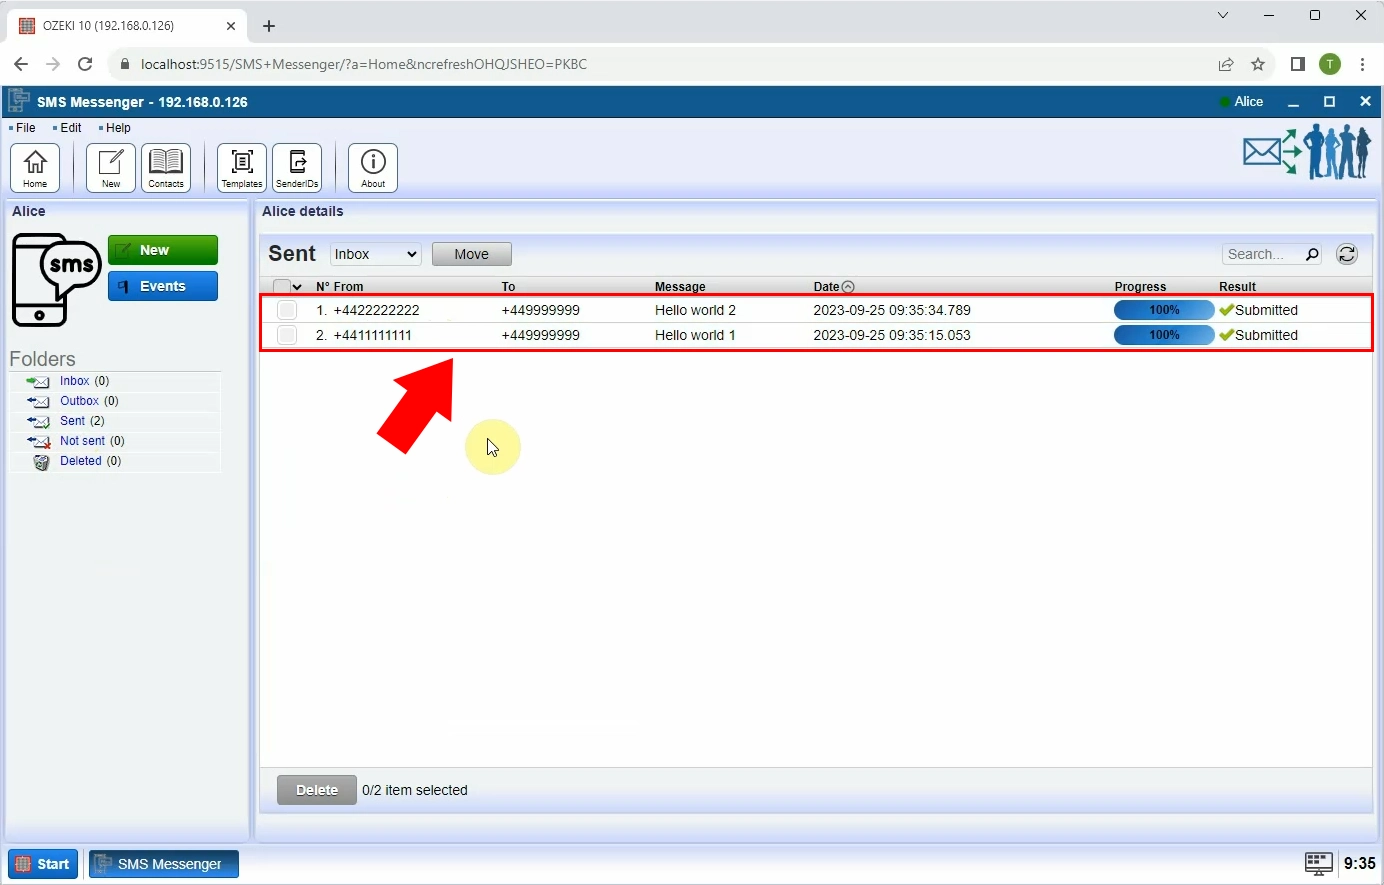
When you click the "Send" button, the messages will be displayed in the "Sent" folder. Upon successful delivery, you'll receive a "Submitted" notification. Within the details page, you can access the main information about your messages, including the Sender IDs, recipient addresses, message contents, delivery dates, and a progress percentage showing the status of the processes.
How to set an alphanumeric Sender ID (Video tutorial)
In this video guide, you can learn how to set an alphanumeric Sender IDs in the Ozeki SMS Gateway. To make your SMS campaigns more personal, you can use alphanumerical Sender IDs. In this way, your recipients will see the given alphanumerical Sender ID when they receive your messages, instead of a numeric Sender ID. As a result, they might feel that you write them in a more personal way. Follow the given instructions, and raise your SMS messaging to a higher level.
Access your Ozeki account, then load the Standard user details page in the same way as before. Open Ozeki Home screen, then click on the Standard user, under the Users and applications menu. Choose the "Power" tab, then the "Create new Power" button. Opt for the "Sender ID" power option for installation.
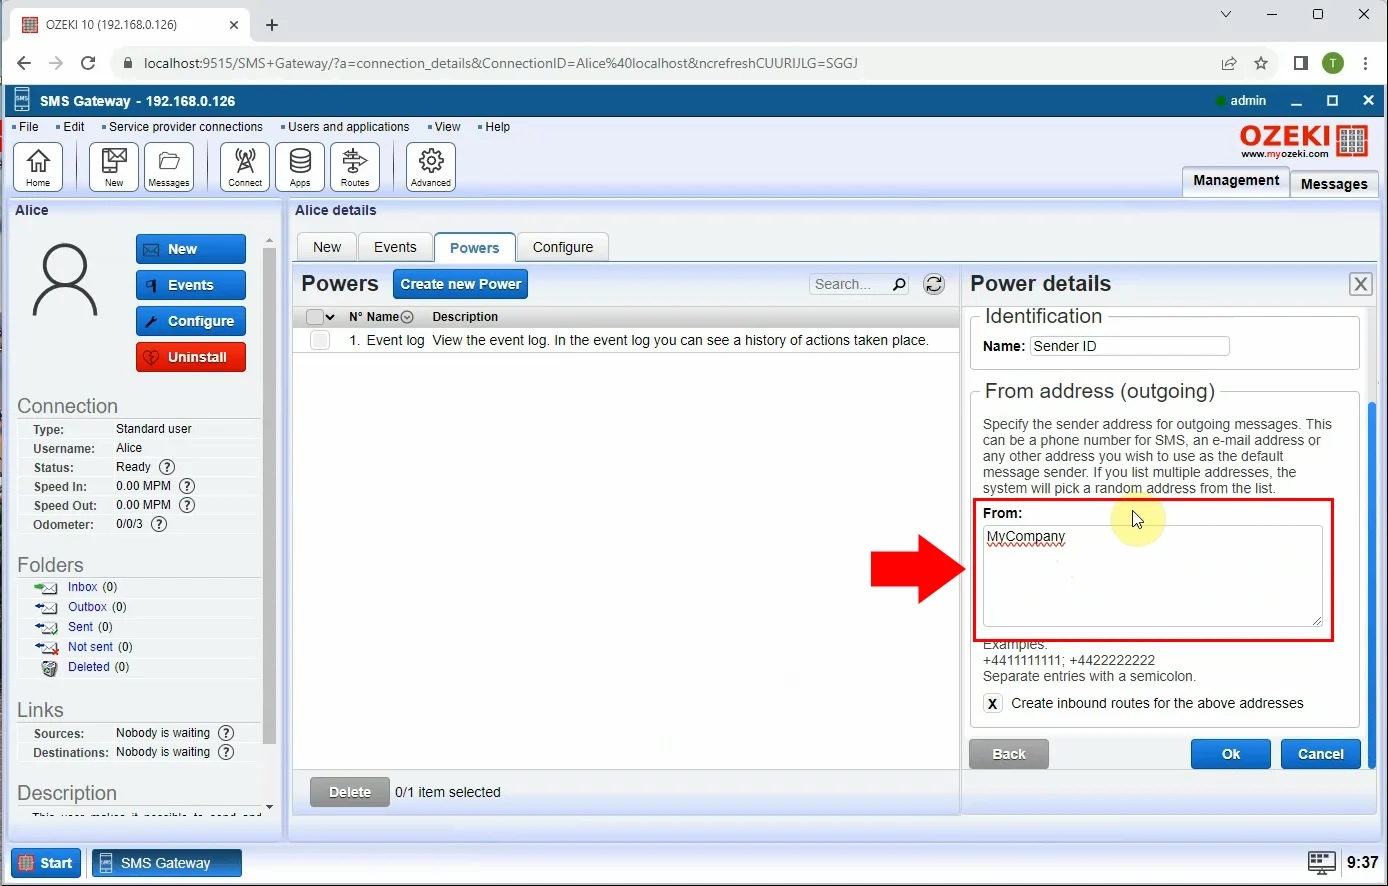
Now, configure your Alphanumeric Sender ID which you want to be displayed on your recipient's mobile screen. Once you've set it, save your changes by clicking on the "Ok" button.
Close the Ozeki Home page, and then proceed to log out from the Ozeki SMS Gateway. To log out, click on the Ozeki Start menu in the bottom left corner of the page. After that, log into Ozeki SMS Gateway as the Standard user that was configured earlier. To gain access to the account, provide it's username and password.
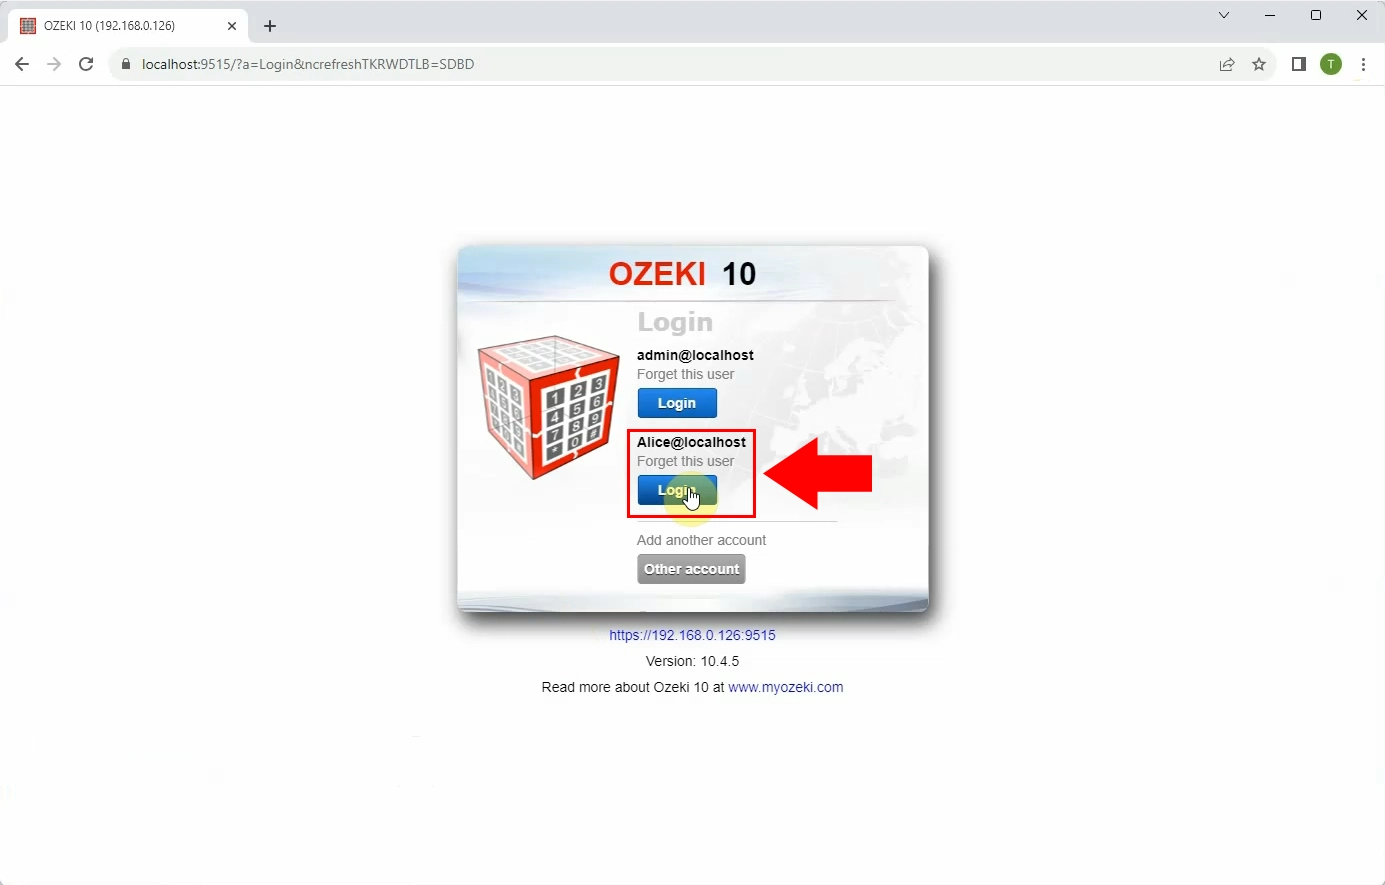
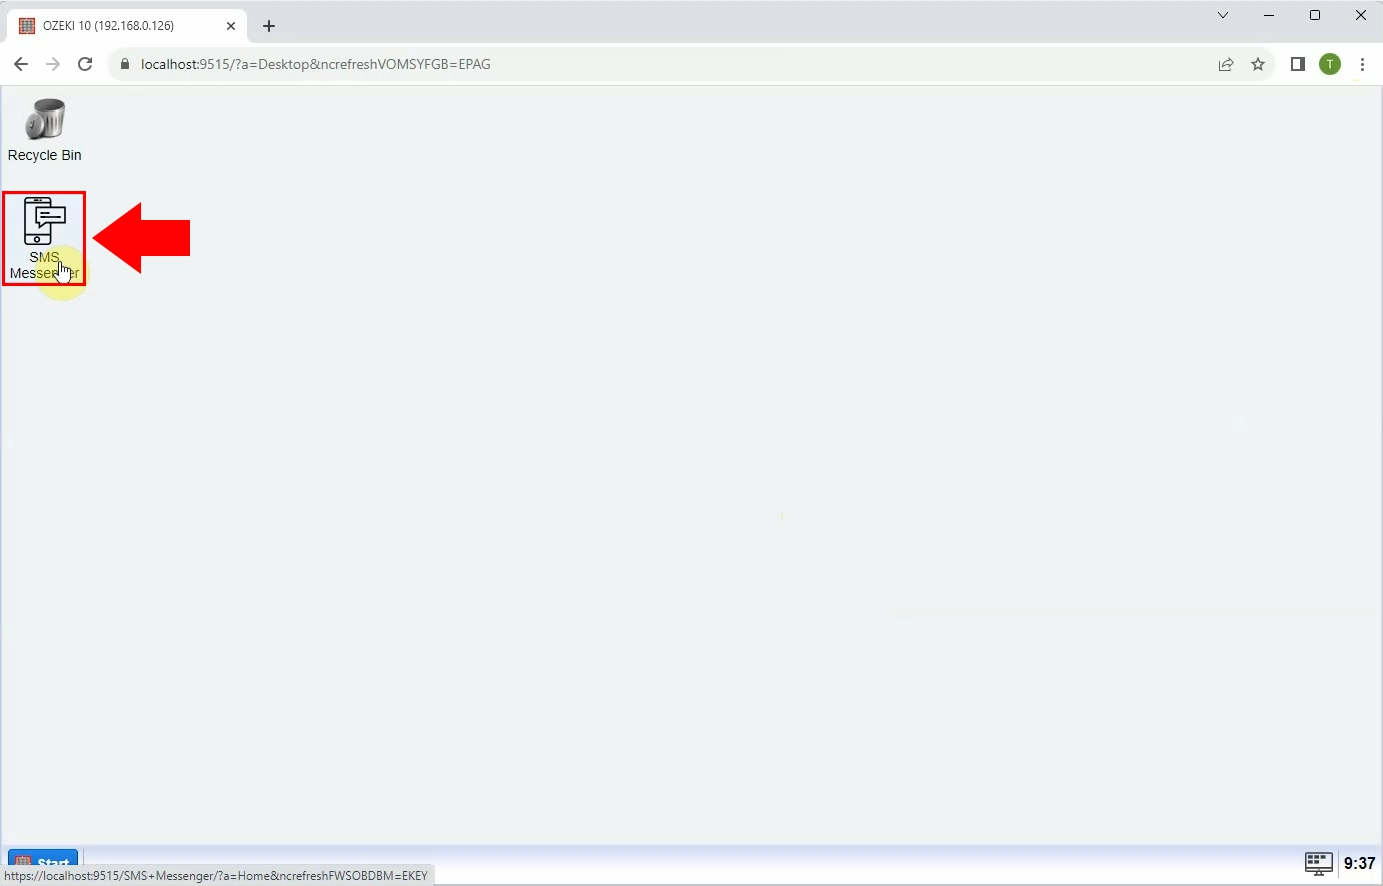
Open the Ozeki "SMS Messenger" menu.
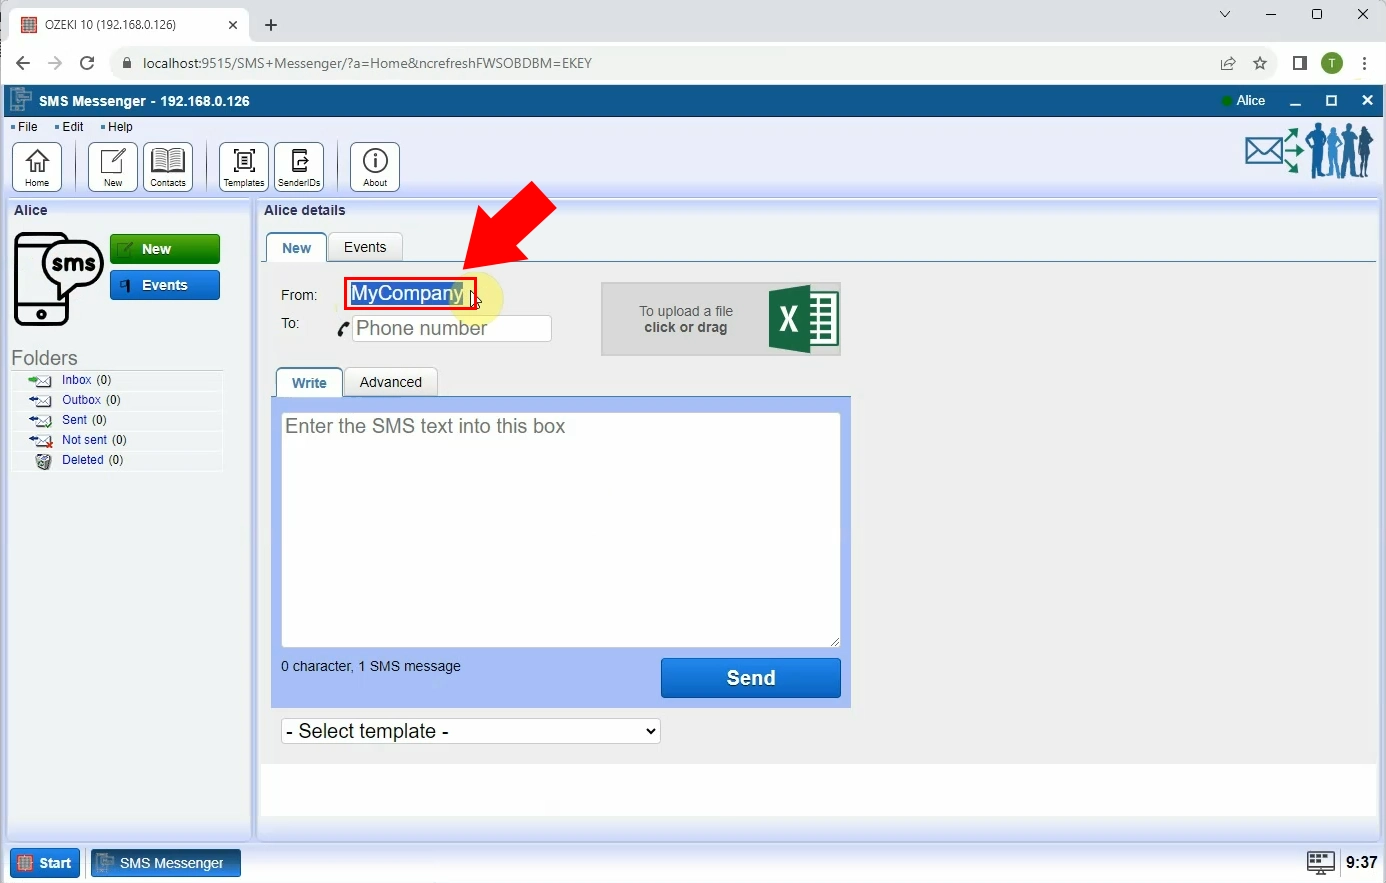
By opening the details of the Standard user, you will notice that the alphanumeric Sender ID has been set up by the system. Now, you can send messages by using this Sender ID. Enter the recipient's phone number, then enter the SMS message into the appropriate "Write" field. If you are done with composing your SMS message, start the delivery process by clicking on the "Send" button.
When you press the "Send" button, the message will be displayed in the "Sent" folder. Upon successful sending, a "Submitted" notification will be visible on the details page of sent messages. In the details section, you can access the most important information regarding your message, including the Sender ID, recipient address, message content, delivery date, and a progress status percentage.

Summary
This page provides a comprehensive guide on how to set up a Sender ID as an Admin in the Ozeki SMS Gateway. It outlines easy steps to set a single Sender ID, multiple Sender IDs, and alphanumeric Sender IDs. By following the given instructions, you can complete the process with ease and elevate your SMS messaging skills to a higher level. Whether you are a business owner, marketer, or administrator, mastering Sender ID setup is a valuable skill that can greatly enhance your SMS communication strategies.
FAQs
How do I set up a Sender ID?
Contact your service provider or platform to register your Sender ID. Complete any verification processes required by the service provider, which may involve confirming your identity and adhering to their guidelines for sender IDs. Once your Sender ID is approved, configure your email or SMS sending platform to use the approved Sender ID in your messages.
What is custom Sender ID?
A custom Sender ID is a specific sender name or identifier that you can use when sending messages or communications through various channels, such as email, SMS, or messaging apps. It allows you to personalize the sender information, often replacing generic or numeric sender information with a recognizable name or brand.
What is the Sender ID rule?
Sender ID rules vary by communication channel and service provider. For email, it typically involves setting up SPF and DKIM records correctly in your DNS settings. SMS Sender ID rules can vary by country, and messaging apps may have specific guidelines for sender identification, often requiring businesses to use official profiles for recognizable sender names or logos. Compliance with these rules is essential to ensure message delivery and maintain trust with recipients.
Is Sender ID unique?
Sender IDs can be unique within a specific communication channel or service provider's platform. However, the uniqueness of a Sender ID often depends on the rules and regulations set by the channel or provider, and multiple users or businesses can use similar Sender IDs as long as they don't conflict or overlap within the same context.
More information
- SMS users
- Sender ID

 Sign in