
How to setup a TURN server on Ubuntu Linux
This straightforward guide gets you up and running with your own TURN server on Ubuntu Linux in just 10 minutes, perfect for smoothing out those communication hiccups. We offer a variety of resources to make setup a breeze, including a quick TL;DR, a detailed written guide with clear screenshots, and a helpful video walkthrough. Plus, clear up any confusion with our informative FAQ section. Take control of your network communication and enjoy crystal-clear calls today!
What is a TURN server?
A TURN server (Traversal Using Relays around NAT) acts as a middleman for devices behind firewalls or complex NAT configurations. Unlike STUN, which just reveals public IP addresses, TURN relays data itself. Imagine it as a postal worker – each device sends its data packets to the TURN server, which then forwards them on to the other device, enabling communication even when direct connections are blocked.
Setting up your own TURN server on Ubuntu Linux (video instructions)
The next video is a tutorial onsetting up your own TURN server on Ubuntu Linux in crystal-clear detail. Follow along step-by-step as we navigate the Terminal: updating packages, installing software, configuring settings, and finally launching your server. It may sound jarring, but do not worry, as it is barely 4 minutes long. By the end, you will be a TURN server pro, empowering direct communication within your network – perfect for video or audio calls.
Setting up your own TURN server on Ubuntu Linux (quick steps)
- Open Terminal
- Update packages
- Install coturn
- Open config file
- Set listening port
- Enable verbose logging
- Enable long term credential mechanism
- Set realm
- Set log file path
- Add username and password
- Open coturn file
- Start turn server
- Restart coturn service
Setting up your own TURN server on Ubuntu Linux (detailed written guide)
First, open Terminal and enter the following to update your packages:
sudo apt-get -y update
Once the update is complete, use the next command to install coturn, as seen in Figure 1:
sudo apt-get install coturn -y

With the usage of the command below, create a backup of the config file (Figure 2):
sudo cp /etc/turnserver.conf /etc/turnserver.conf.bak

sudo nano /etc/turnserver.conf

Next, enter this command to set your desired listening port, as shown in Figure 4:
listening-port=3478

Enable verbose logging by entering the next command, as you can see in Figure 5:
verbose

To enable long term credential mechanism, use the following command (Figure 6):
lt-cred-mech

Set your desired realm via the command below, similarly to Figure 7:
realm=mycompany.com

Set your log file's path by entering the next command, highlighted in Figure 8:
log-file=/var/tmp/turn.log

Add your username and password with this command (Figure 9):
user=ozekitestuser:abc123

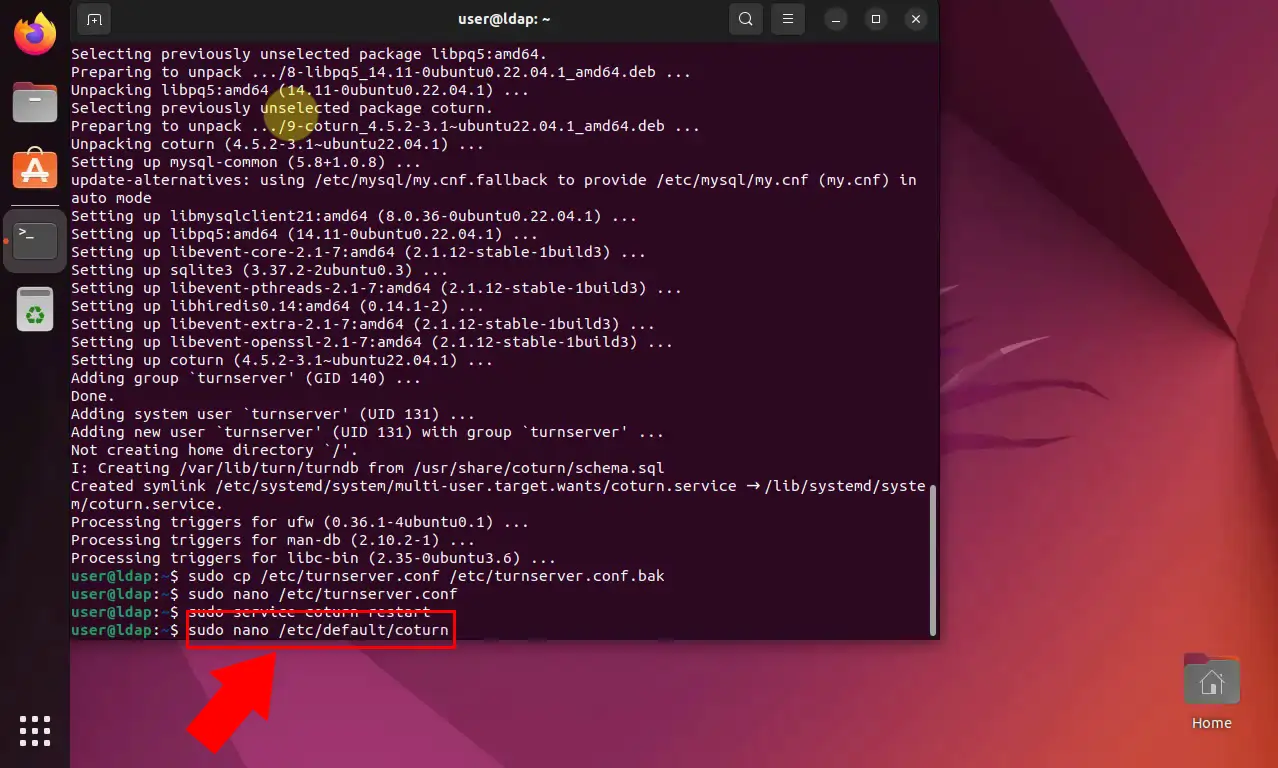
Go back to the Terminal and open your coturn file by entering the command below, as seen in Figure 10:
sudo nano /etc/default/coturn
Once inside, enter the following command to enable your turn server, as demonstrated by Figure 11:
TURNSERVER_ENABLED=1

Finally, head back to the Terminal and restart the coturn service with the next command:
sudo service coturn restart

Is there a way for me to test my TURN server?
Are TURN servers TCP or UDP?
TURN servers are flexible, able to utilize both UDP and TCP for data relay. UDP is the go-to choice for its speed, crucial for real-time applications, but it does not guarantee delivery. When speed is not paramount and data integrity is critical, like in file transfers, TCP steps in with its reliable, ordered delivery, even if it might introduce some lag.
More information
- How to setup a TURN server on Ubuntu Linux
- How to test your TURN server
- How to setup a STUN server on Ubuntu Linux
- How to test your STUN server