Ozeki 4G SMS Modem Dual SIM installation
The Ozeki 4G LTE SMS Modem Dual SIM offers a versatile solution for SMS messaging using two SIM Cards. With its capability to select the appropriate SIM Card based on the Sender ID, it provides efficient and reliable communication. Operating at 115200 baud, this high-speed wireless cellular modem seamlessly integrates with Ozeki NG 10 and Ozeki 10 platforms, ensuring excellent compatibility and support. Moreover, its self-powering build through two USB ports eliminates the need for an external power supply, contributing to its convenience and reliability.
What is a 4G modem?
A 4G modem is a hardware device that can provide you connection with a service provider. It requires a SIM card to work. It is mostly used to send out automated or bulk messages.
How does a Dual SIM modem work?
The Ozeki 4G Modem Dual SIM provides the advantage of utilizing two distinct SIM cards. When sending a message, our software intelligently selects the appropriate SIM card based on the Sender ID. This dynamic approach enhances cost-effectiveness by optimizing message sending costs. Additionally, this setup offers increased fault tolerance and redundancy, as two SIM cards provide a backup solution in case of any issues.
How sending SMS through a 4G modem works
This SMS sending solution makes it possible to send SMS messages from a computer. This solution uses a few components: a computer equipped with the Ozeki SMS Gateway software, an Ozeki modem, and the recipient's mobile phone. The computer, hosting the Ozeki SMS Gateway application takes on the role of assembling the message, requiring both an address and a text body. The SMS message is sent through the Ozeki SMS modem, which communicates with a service provider. The service provider facilitates the delivery of the message to the designated phone number as an SMS message.
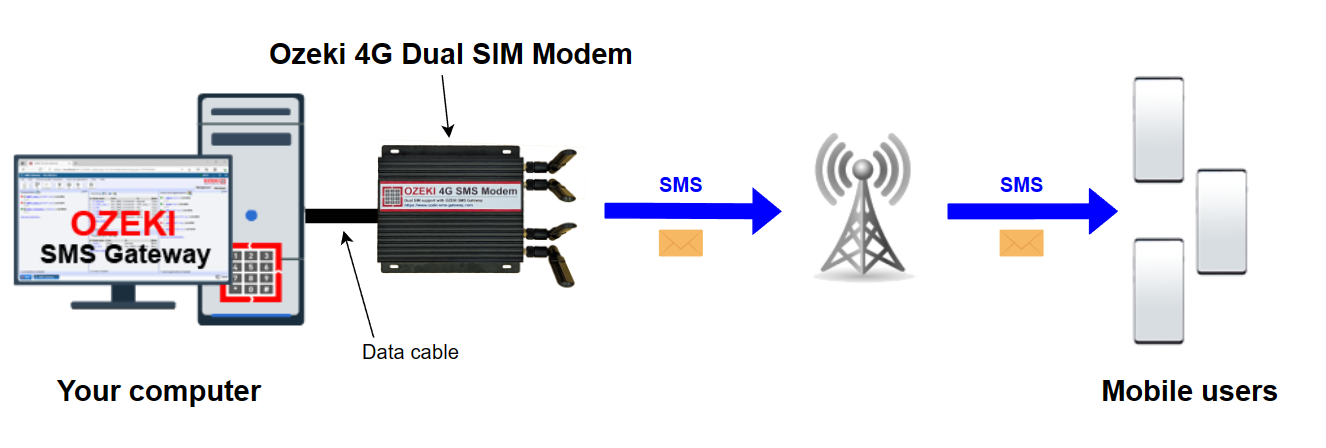
How to send SMS with a 4G modem (Clear steps)
To send SMS with a 4G modem:
- Insert the SIM cards into the modem
- Plug the antennas into the modem
- Connect the modem to your PC with USB cable
- Launch the Ozeki SMS Gateway
- Run the sms modem autodetection
- Specify the sms phone numbers
- Write the text of the SMS message
- Click on Send to send the SMS
- Review the test SMS message you sent
Ozeki 4G LTE SMS Modem Dual SIM hardware setup (video tutorial)
In the presented video, you will receive guidance on configuring an Ozeki 4G LTE SMS Modem Dual SIM to send SMS messages using a USB cable. To initiate this setup, you will require the modem, two SIM cards, four antennas, and two USB cables, all of which are provided within the package. The procedure commences with the insertion of the SIM cards into the modem, followed by the attachment of the antennas. Subsequently, the modem is connected to the computer using the USB cables. A successful connection between the modem and the PC is indicated by the power LED turning on.
Modem Drivers
The modem drivers are available for download after activating your product on myozeki.com
More information about the product
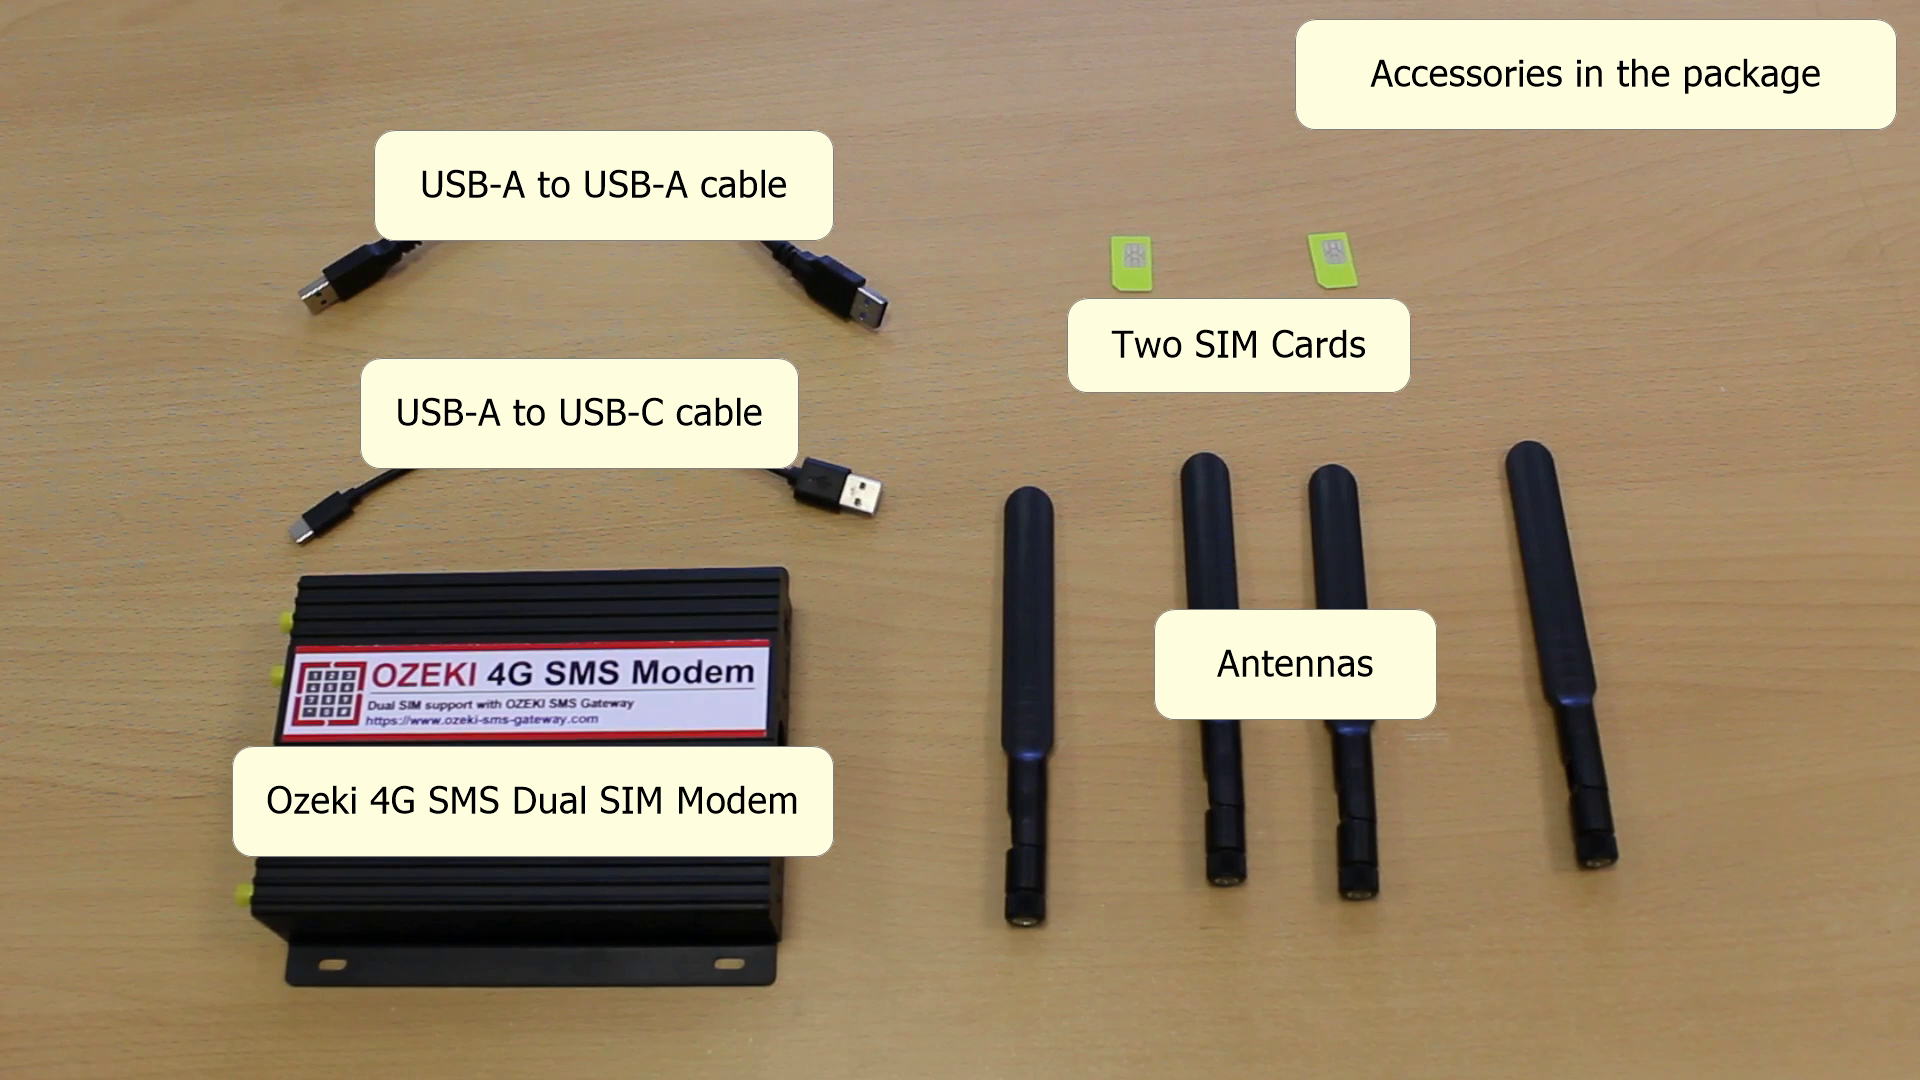
Get the parts that you need to connect the modem successfully
For a successful connection of the modem, it's essential to have a SIM card , an antenna, a USB cable, and the modem itself. All these components are depicted in Figure 2. Ensuring that you possess all the necessary hardware is crucial as every detail plays a significant role in the functionality of the modem setup.
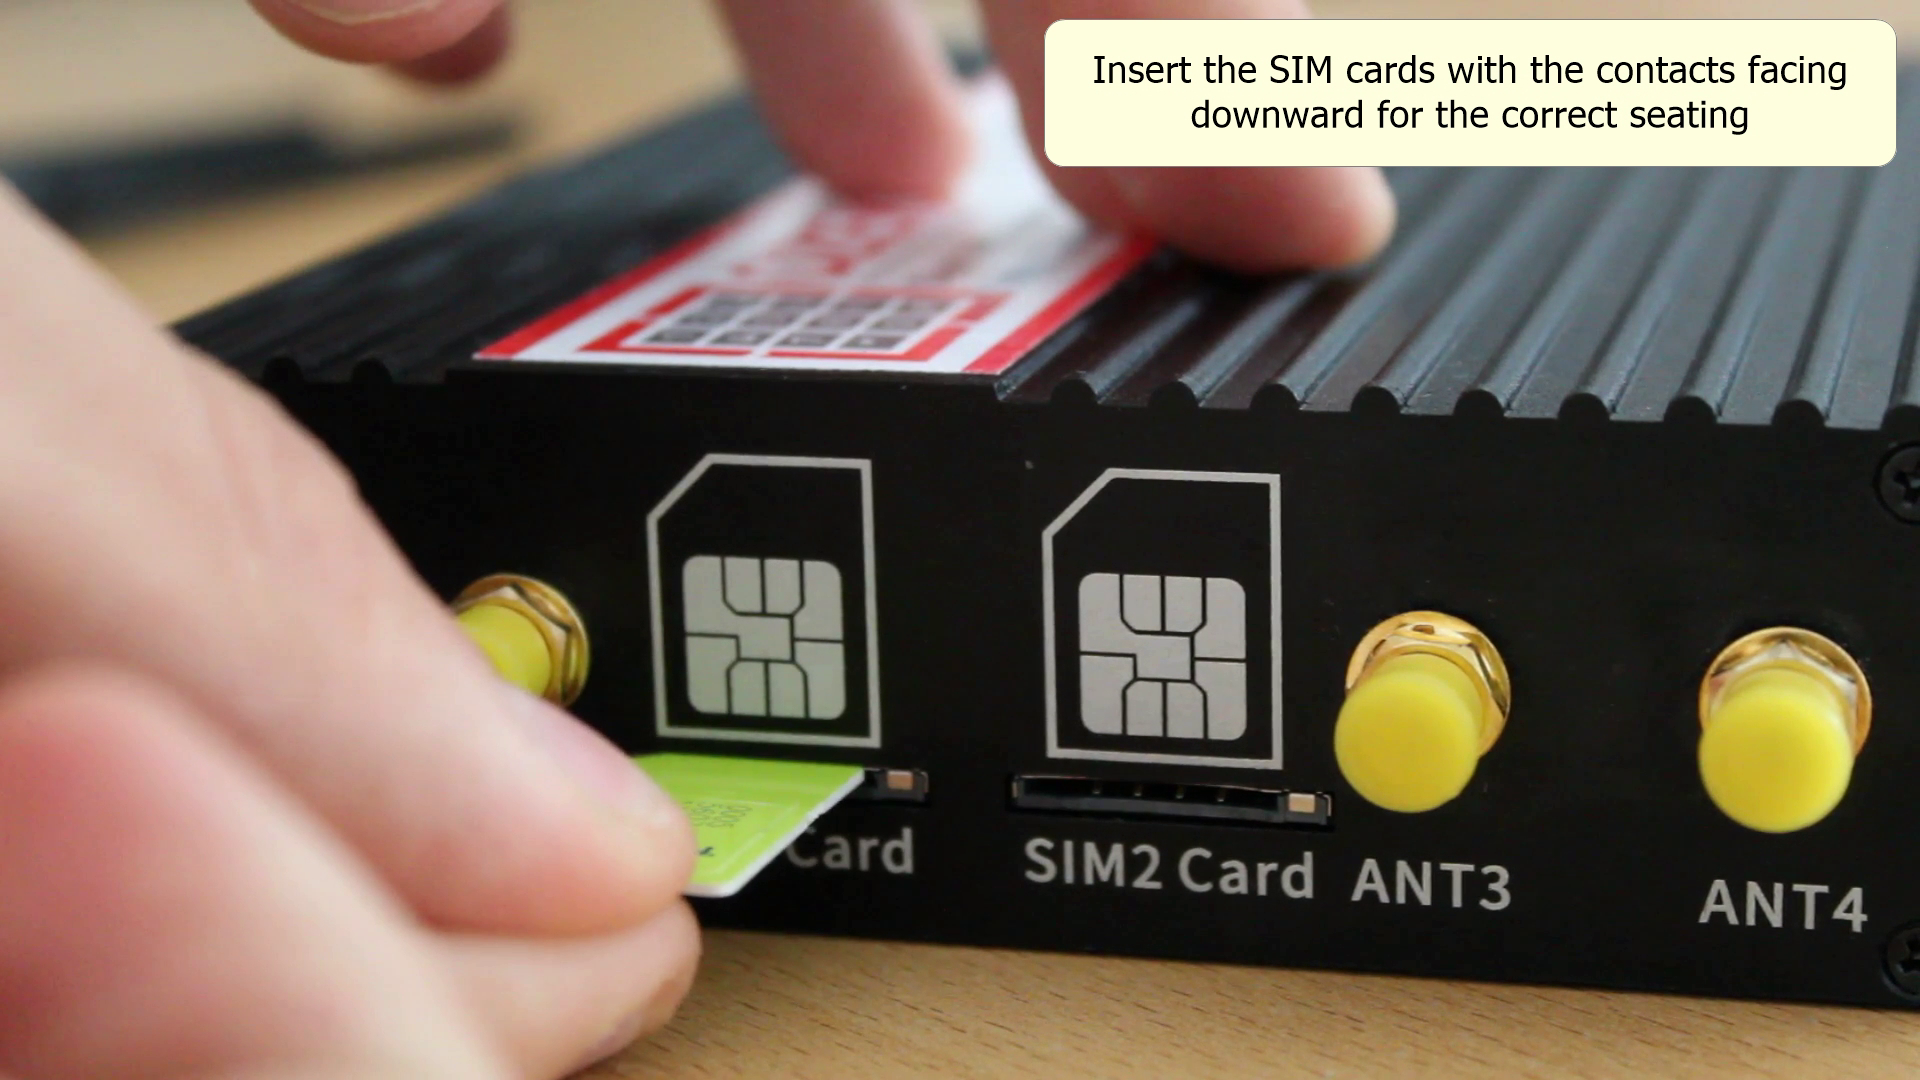
Insert the SIM card into the modem
The first step is to insert the SIM card into the modem, a process similar to inserting a SIM card into a mobile phone. The SIM card establishes the connection between the modem and the network, enabling communication. (Demonstrated in Figure 3)
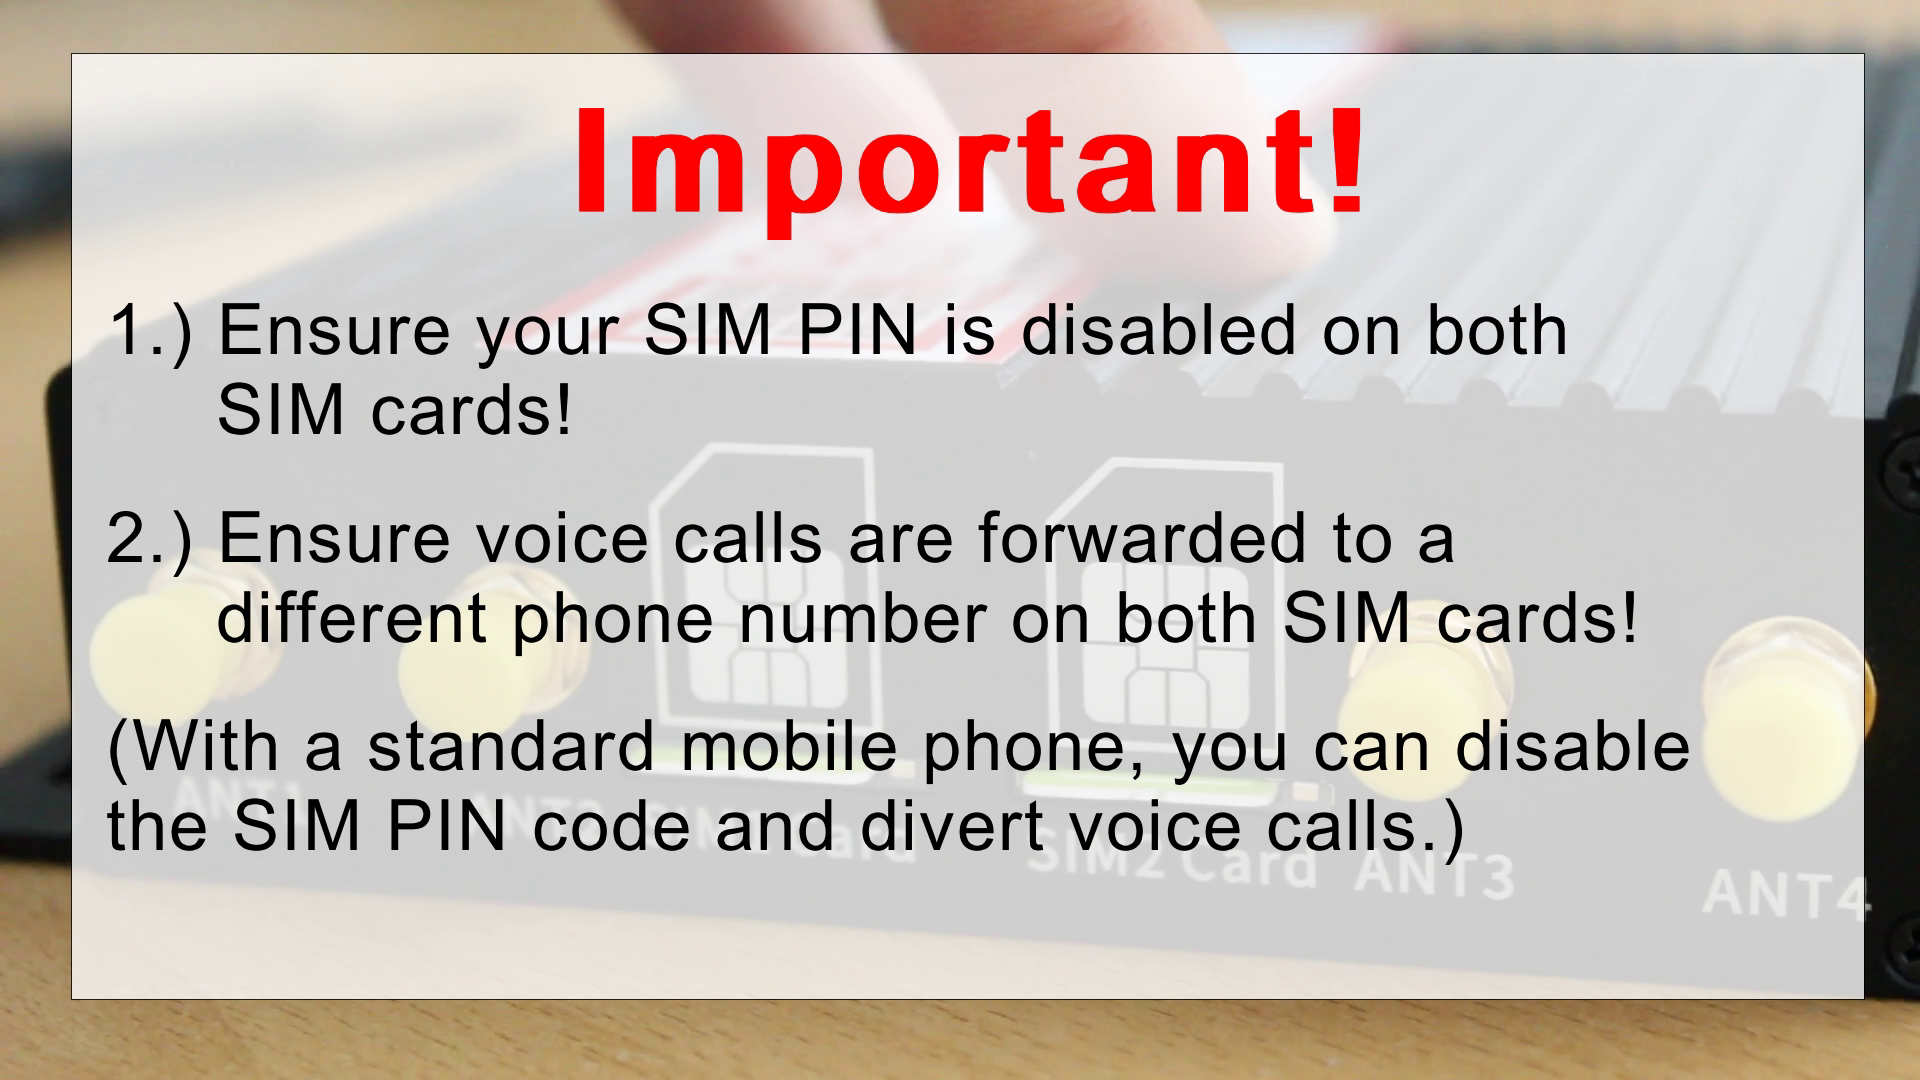
Important settings for SIM card
It is crucial to pay close attention to these settings, as failing to complete them could result in your SIM card not functioning with Ozeki Gateway One. You need to deactivate your PIN code and forward phone calls to an alternative phone number. These steps can typically be carried out using a regular mobile phone. (Figure 4)
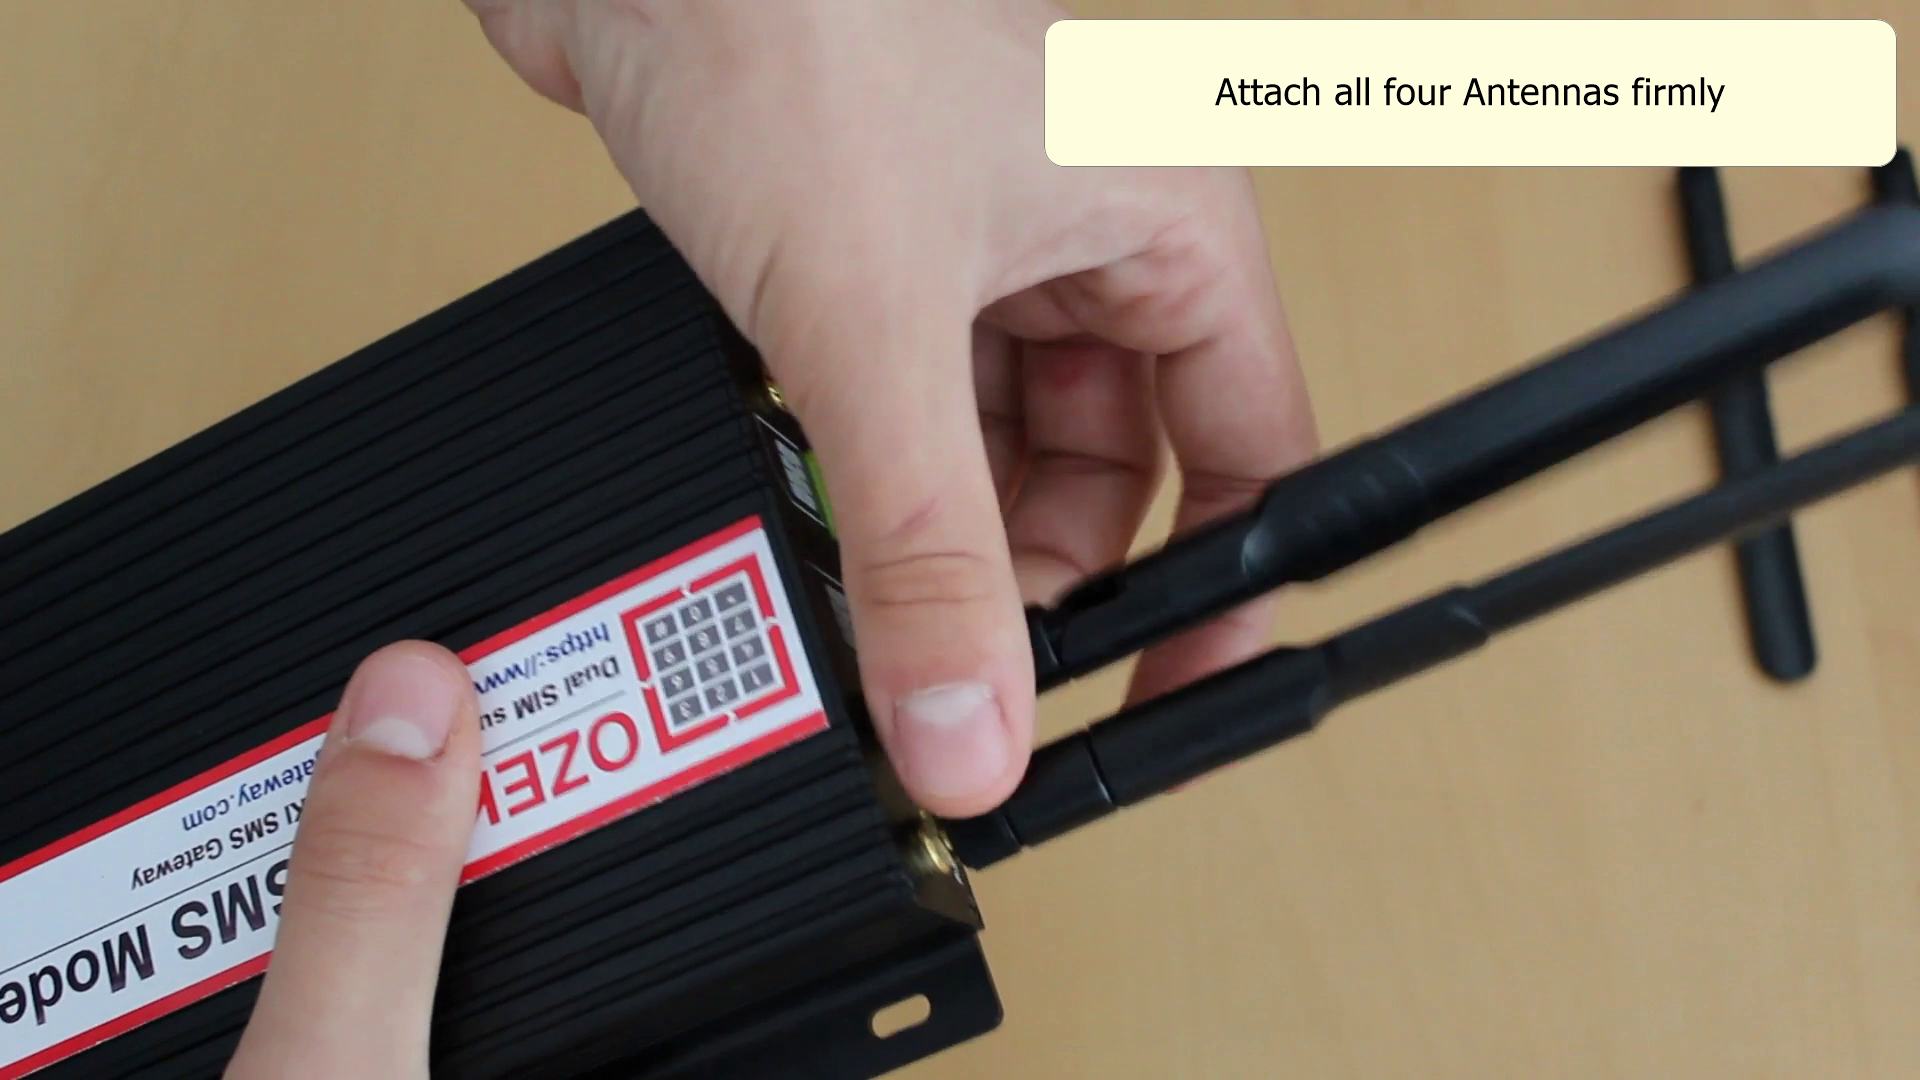
Connect the antenna to the modem
Once the SIM card is securely inserted, the next step is to connect the modem to its antennas. Ensuring a proper and secure connection is crucial to achieve optimal performance. The antennas play a vital role in both transmitting and receiving signals, so proper attachment is essential for effective communication. You can refer to Figure 4 for visual guidance on how to connect the antennas correctly.
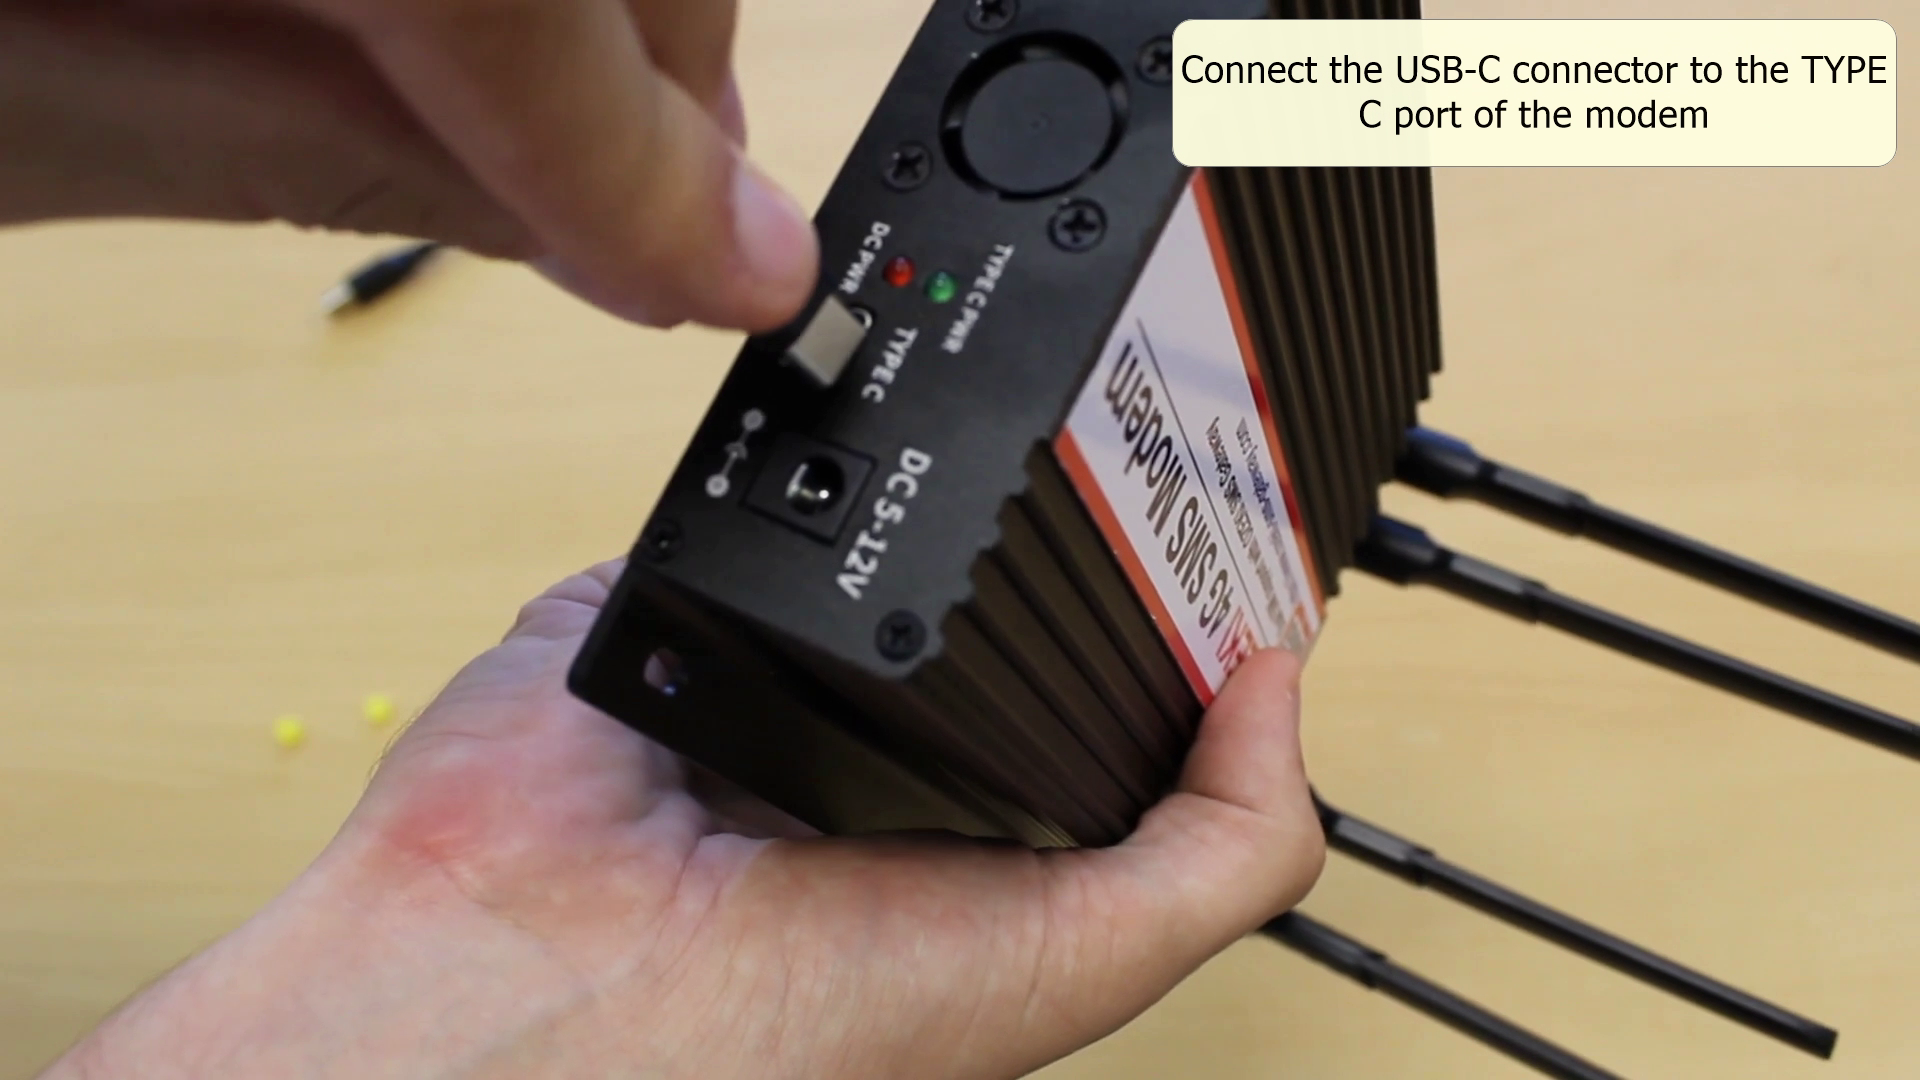
Insert the USB-C cable into the modem
Moving forward, you'll need to insert the USB-C cable into the modem. This cable serves as the power supply for the modem, drawing power from the computer. It's crucial to use a reliable and fully functional cable to prevent any disruptions or disconnections during the setup process. You can find a visual representation of this step in Figure 5.
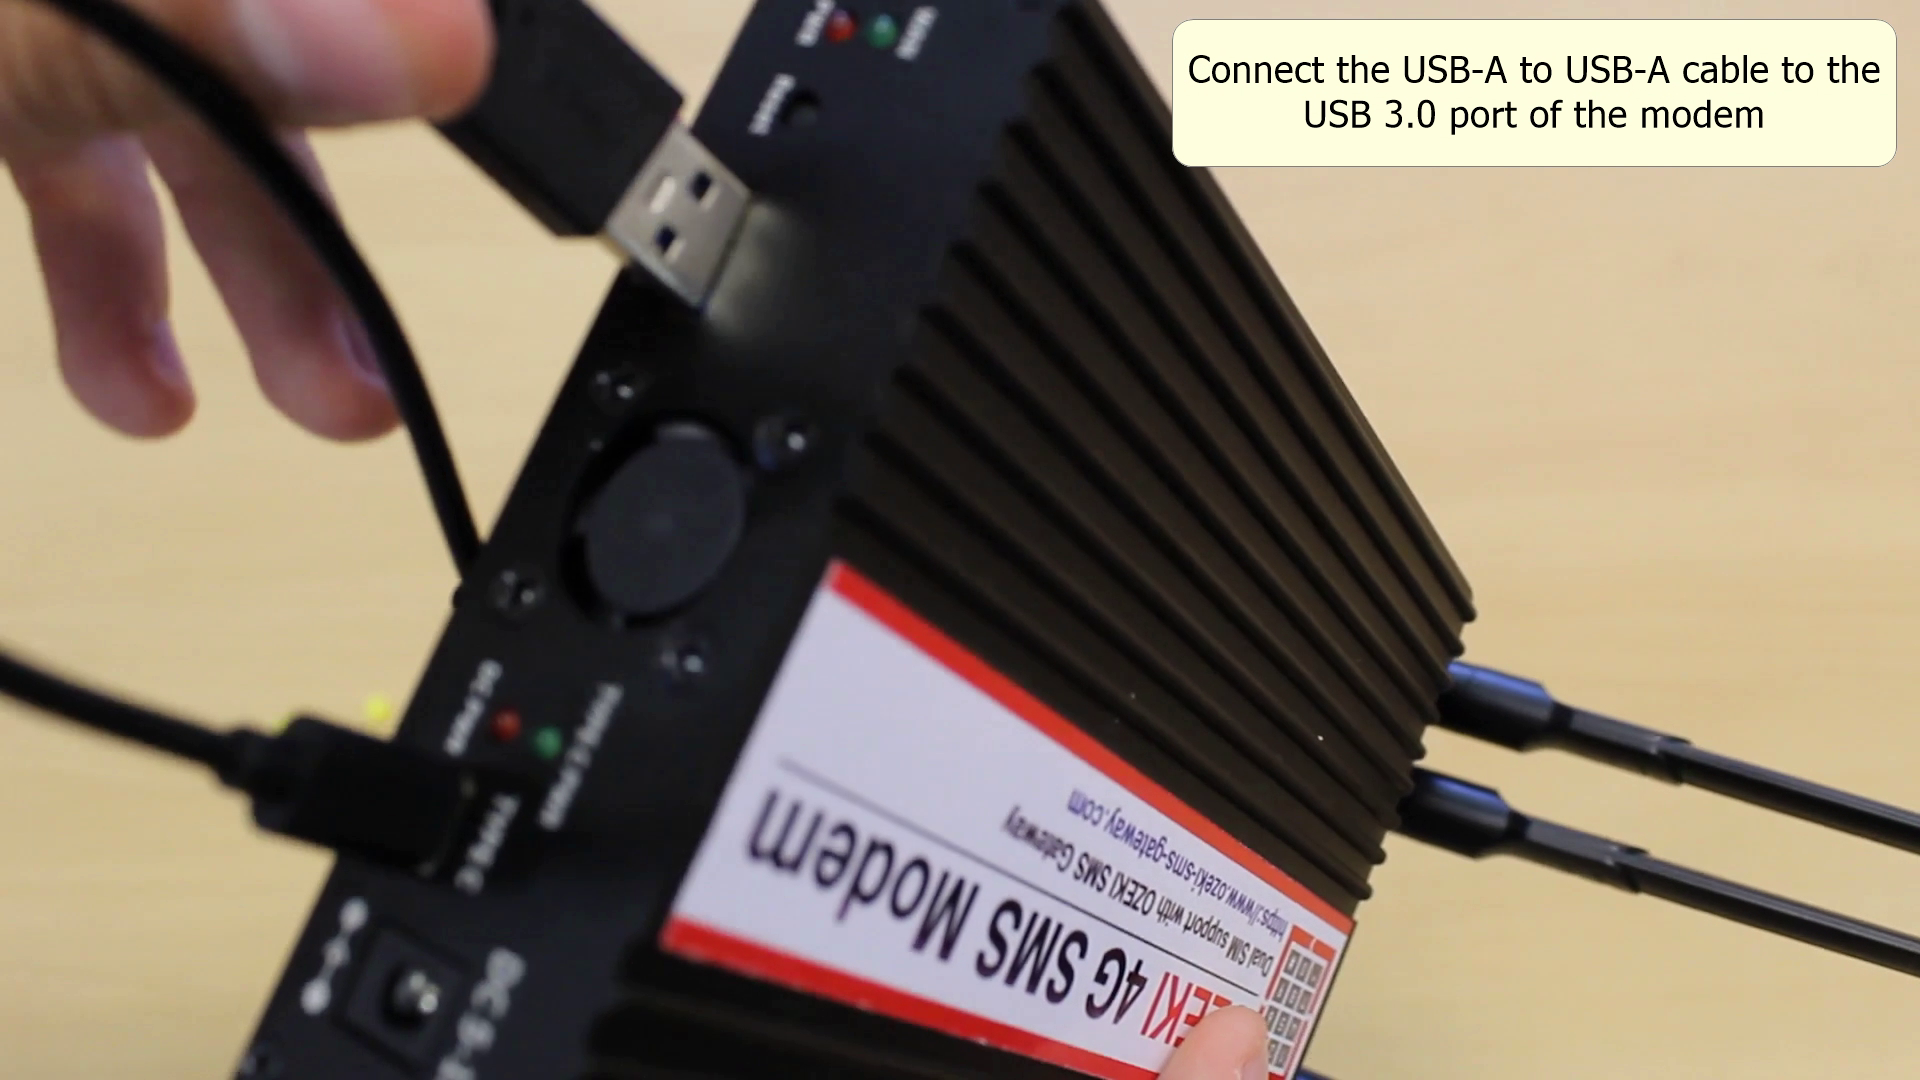
Insert the USB-A cable into the modem
Continuing with the setup, insert the USB-A cable into the modem. This cable establishes the connection between the modem and your computer. It's essential to use a high-quality cable that's in proper working condition to prevent any potential disconnections or interruptions. You can refer to Figure 6 for a visual representation of this step.
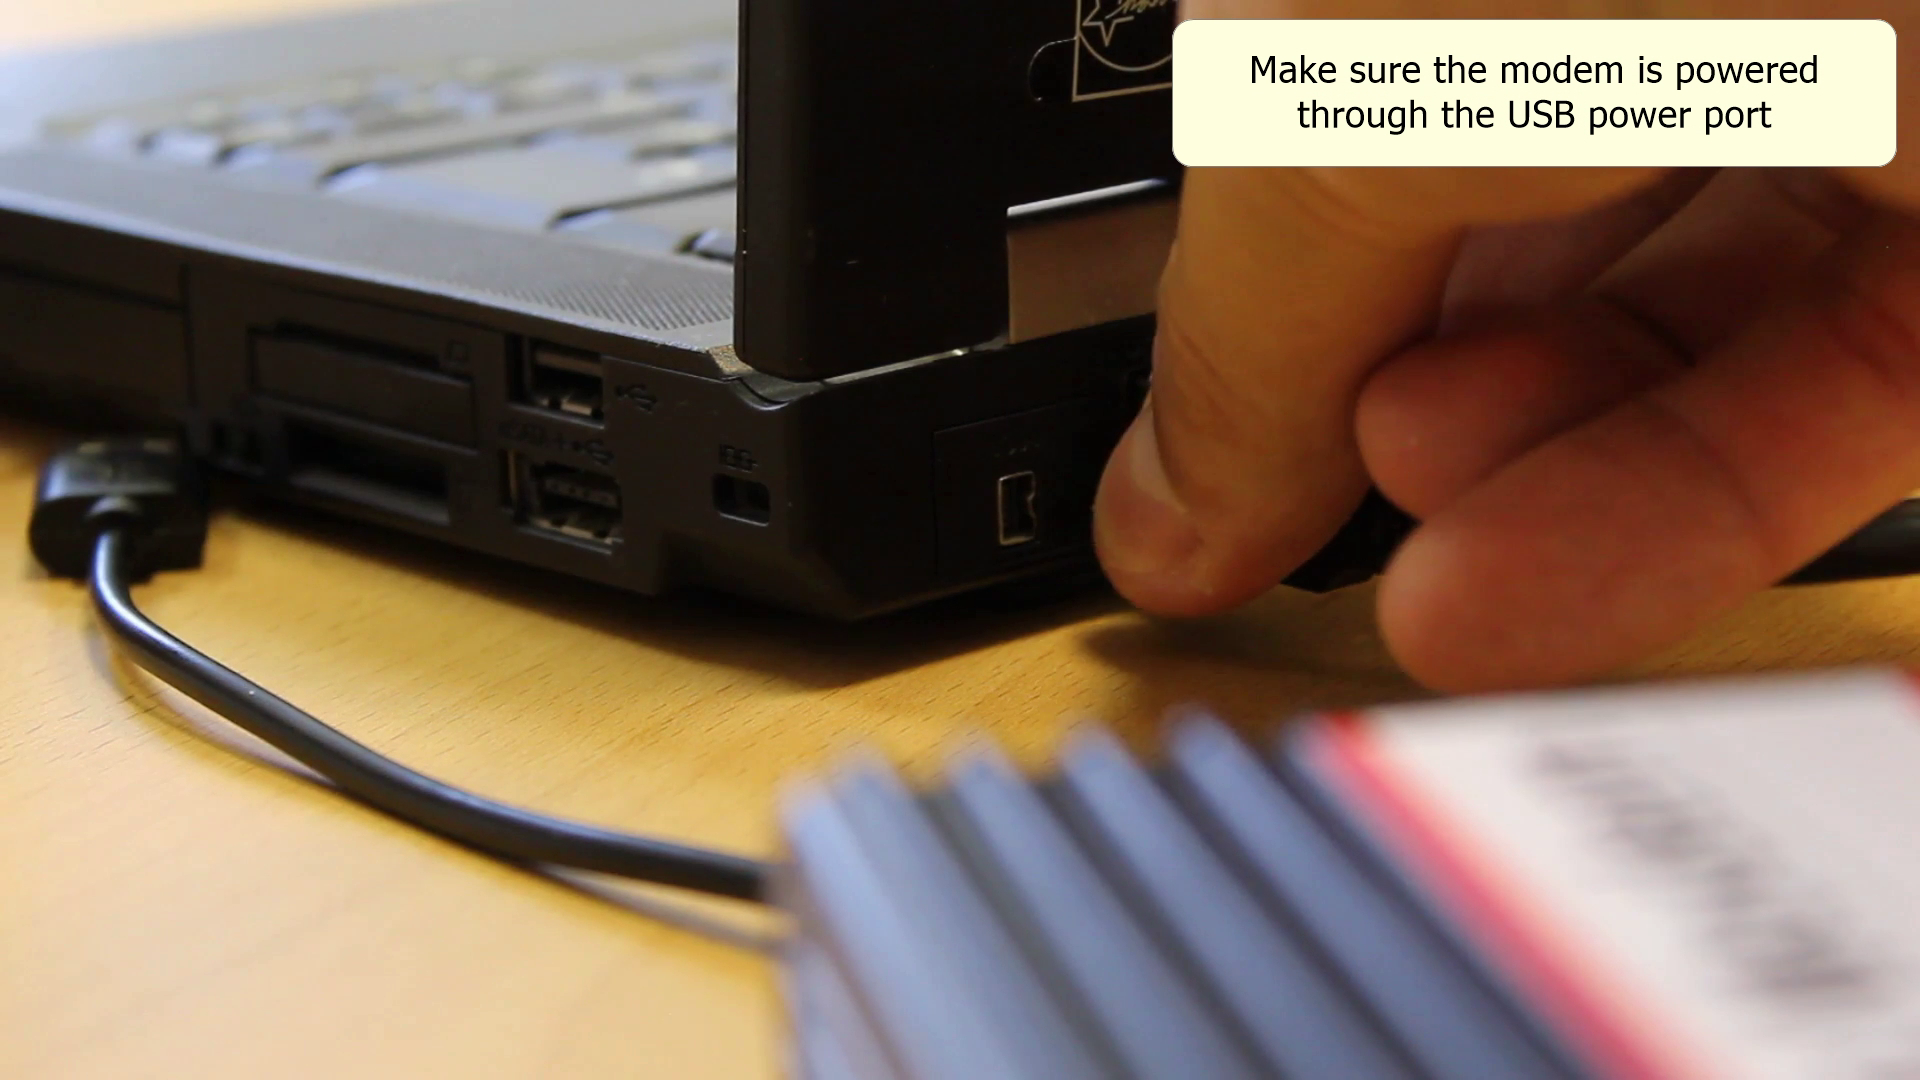
Plug the USB cable into your computer
Connect the other ends of the USB cables to your PC. Plug each end of the USB cables into the corresponding USB ports on your computer. You can refer to Figure 7 for a visual representation of this step.
Ozeki 4G LTE SMS Modem Dual SIM Software setup (video tutorial)
In the following video tutorial, you will receive guidance on how to configure an Ozeki 4G LTE SMS Modem Dual SIM for sending text messages (SMS) using Ozeki SMS Gateway. To proceed with this setup, ensure that you have the modem properly connected to your computer. The steps involved include opening the SMS Gateway within the Ozeki Software Platform, adding a new connection, and installing the SMS modem. Once the modem installation is complete, you'll be ready to start the process of sending text messages through your Ozeki 4G Dual SIM modem.
Install the Ozeki Modem Driver
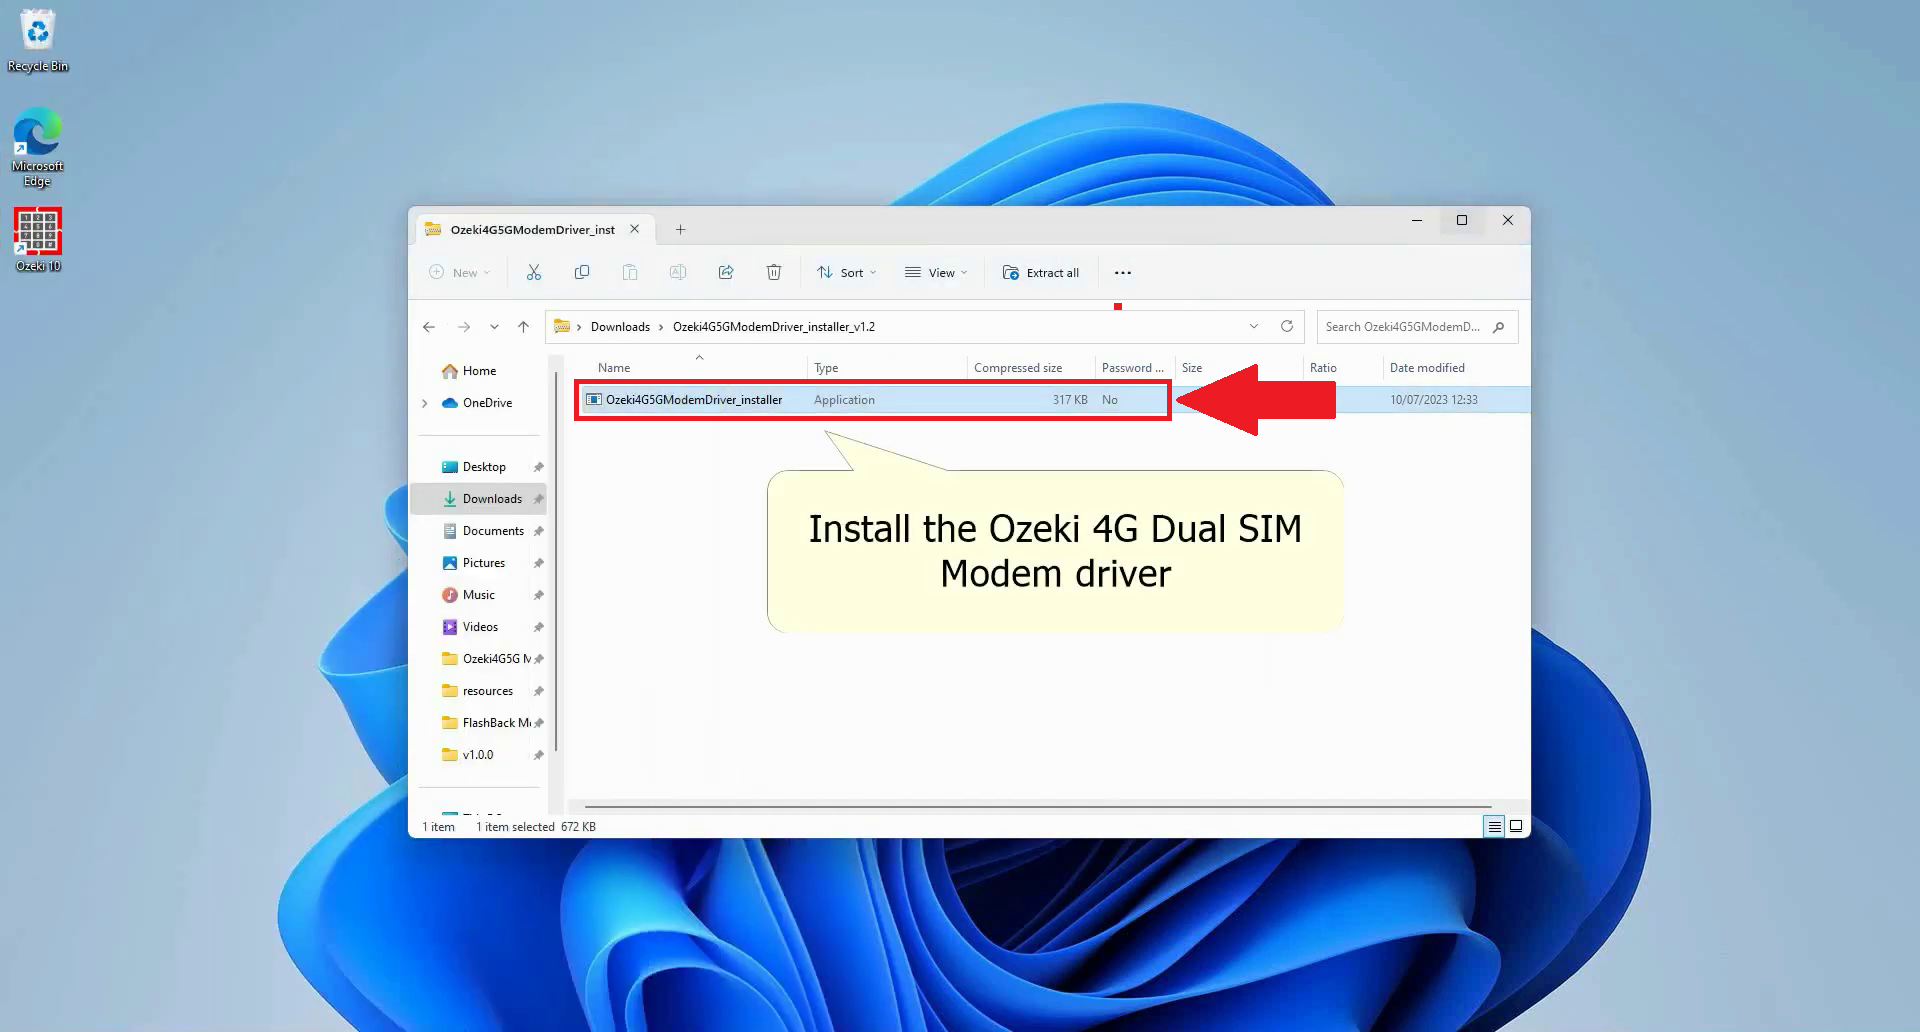
Once you've downloaded the driver and extracted its contents, proceed by opening the executable file. You can refer to Figure 8 for an example of this step.
Proceed with Installing
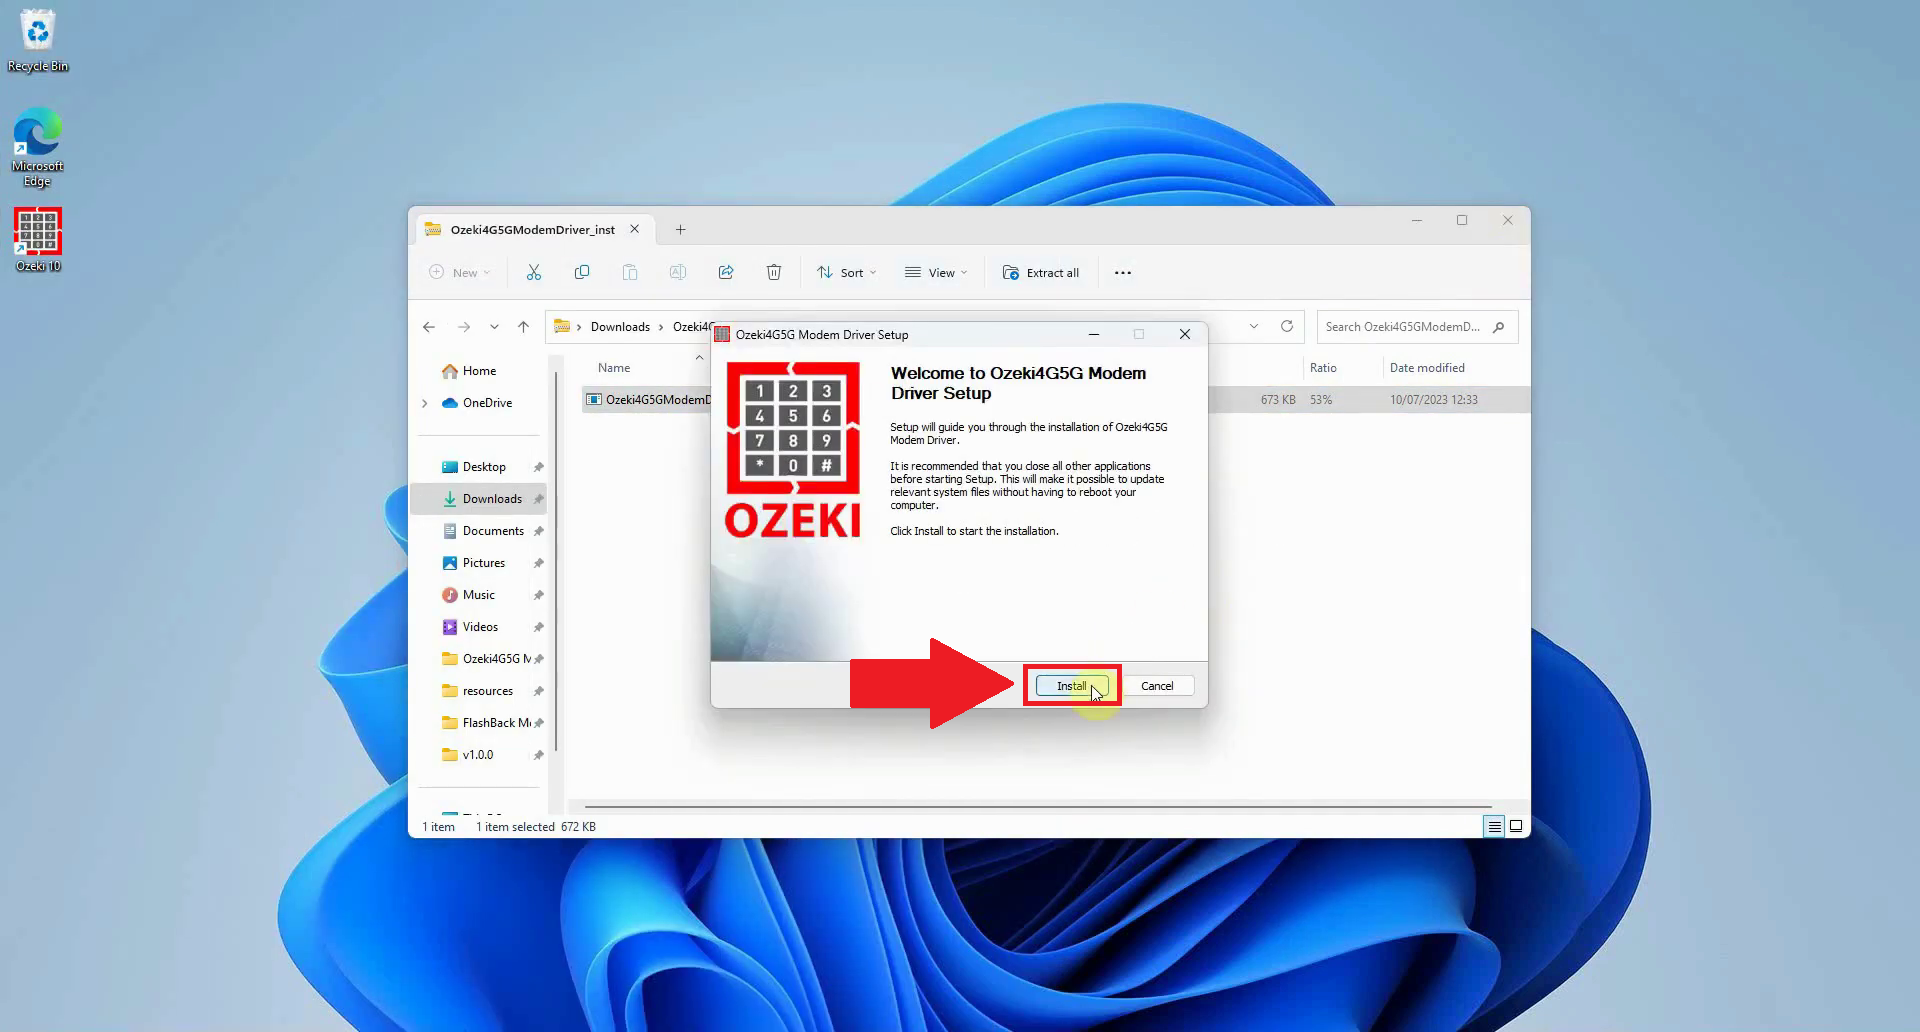
After launching the executable file, you will need to click on the "Install" button to proceed with the installation process. This step is illustrated in Figure 9.
Open Ozeki 10 SMS Gateway App
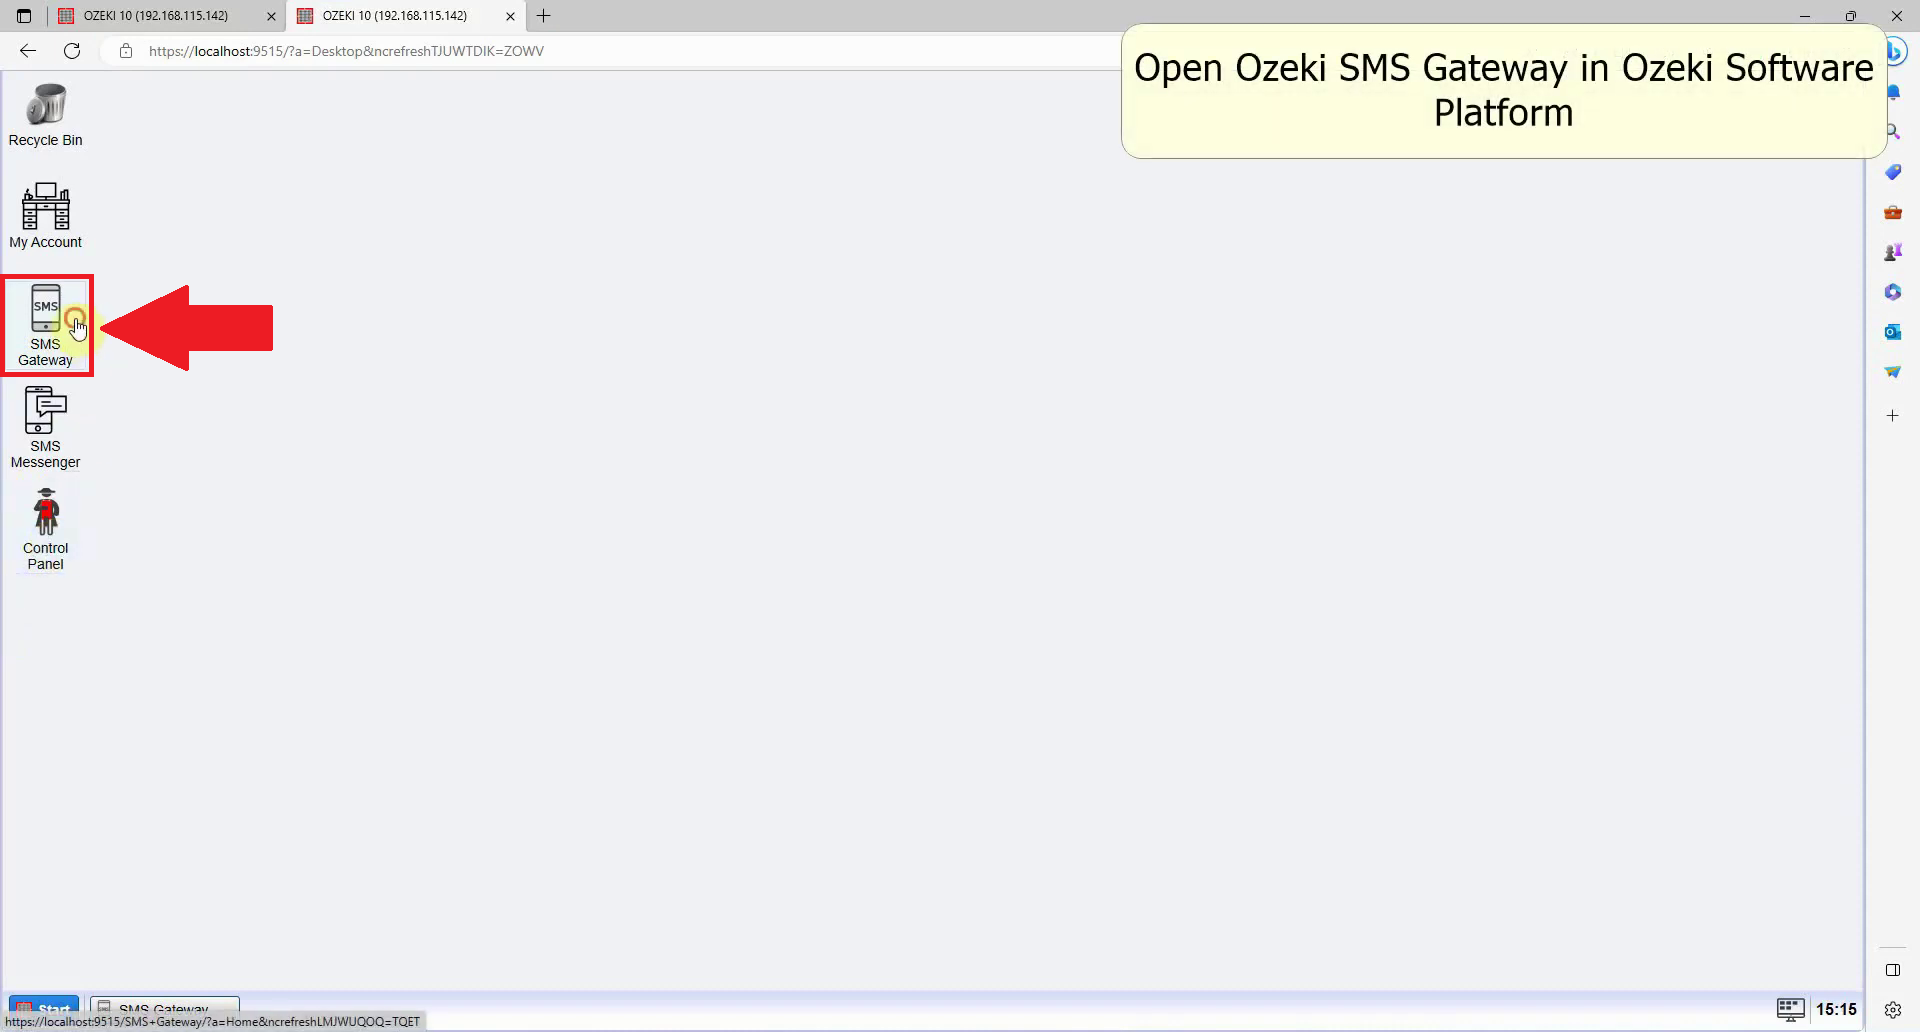
Once the installation is complete, open Ozeki 10 and launch the SMS Gateway Application. You can locate this step in Figure 10.
if you have not yet downloaded Ozeki 10, you can download it here: Ozeki Installer Download Page
Add a new connection
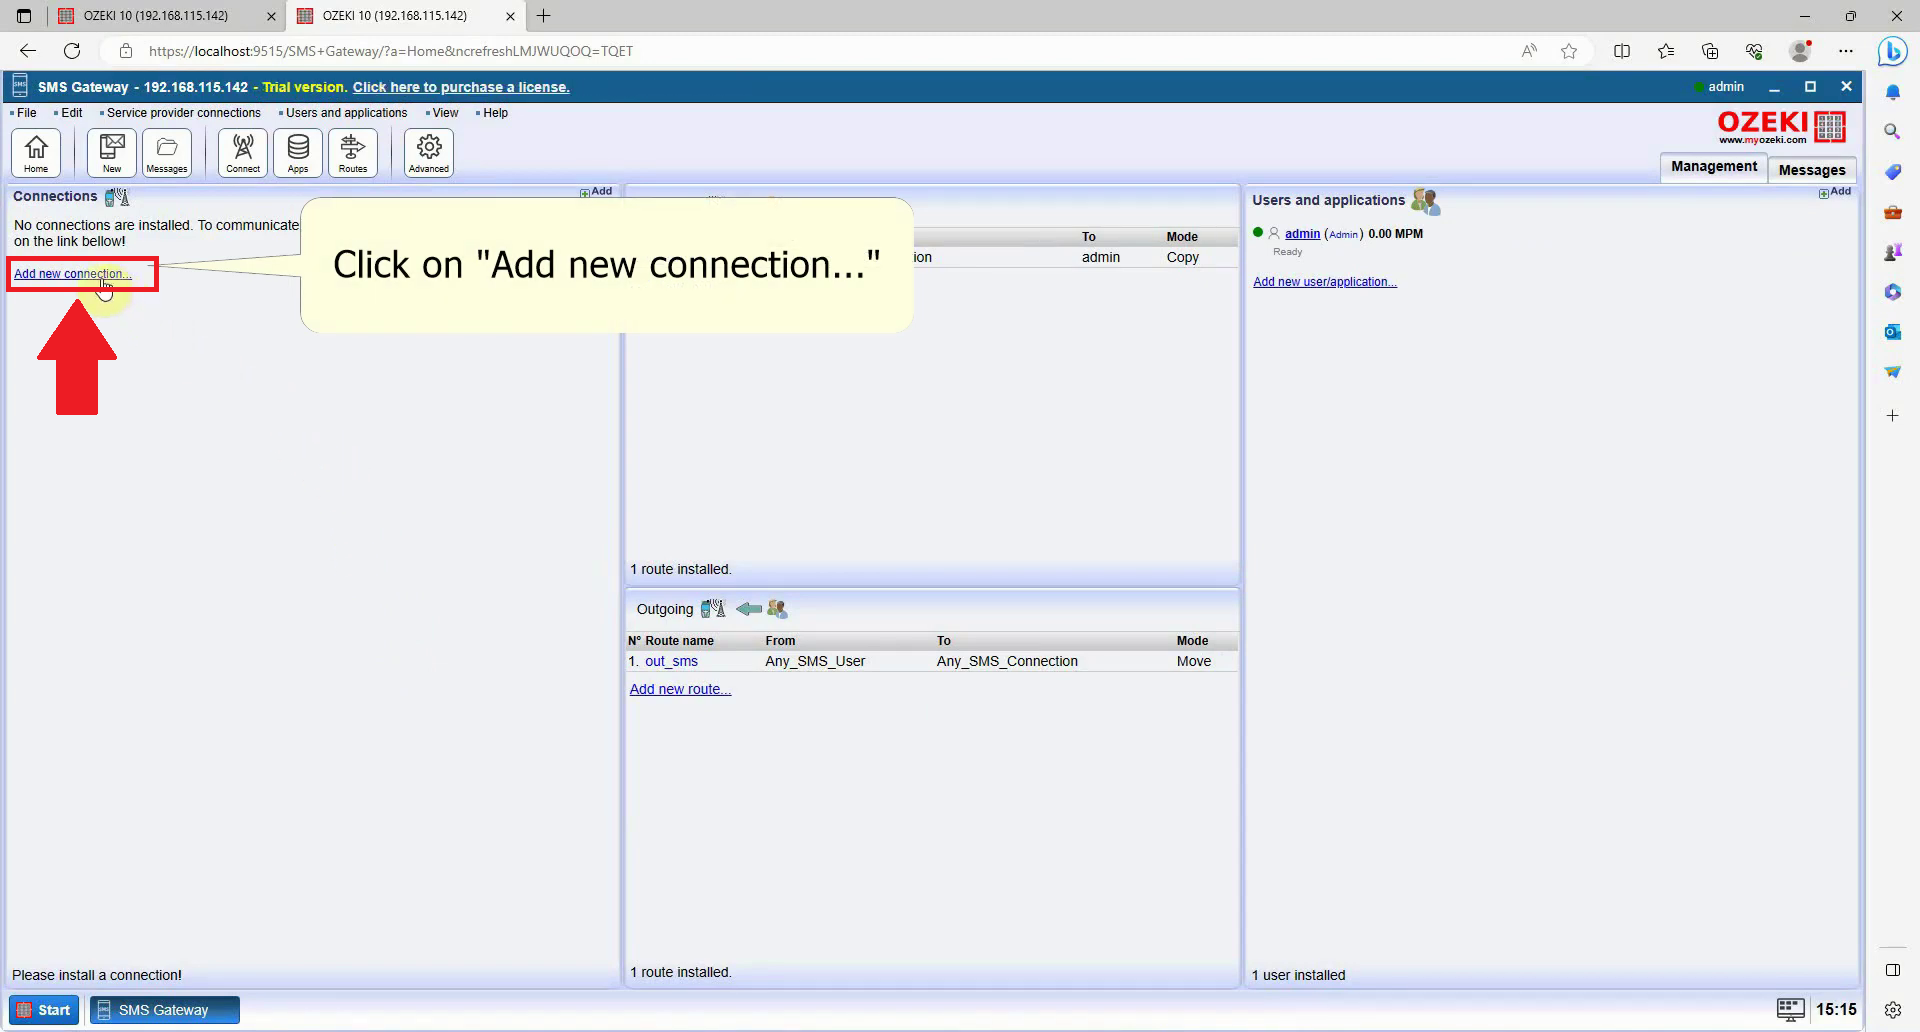
After launching the application, navigate to the "Connections" group on the left-hand side and locate the link labeled "Add new connection." This can be found in Figure 11.
Install a new SMS Modem
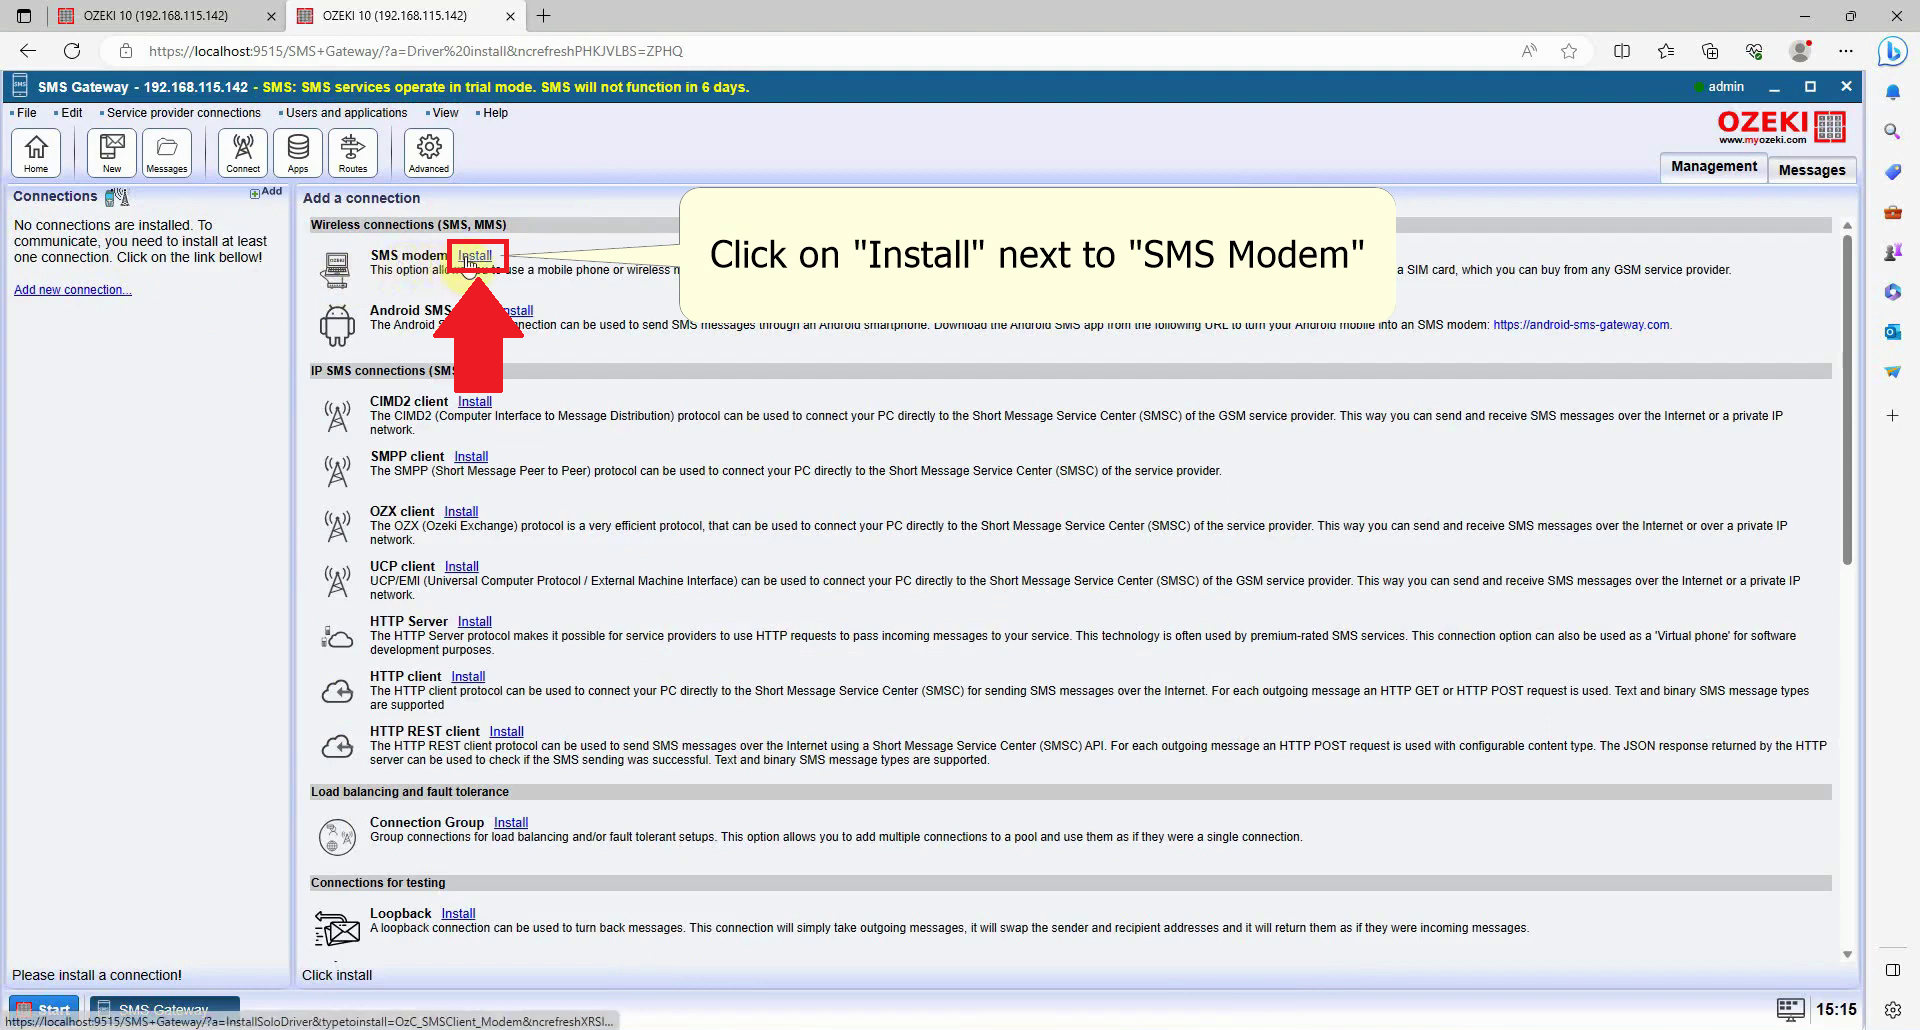
In the next window, you will see a list of all the available connections that you can create in the SMS Gateway application. From here, locate the "Wireless connections install" list and find the SMS modem install item. Click on the Install link associated with it. This action will enable you to utilize the modem within the Ozeki SMS Gateway, as shown in Figure 12.
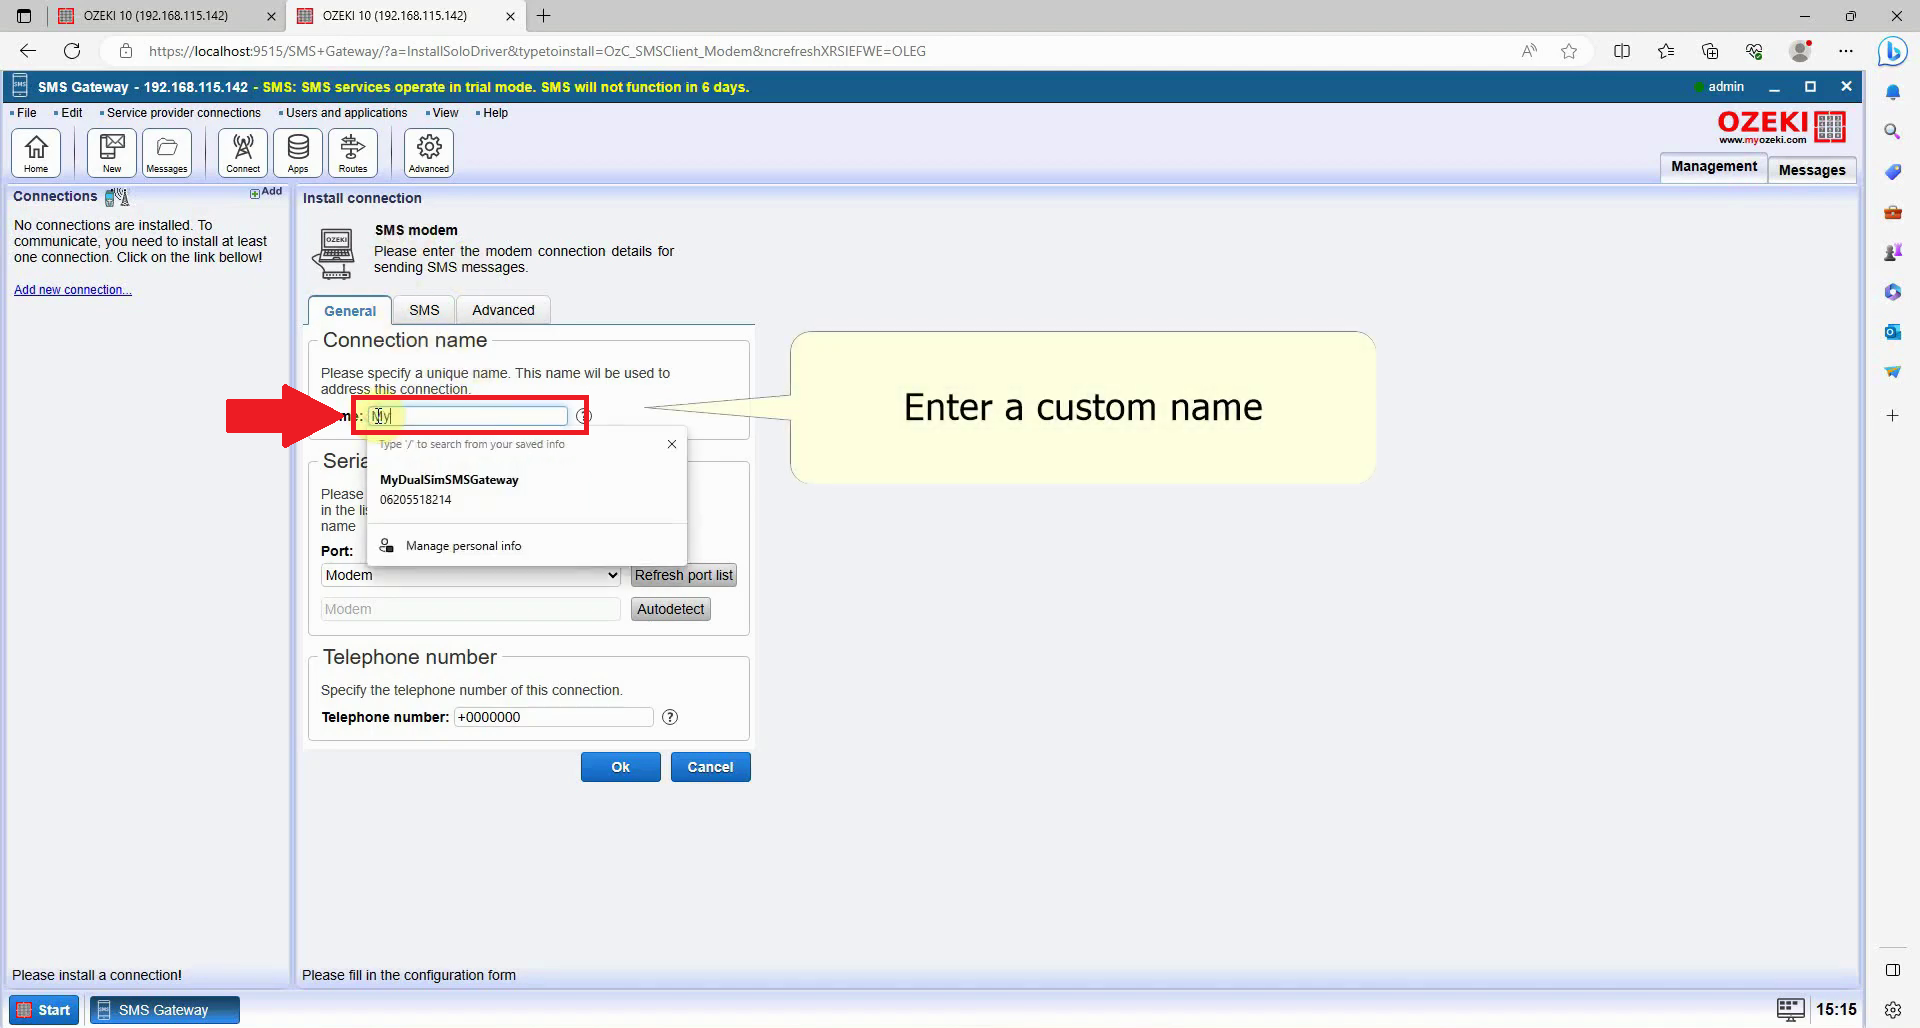
Set a name for your modem
During this step, you'll need to assign a name to your modem. While you can stick with the default value, it's advisable to provide a more descriptive name that allows for easy identification. Refer to Figure 13 for a visual representation.
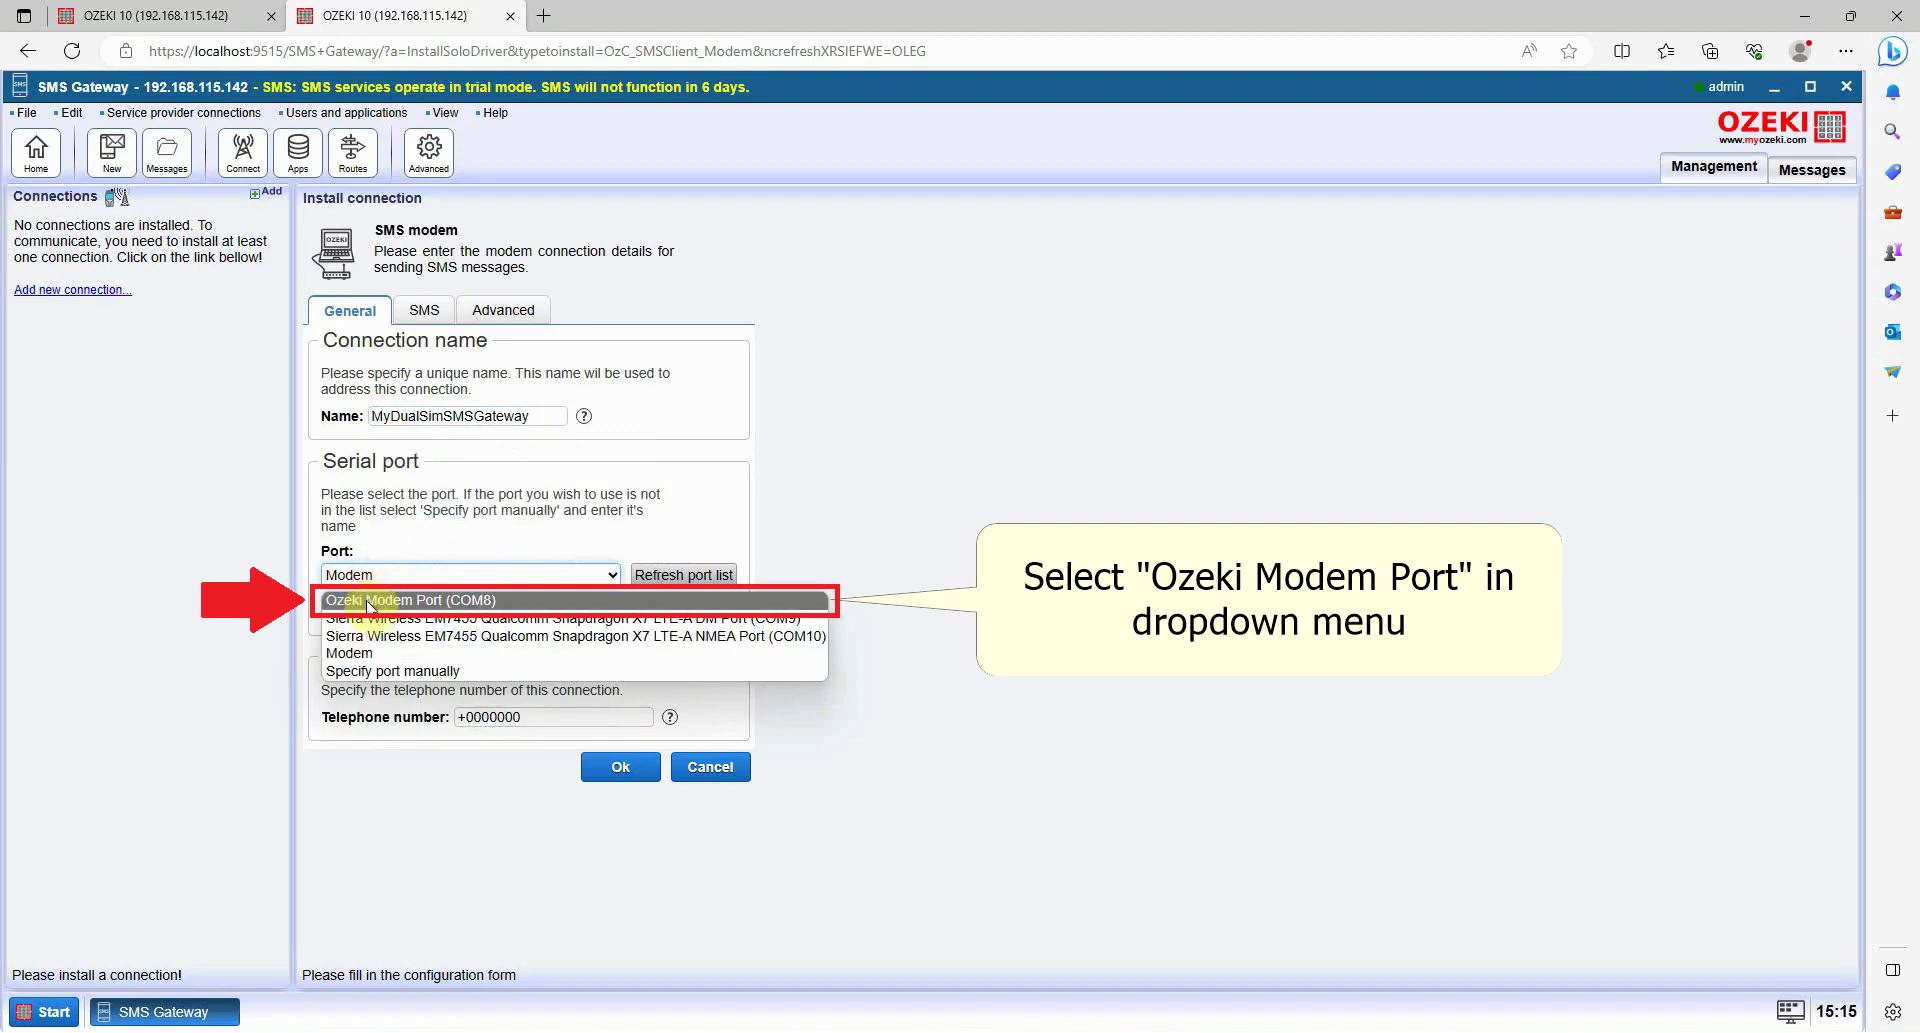
Select the Port
After determining the name for your modem, proceed by selecting the appropriate port for the modem. Locate and choose the "Ozeki Modem Port." In case the port is not visible, ensure that you have correctly installed the drivers. If the port still isn't showing, consider flipping the USB-C connector. You can refer to Figure 14 for a visual guide.
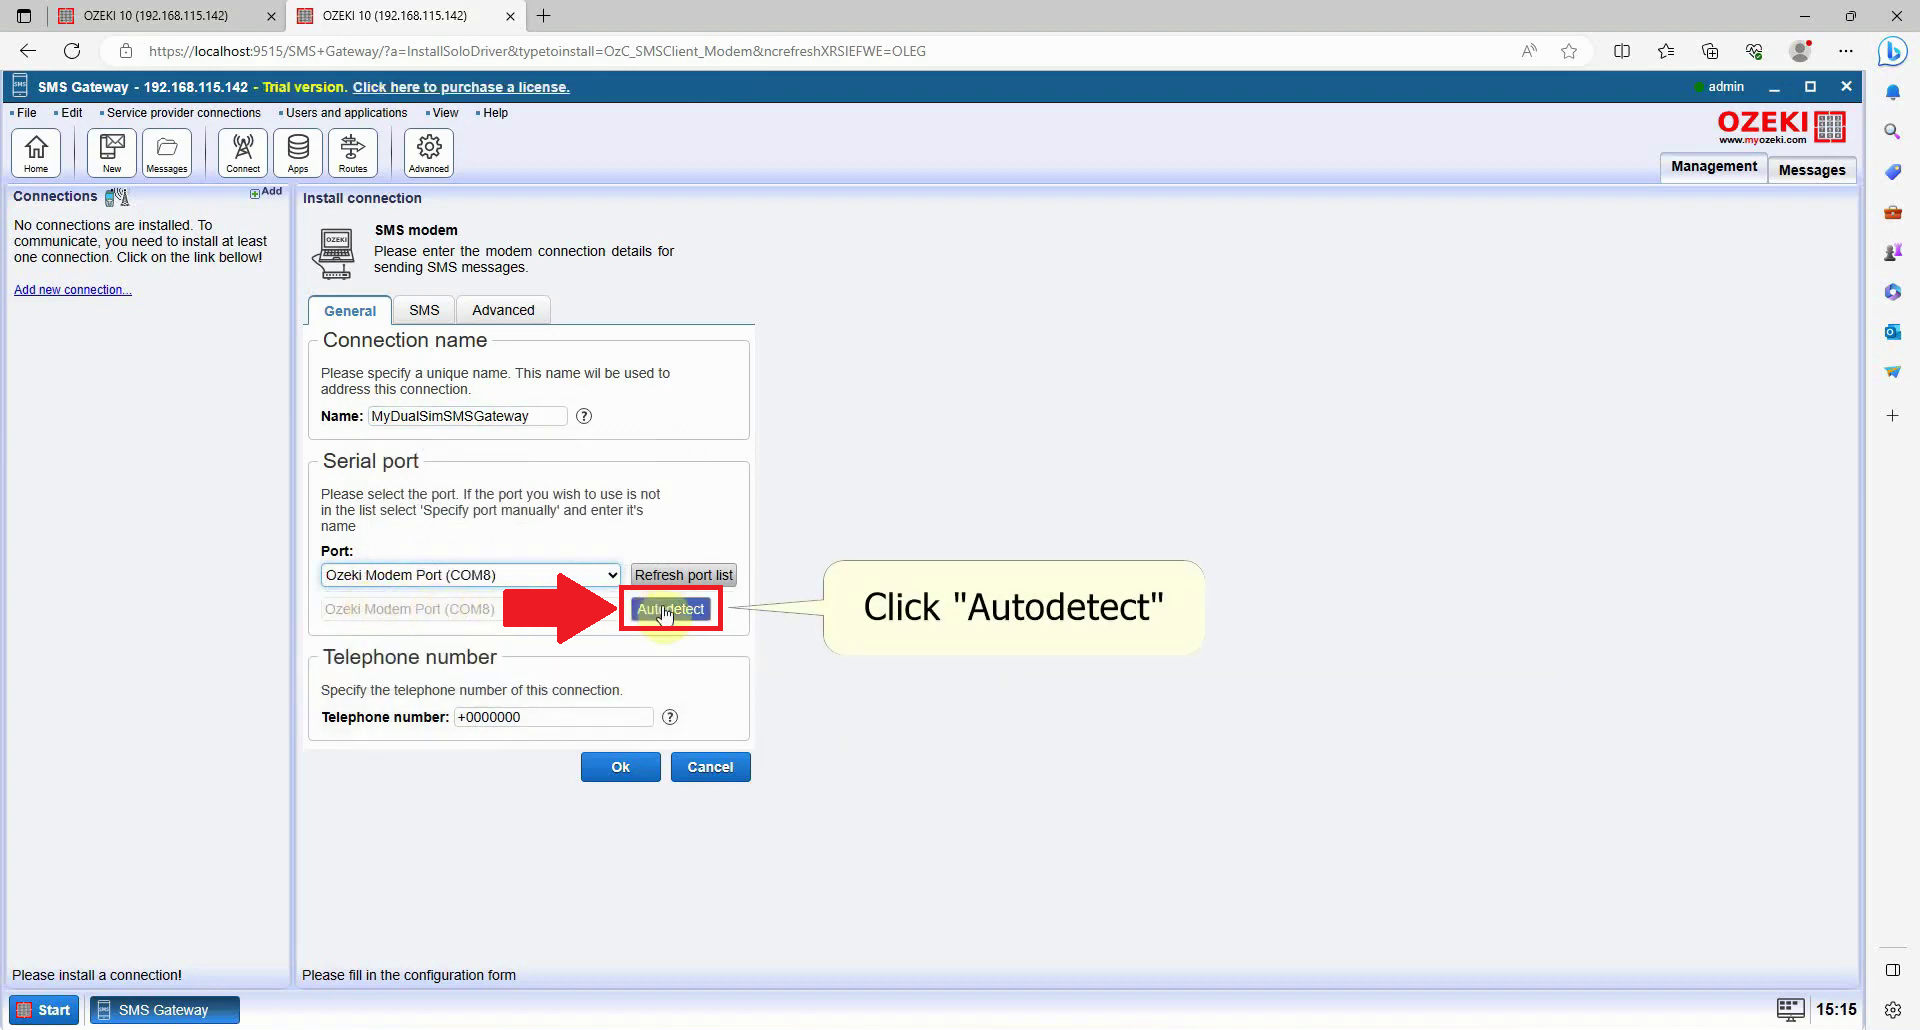
Autodetect properties
In the installation menu, navigate to the General tab, where you will find the Serial port groupbox. In the "Port" combobox, select the port to which you have connected the modem. For automatic detection, click on the "Autodetect" button. The Autodetect feature will identify your device if it is properly connected. Refer to Figure 15 for a visual representation.
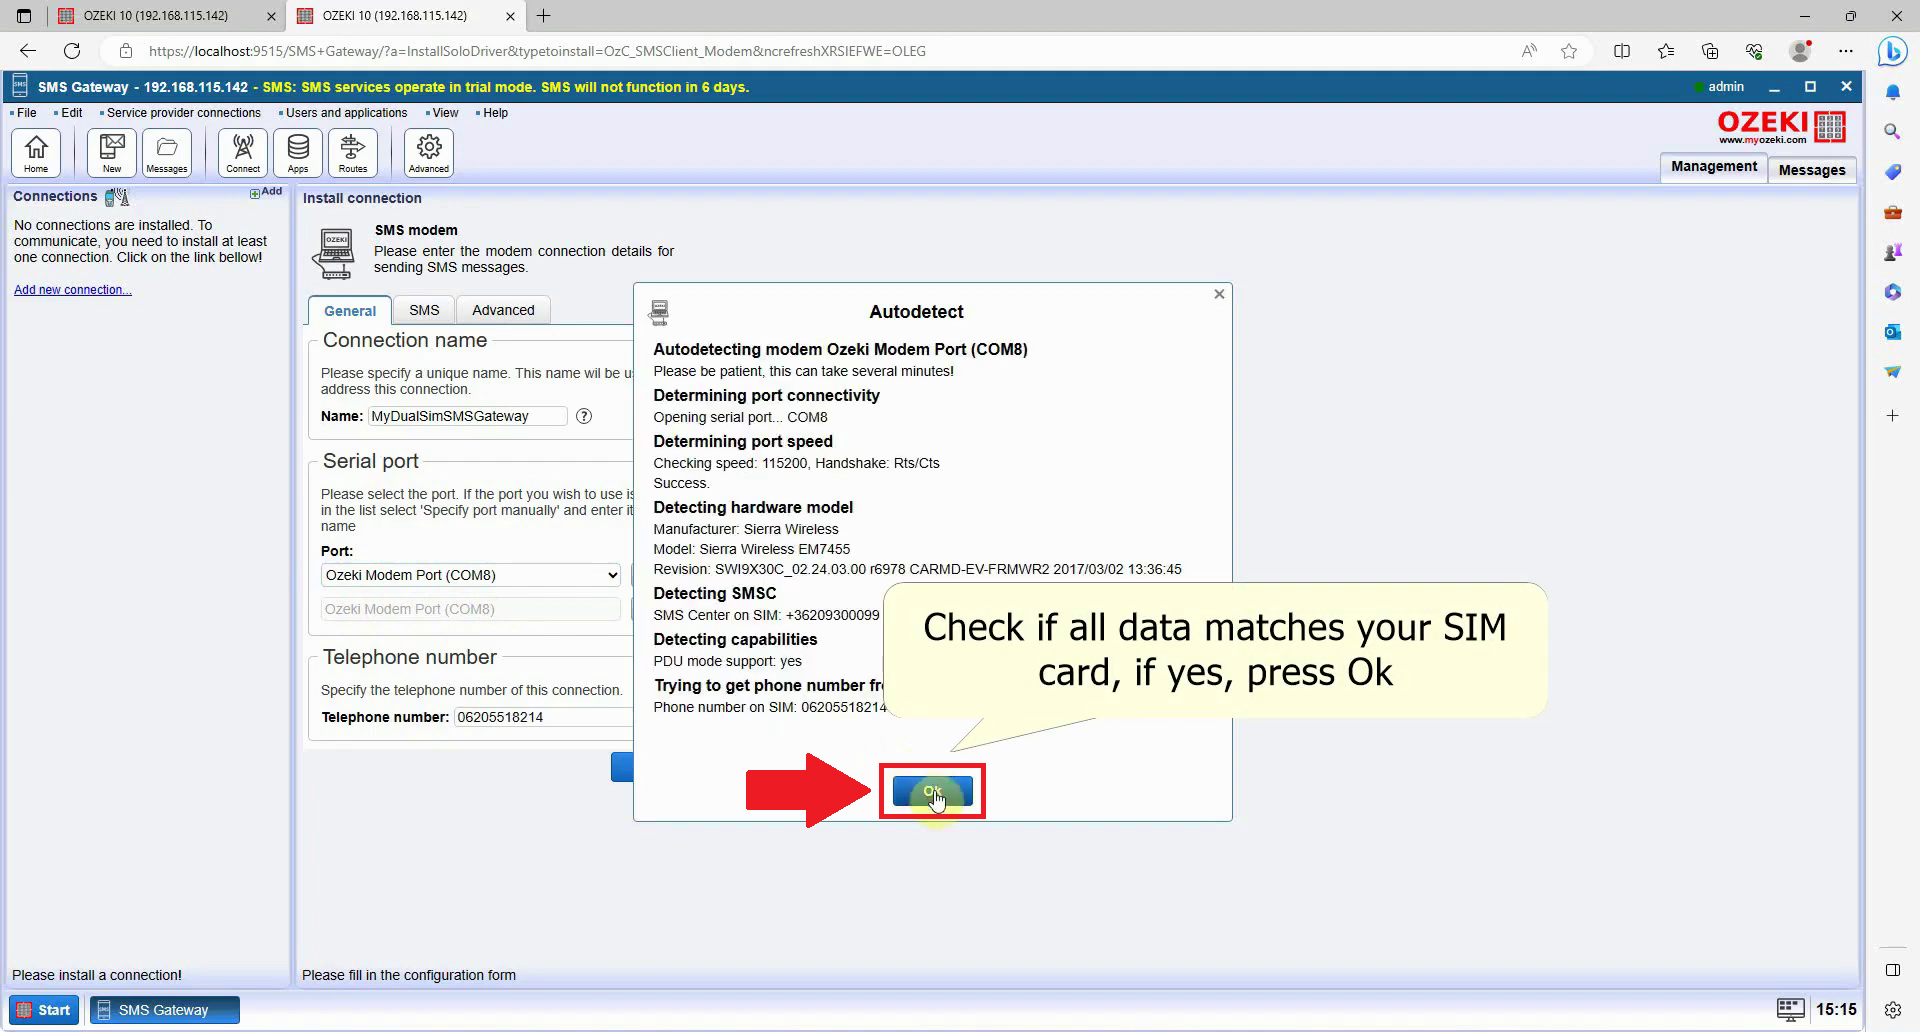
Check the information
The Autodetect option will identify your modem, and if it is connected correctly, the subsequent window will display information about your connected modem and SIM card. You can review the details in this window to ensure that the hardware and SIM card are correct. Once you have reviewed the information, click the Ok button to proceed. You can refer to Figure 16 for a visual representation.
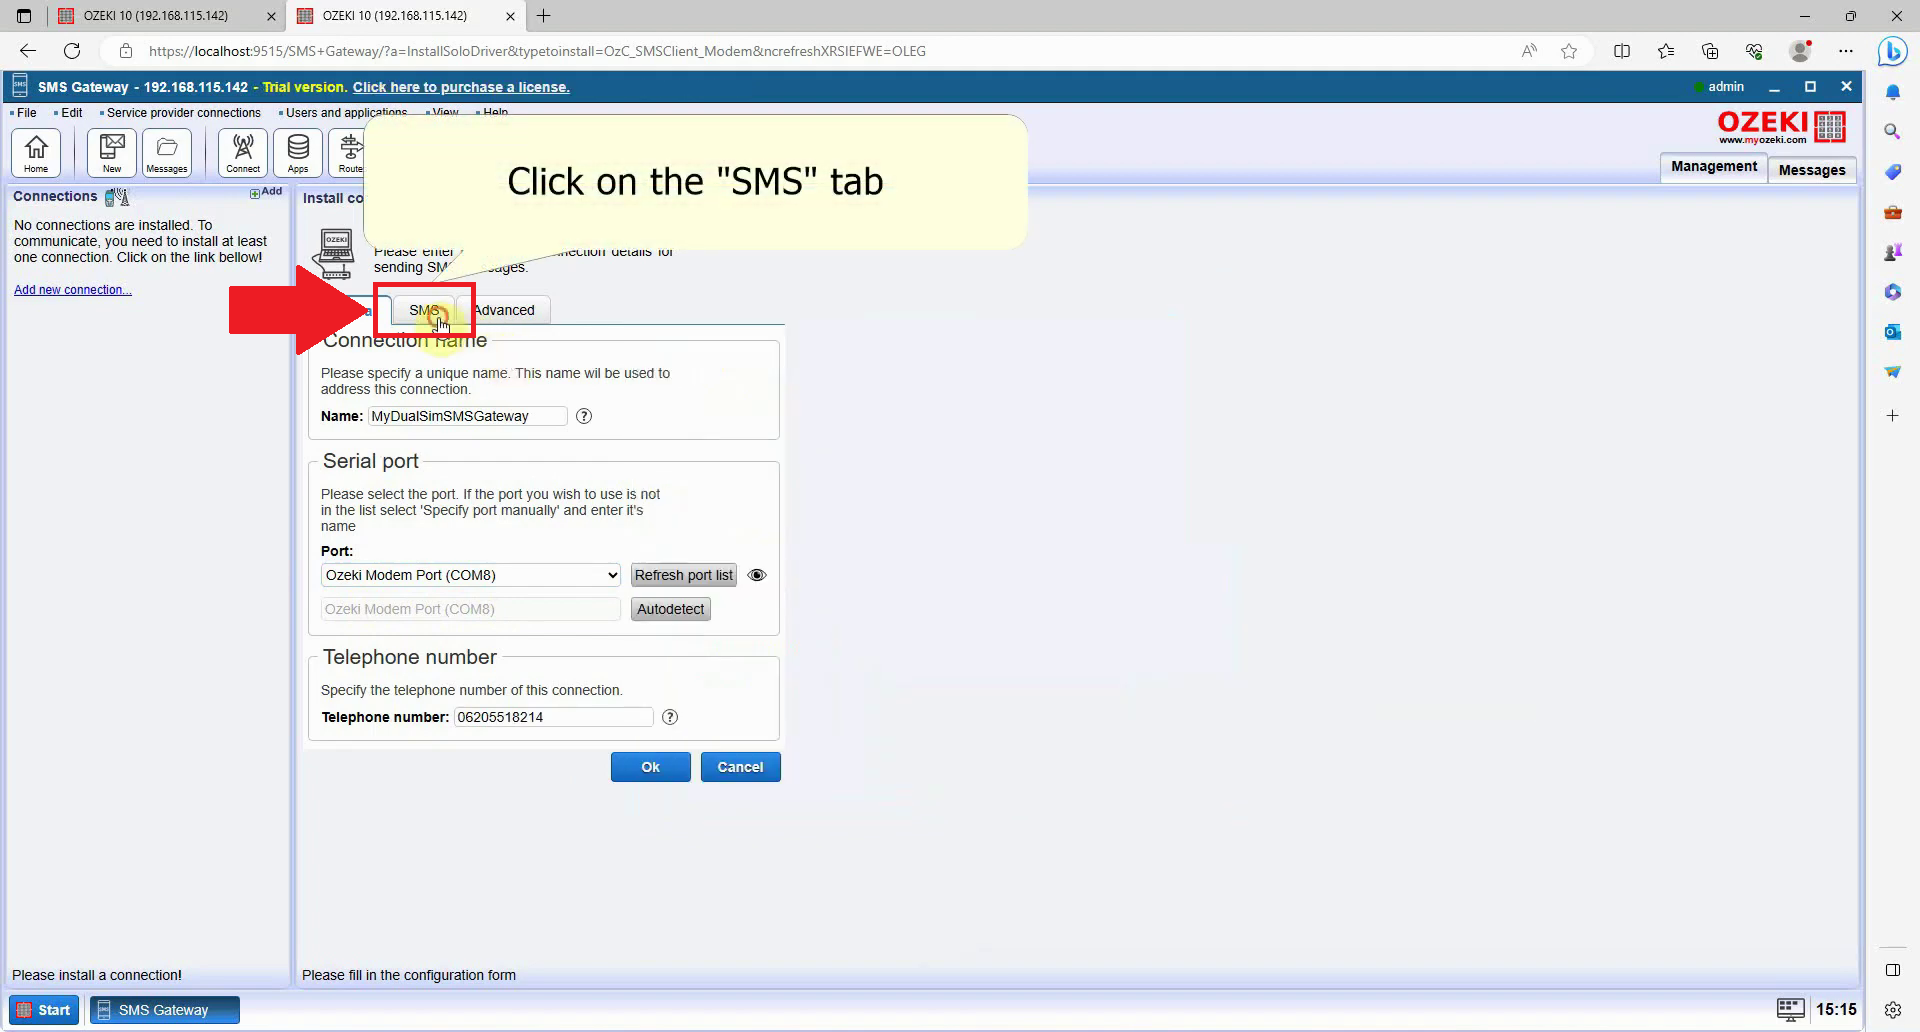
Select the SMS options
Navigate to the SMS options located next to the General option. By selecting this, you can initiate the configuration process for your Dual SIM modem. For a visual reference, consult Figure 17.
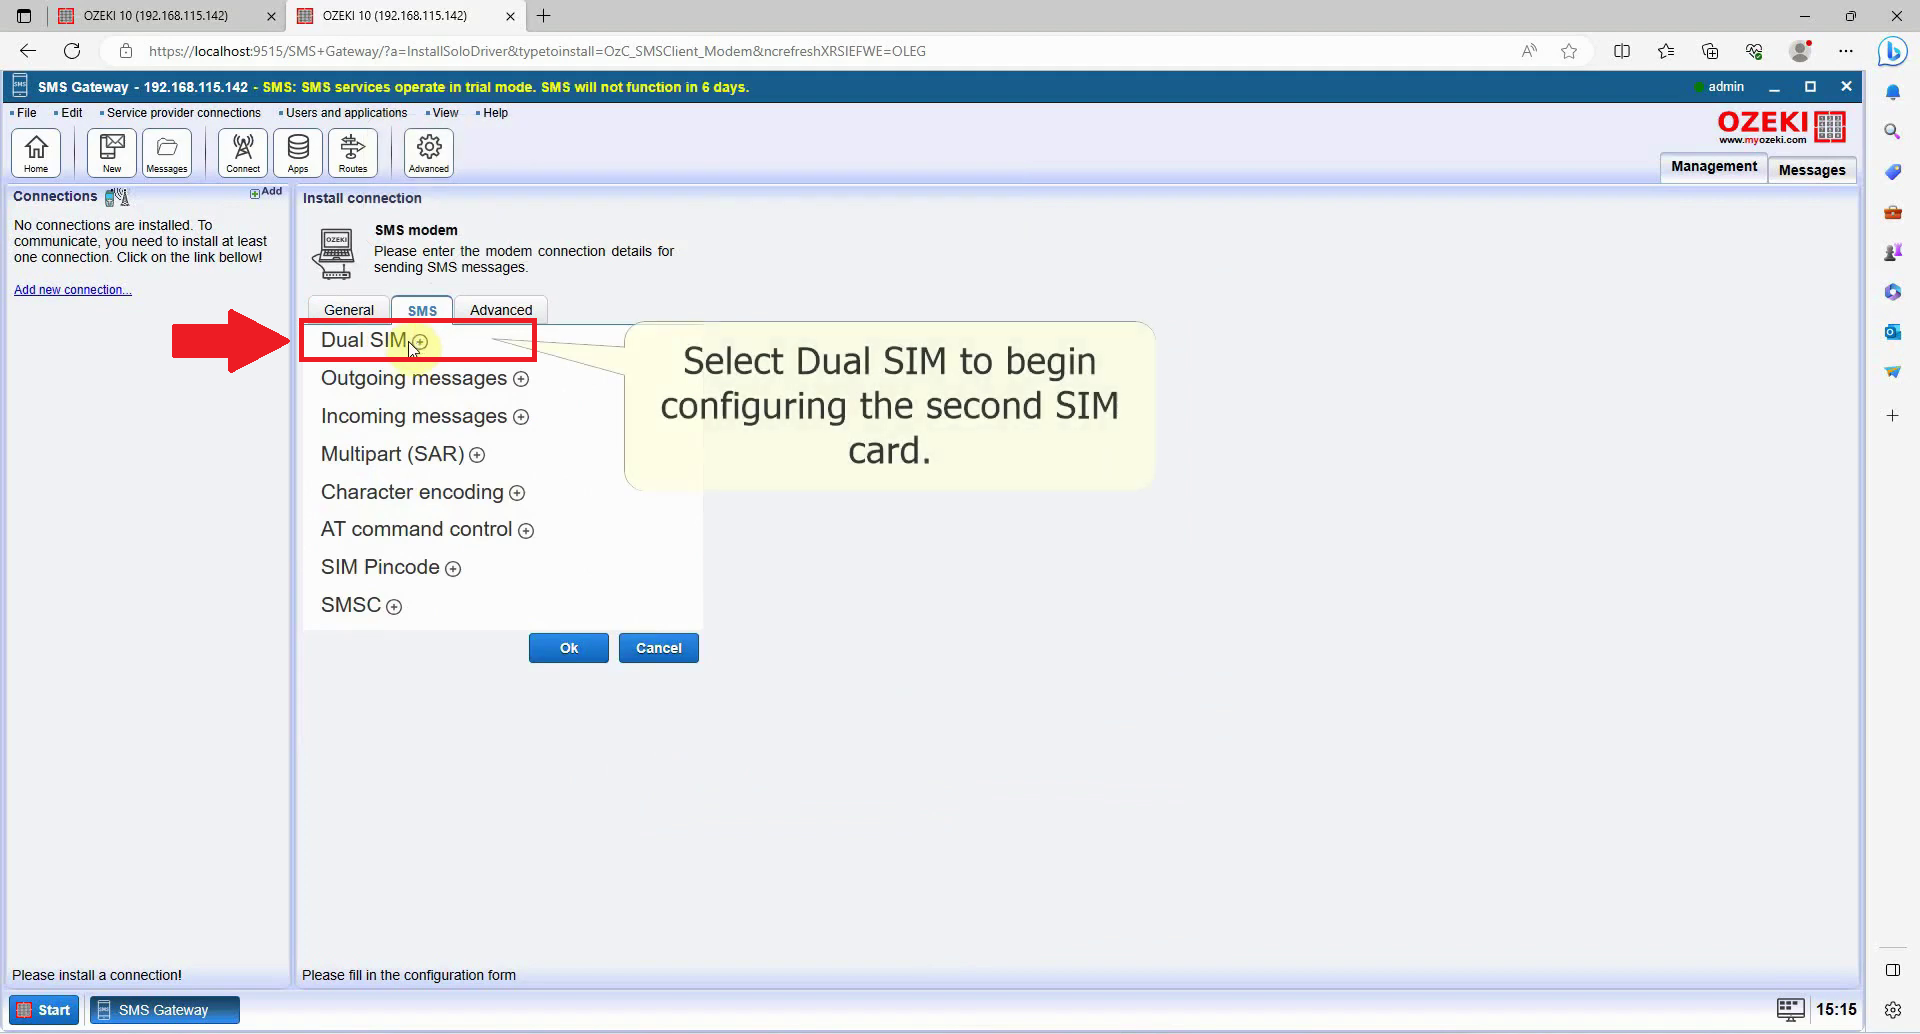
Open Dual SIM settings
You can set your Dual SIM settings under the Dual SIM dropdown menu, open it (As seen on Figure 18)
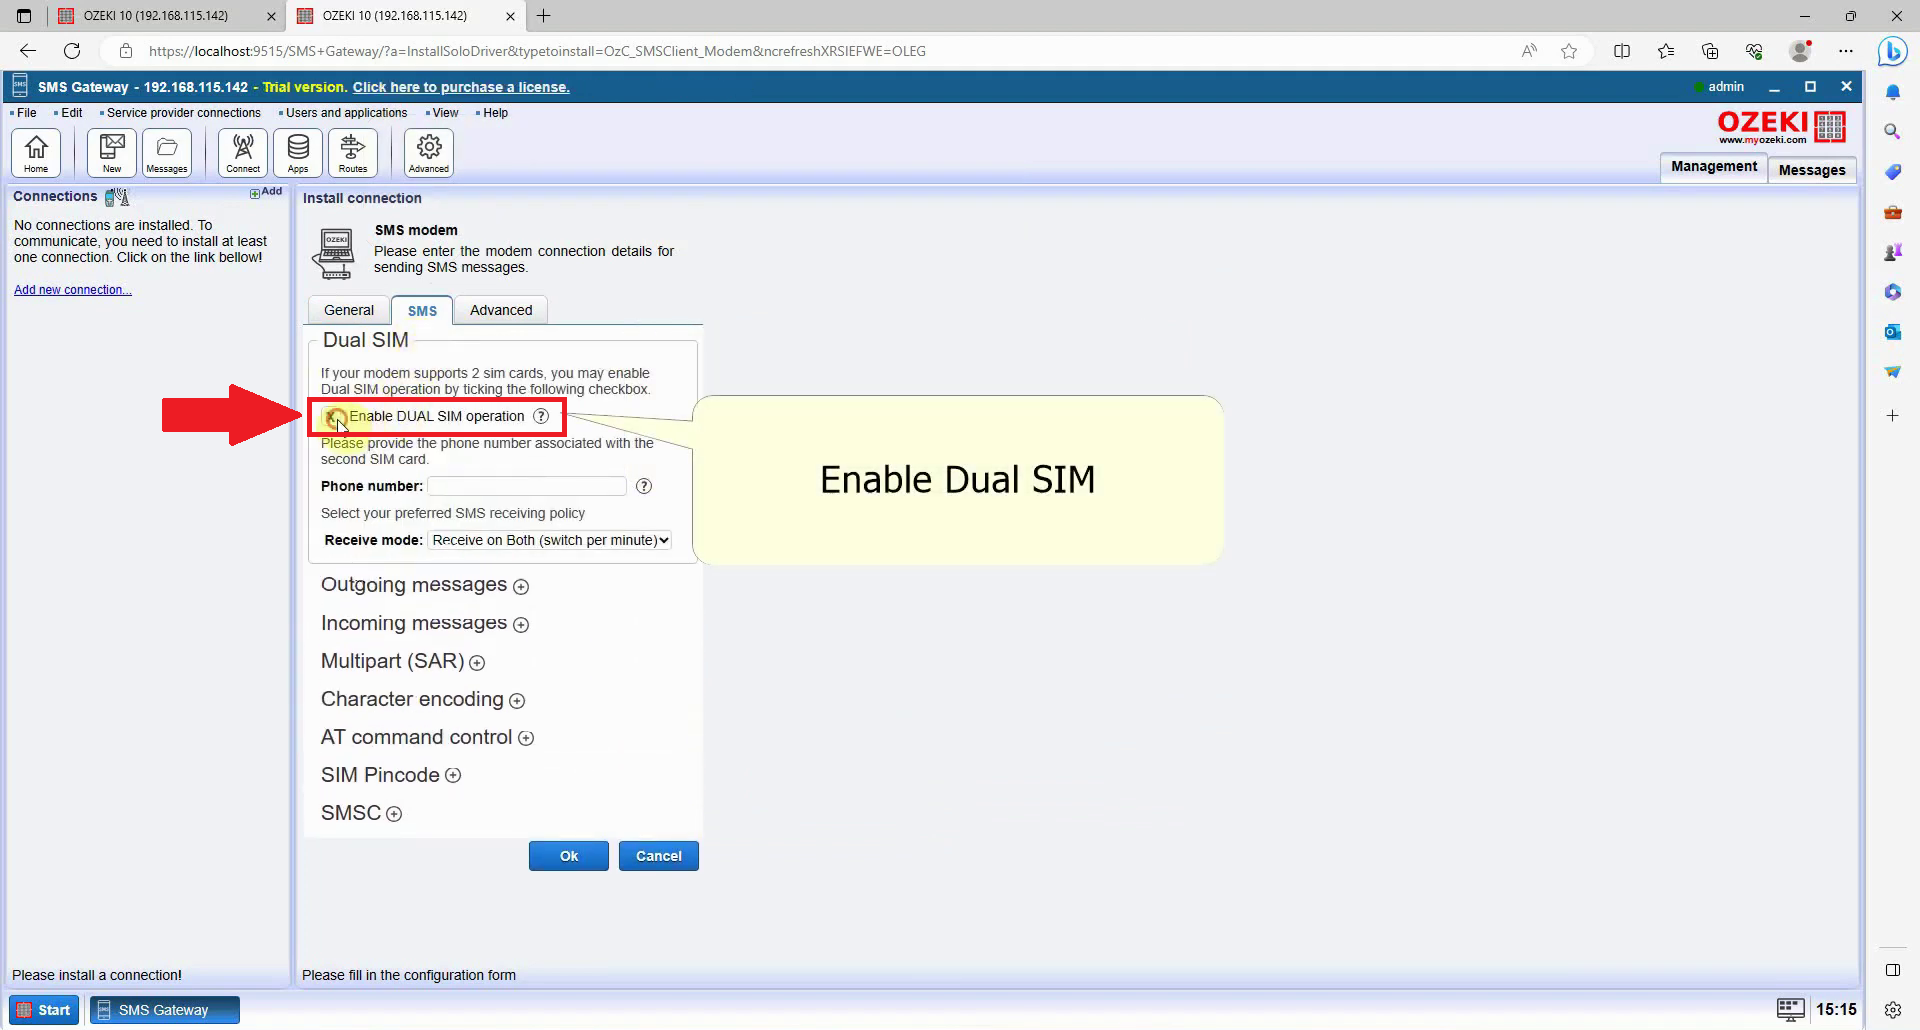
Enable Dual SIM
If you want to use both SIM cards, you have to enable Dual SIM (Figure 19)
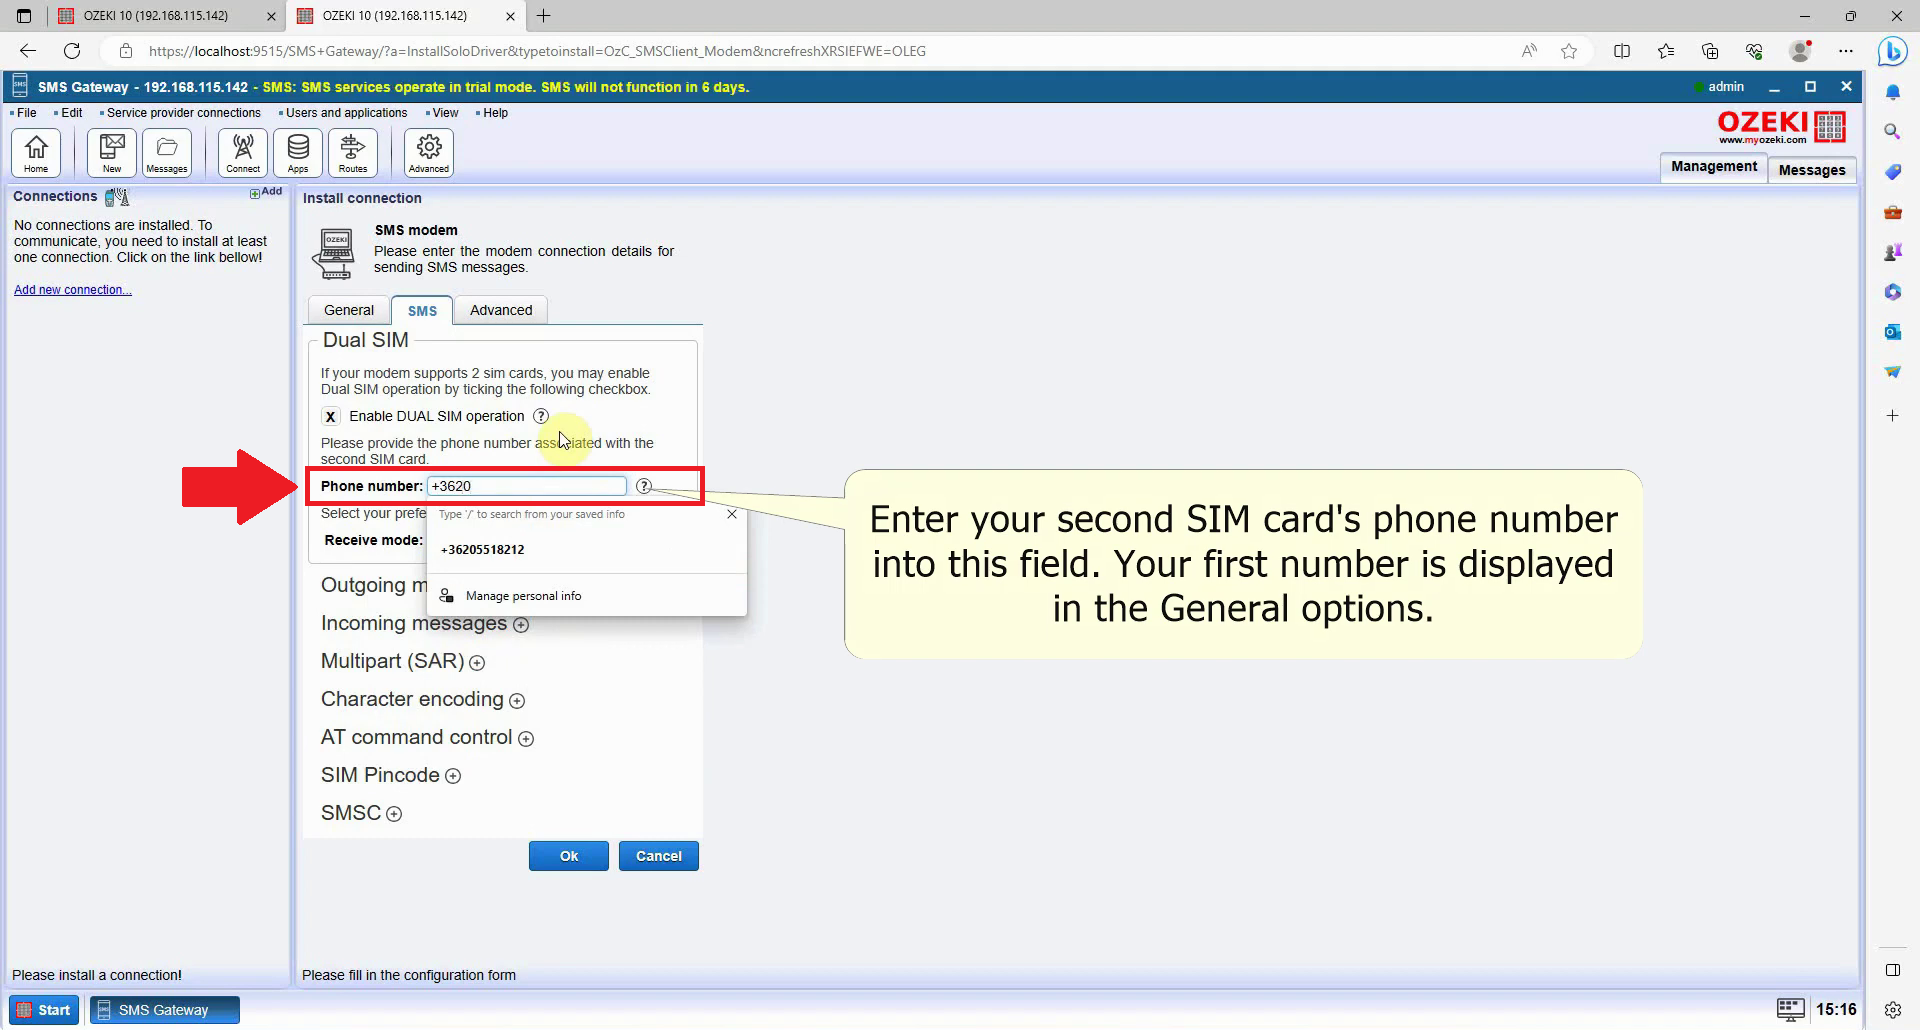
Set second SIM card number
Input the phone number associated with your second SIM card. This information can typically be found on the packaging in which your SIM card was provided. Refer to Figure 20 for a visual representation.
Set the receive mode
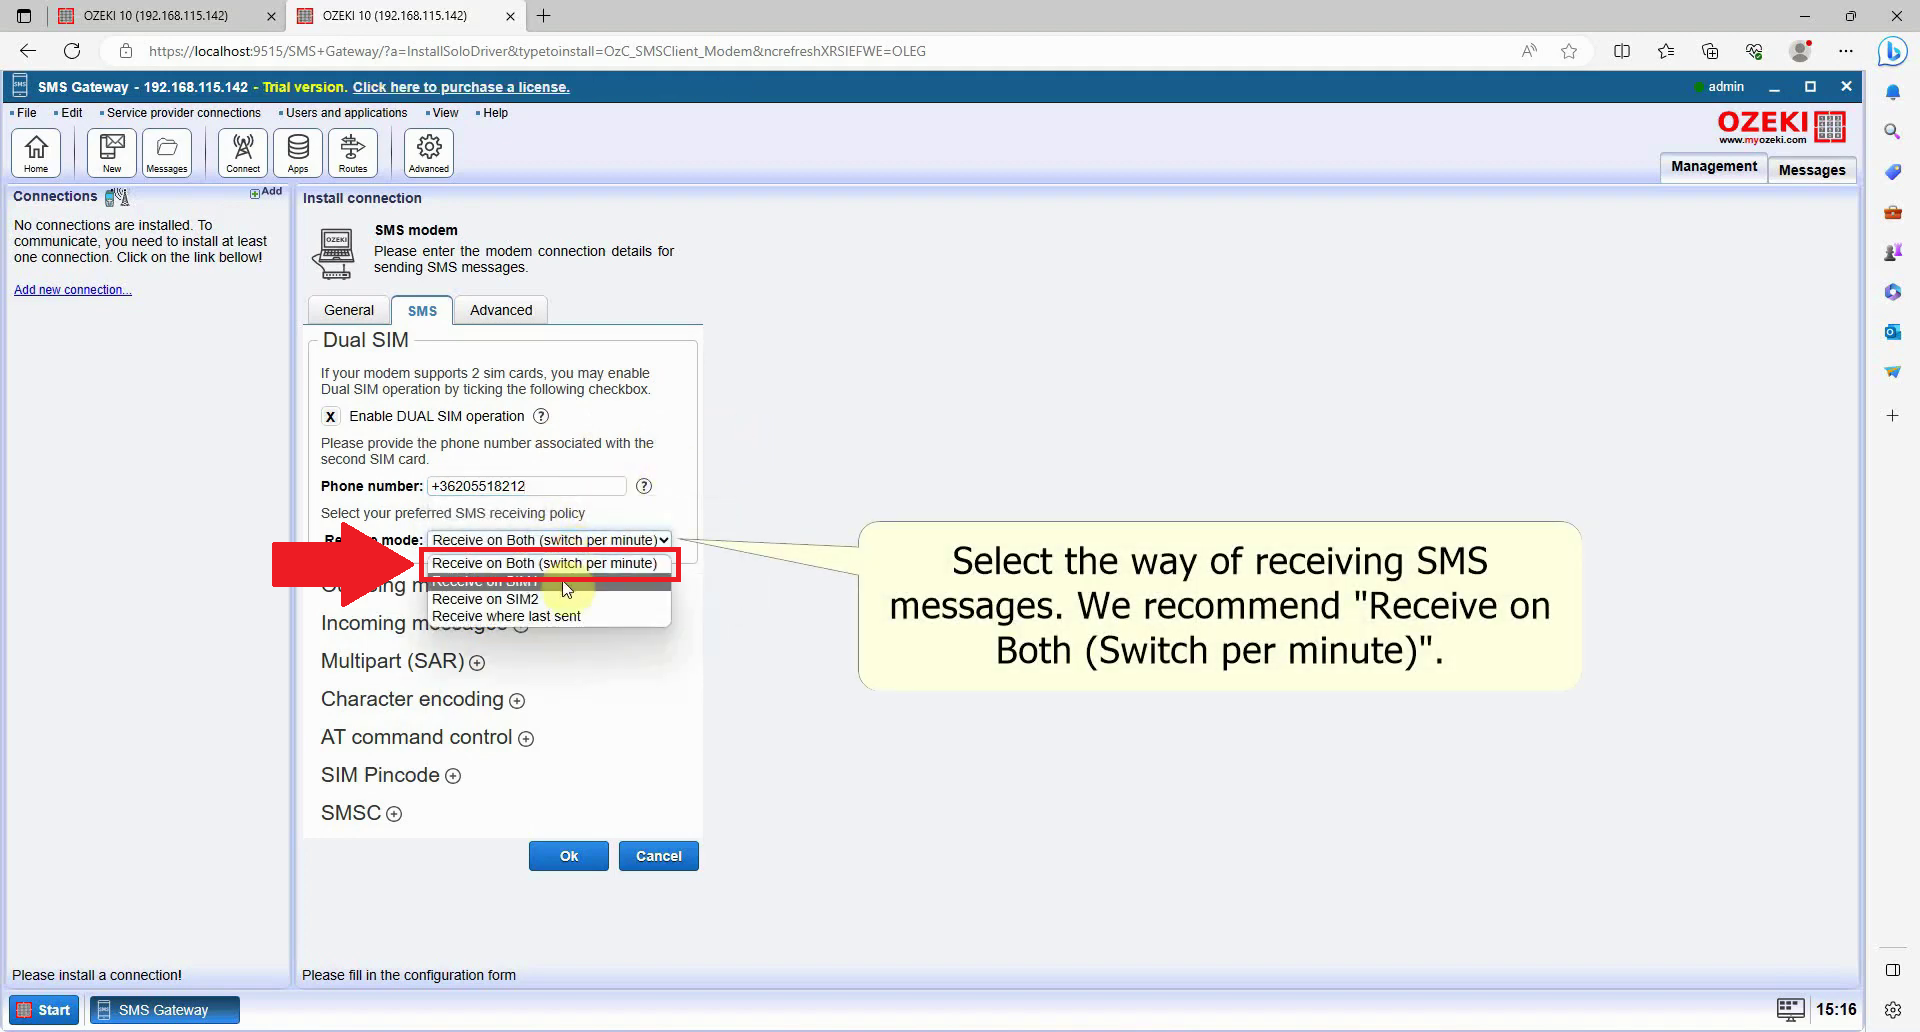
For this configuration, I suggest selecting the "Receive on both" option for the modem. This setting will allow you to monitor network changes through events. The "Receive mode" determines how the modem manages incoming text messages. Ozeki SMS Gateway offers four receive modes for dual SIM modems, enabling the use of both SIM cards or just one. Refer to Figure 21 for visual guidance.
- Receive on both changes SIM cards every minute, text messages may appear a bit late.
- Receive on SIM1 will only show messages sent to SIM1.
- Receive on SIM2 will only show messages sent to SIM2.
- Receive where last sent will only show messages sent to the SIM that was last used for sending messages.
Finish the installation
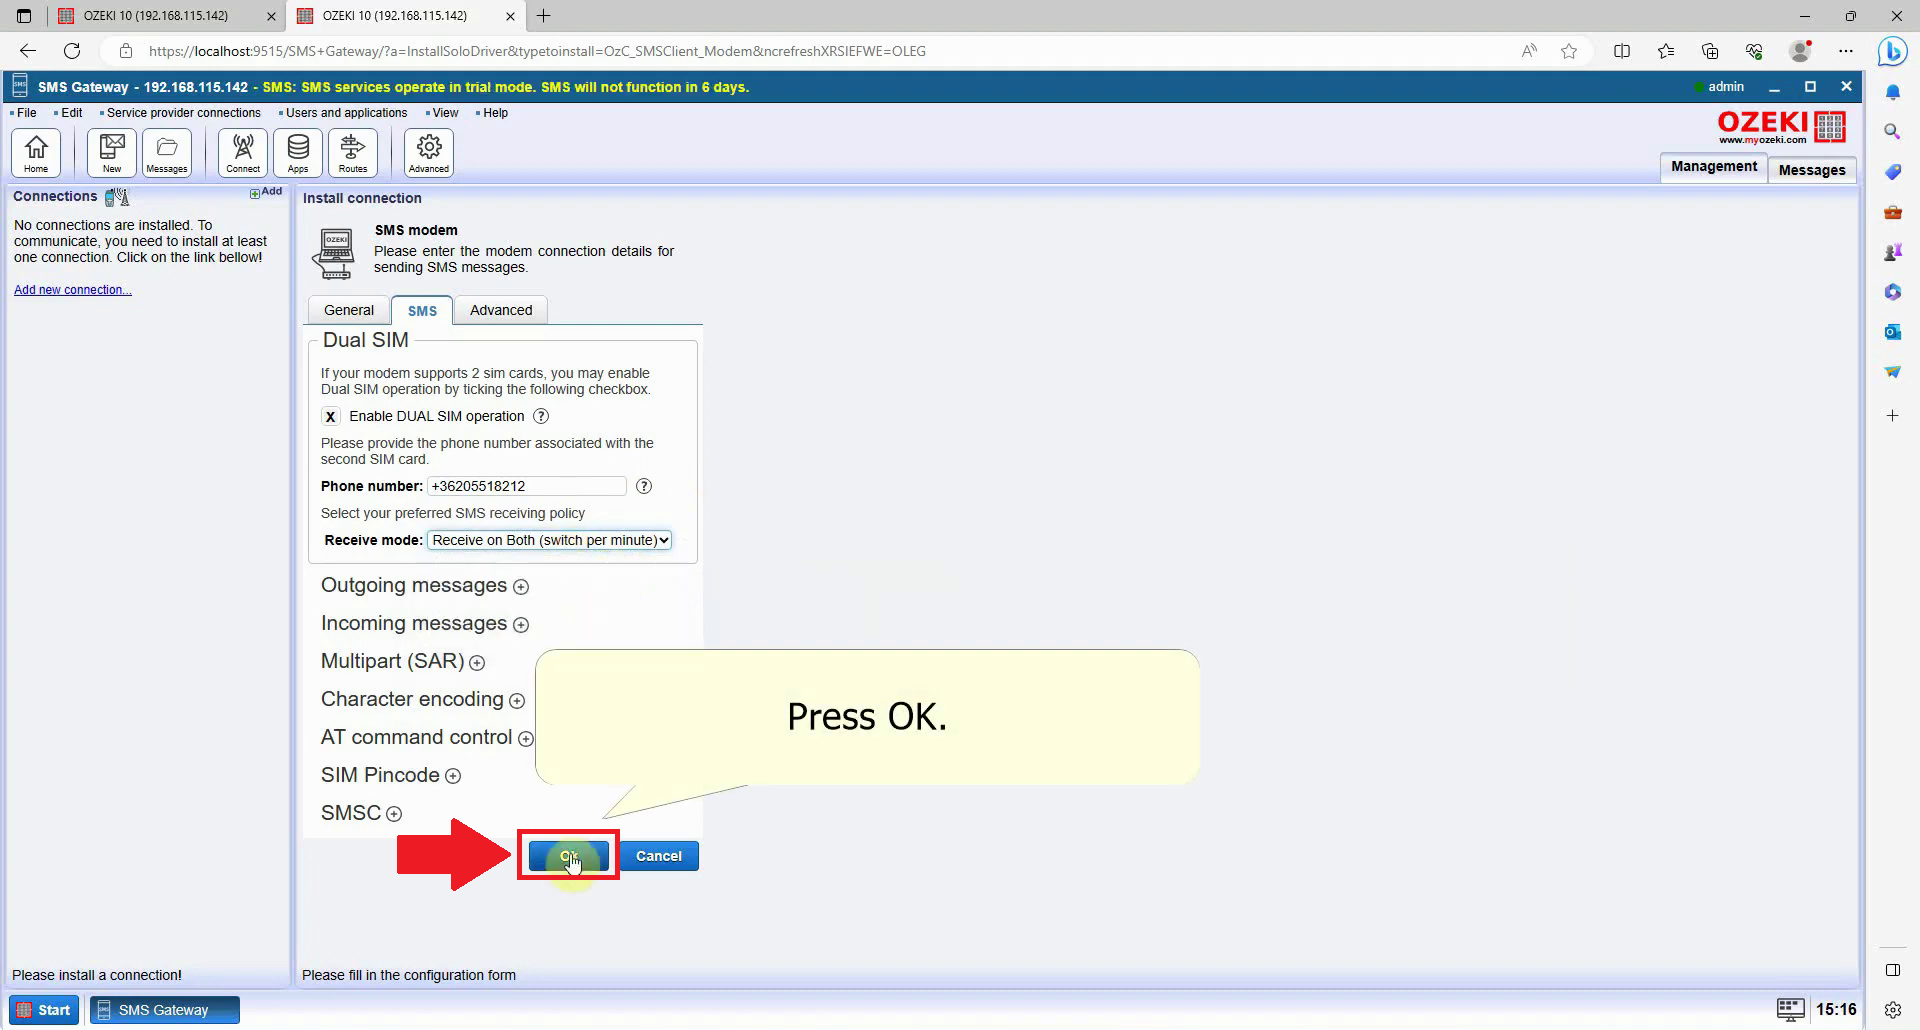
After you've completed the modem configuration, click the Ok button at the bottom of the window to finalize the setup (as shown in Figure 22).
Enable SMS Modem Connection
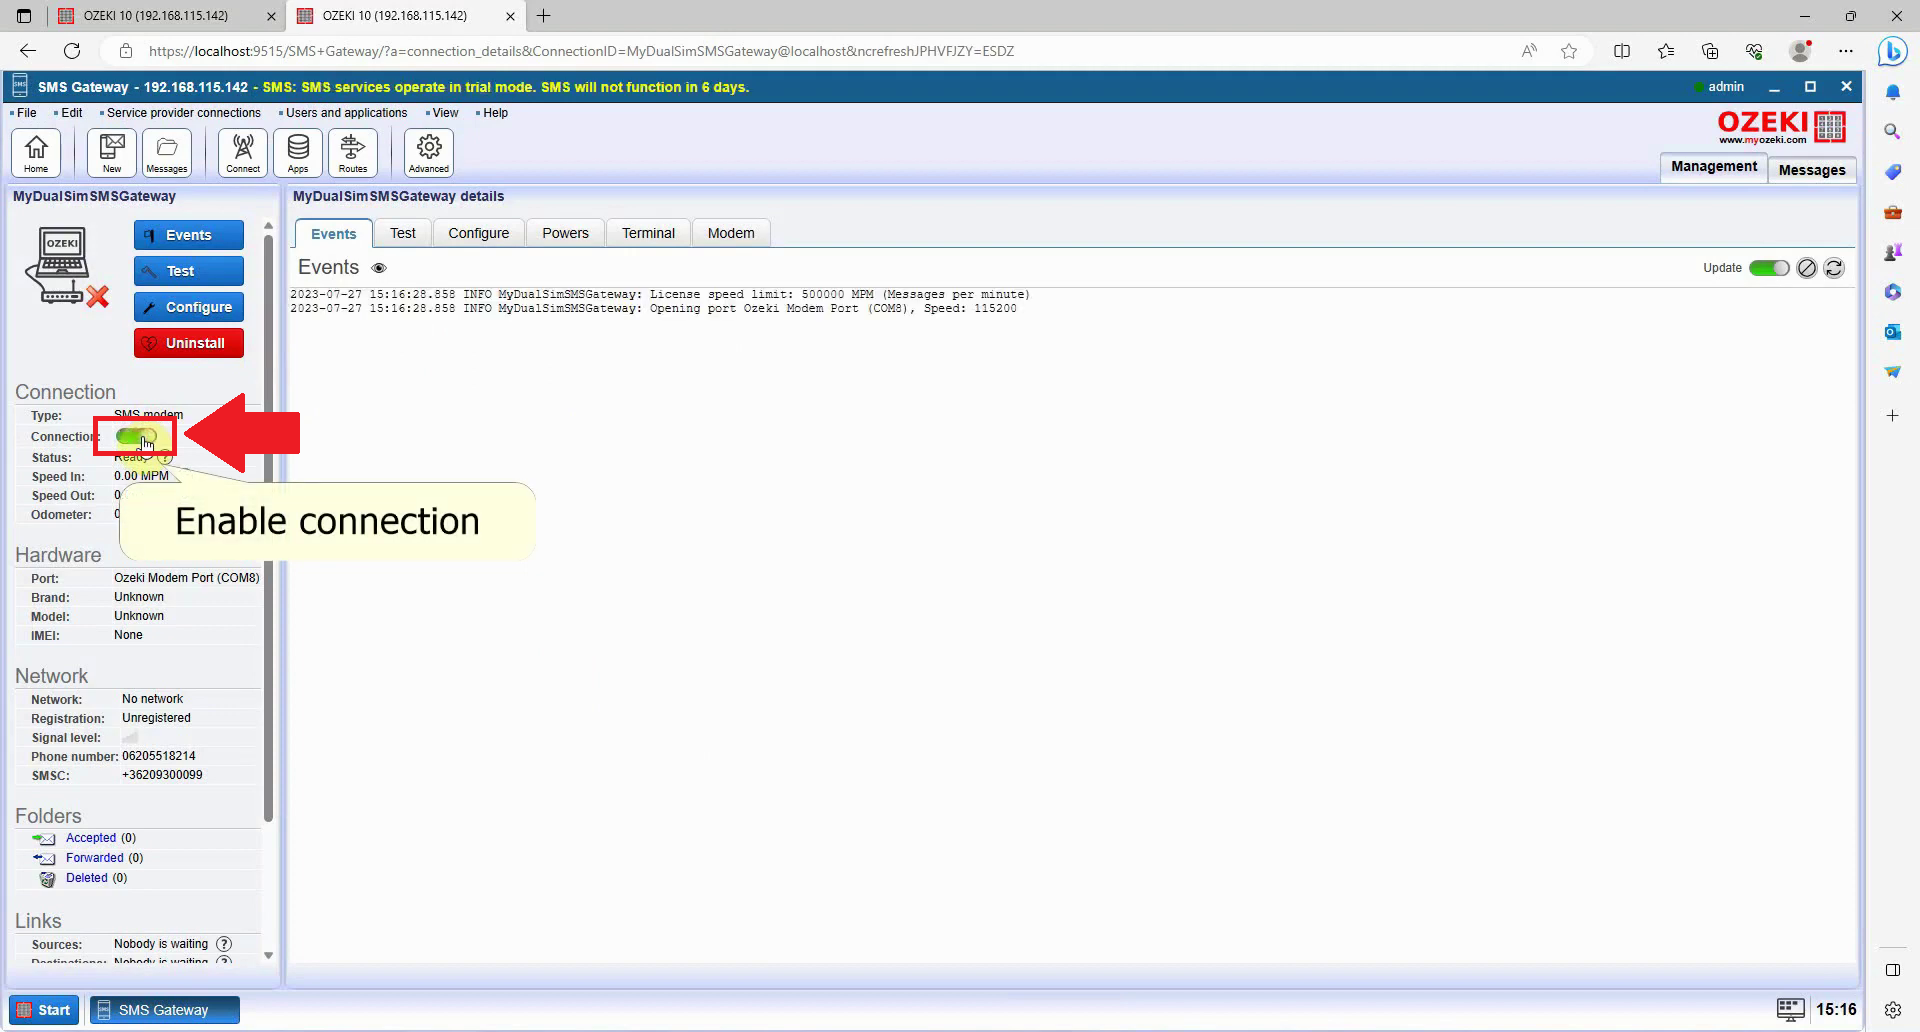
Now you have an SMS modem connection set up in the SMS Gateway application. To start handling SMS messages with this connection, you need to enable it (as shown in Figure 23) by toggling the switch button in the connection details window. The switch turning green indicates that the SMS modem connection is enabled. It's essential to remember that you must perform this step, as an enabled connection is necessary for sending SMS messages.
Check if you have a connection
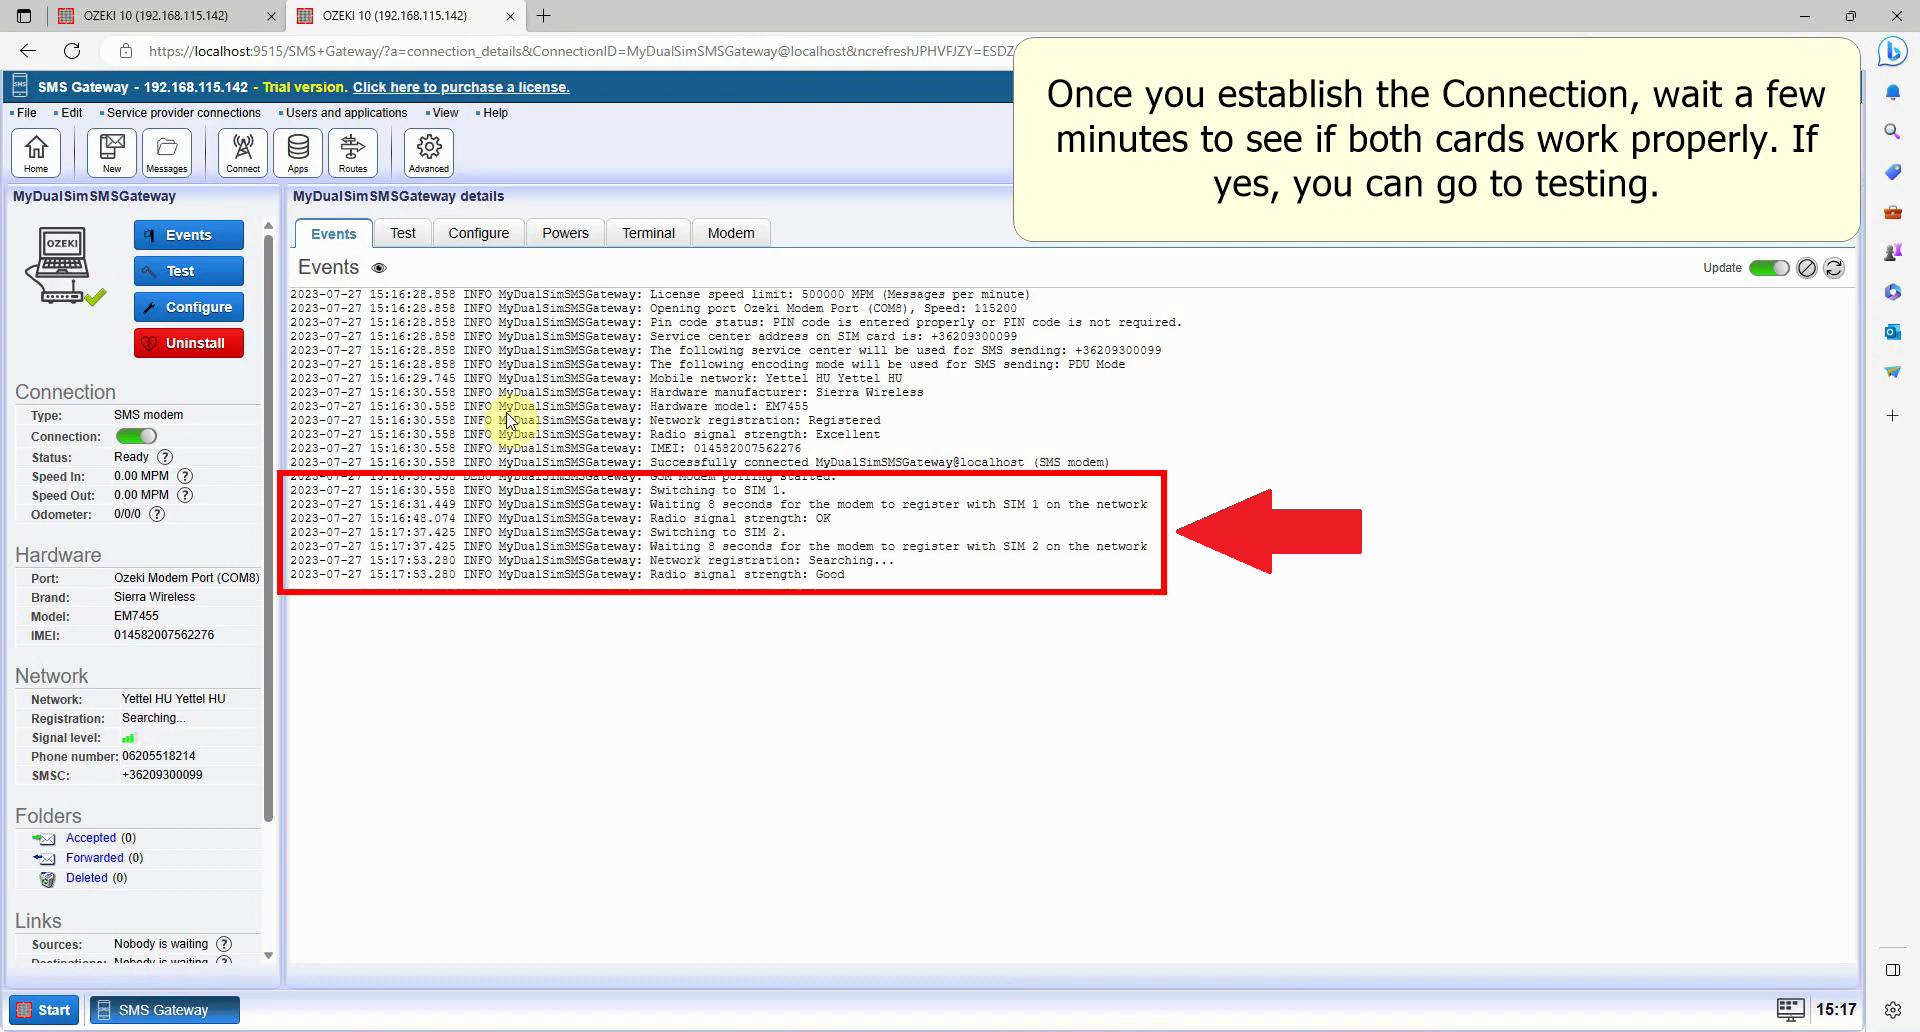
Once you can observe both SIM cards (SIM1 and SIM2) being connected to the network with a good signal, you are ready to move on to the next step. Please be patient, as this step might take a few minutes to complete. You can refer to the visual aid provided in Figure 24 for assistance.
Navigate to the Test panel
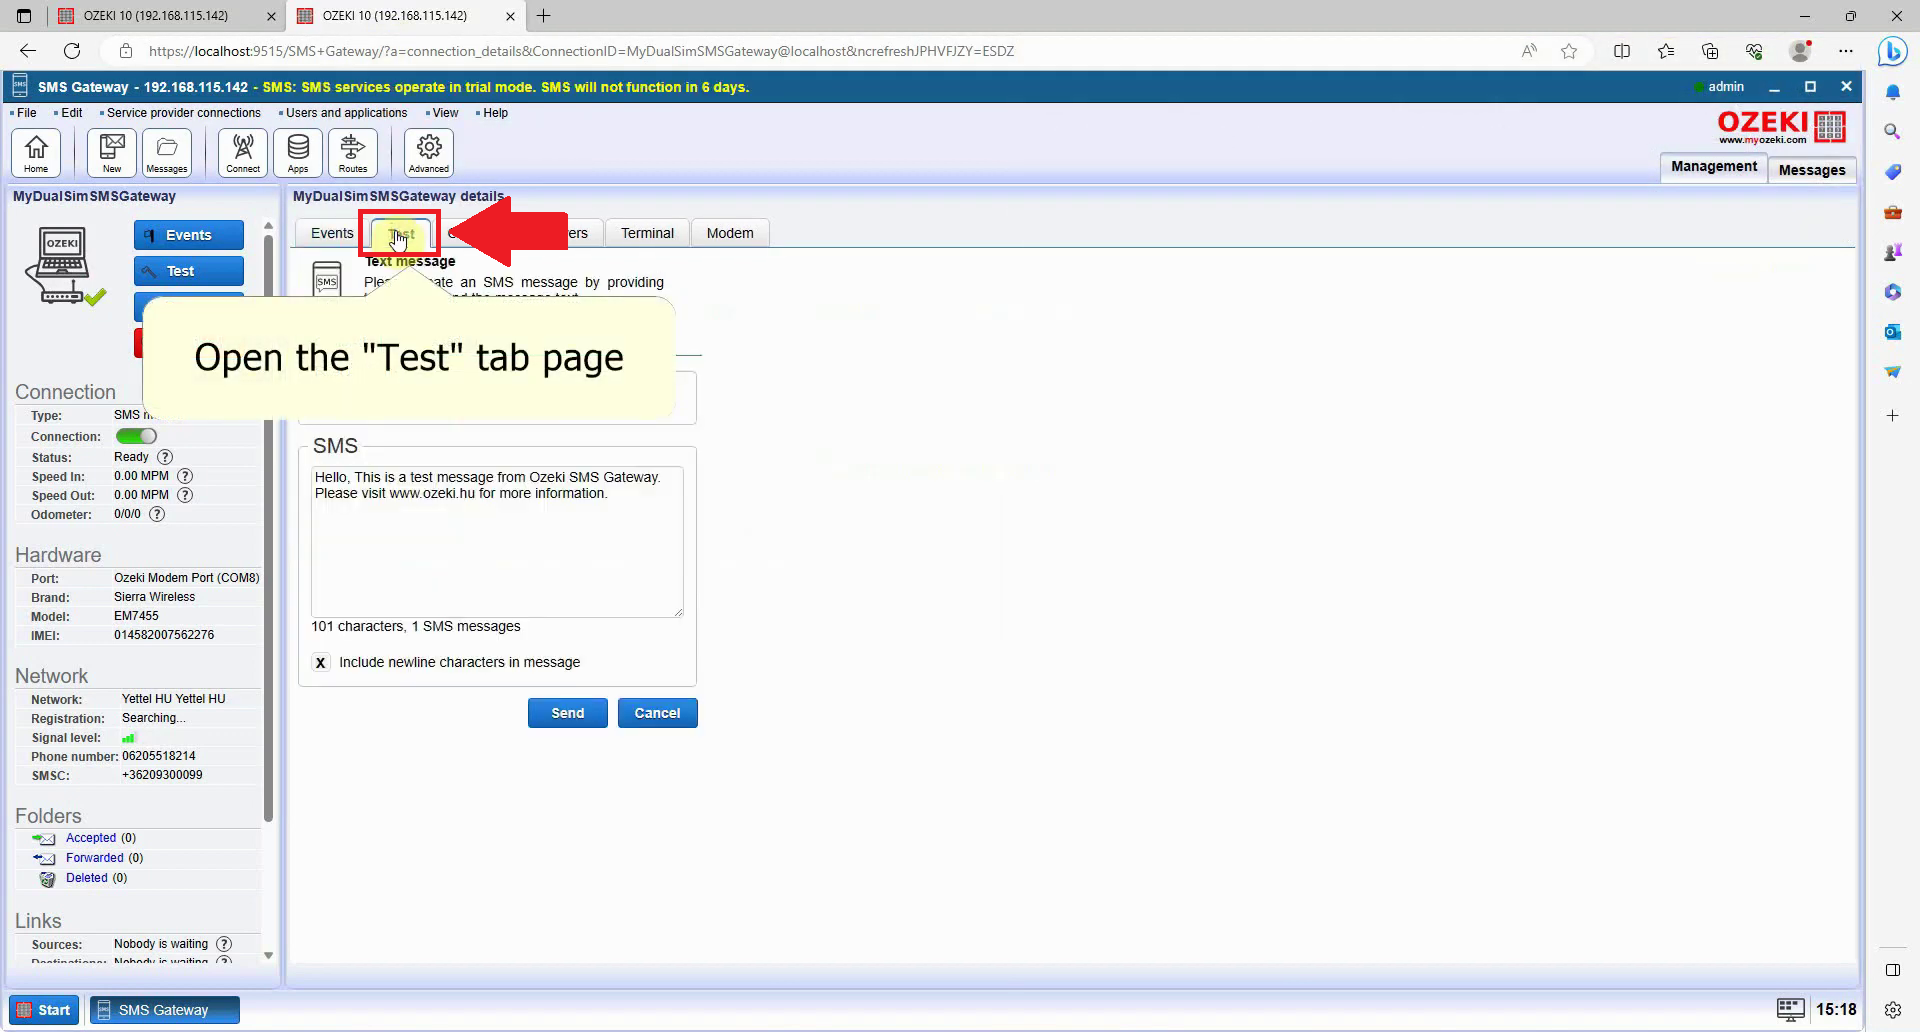
To send test messages, navigate to the Test panel within the SMS Gateway details panel. You can locate this option labeled "Test" at the top, as indicated in Figure 25.
Fill the recipient's address and test message
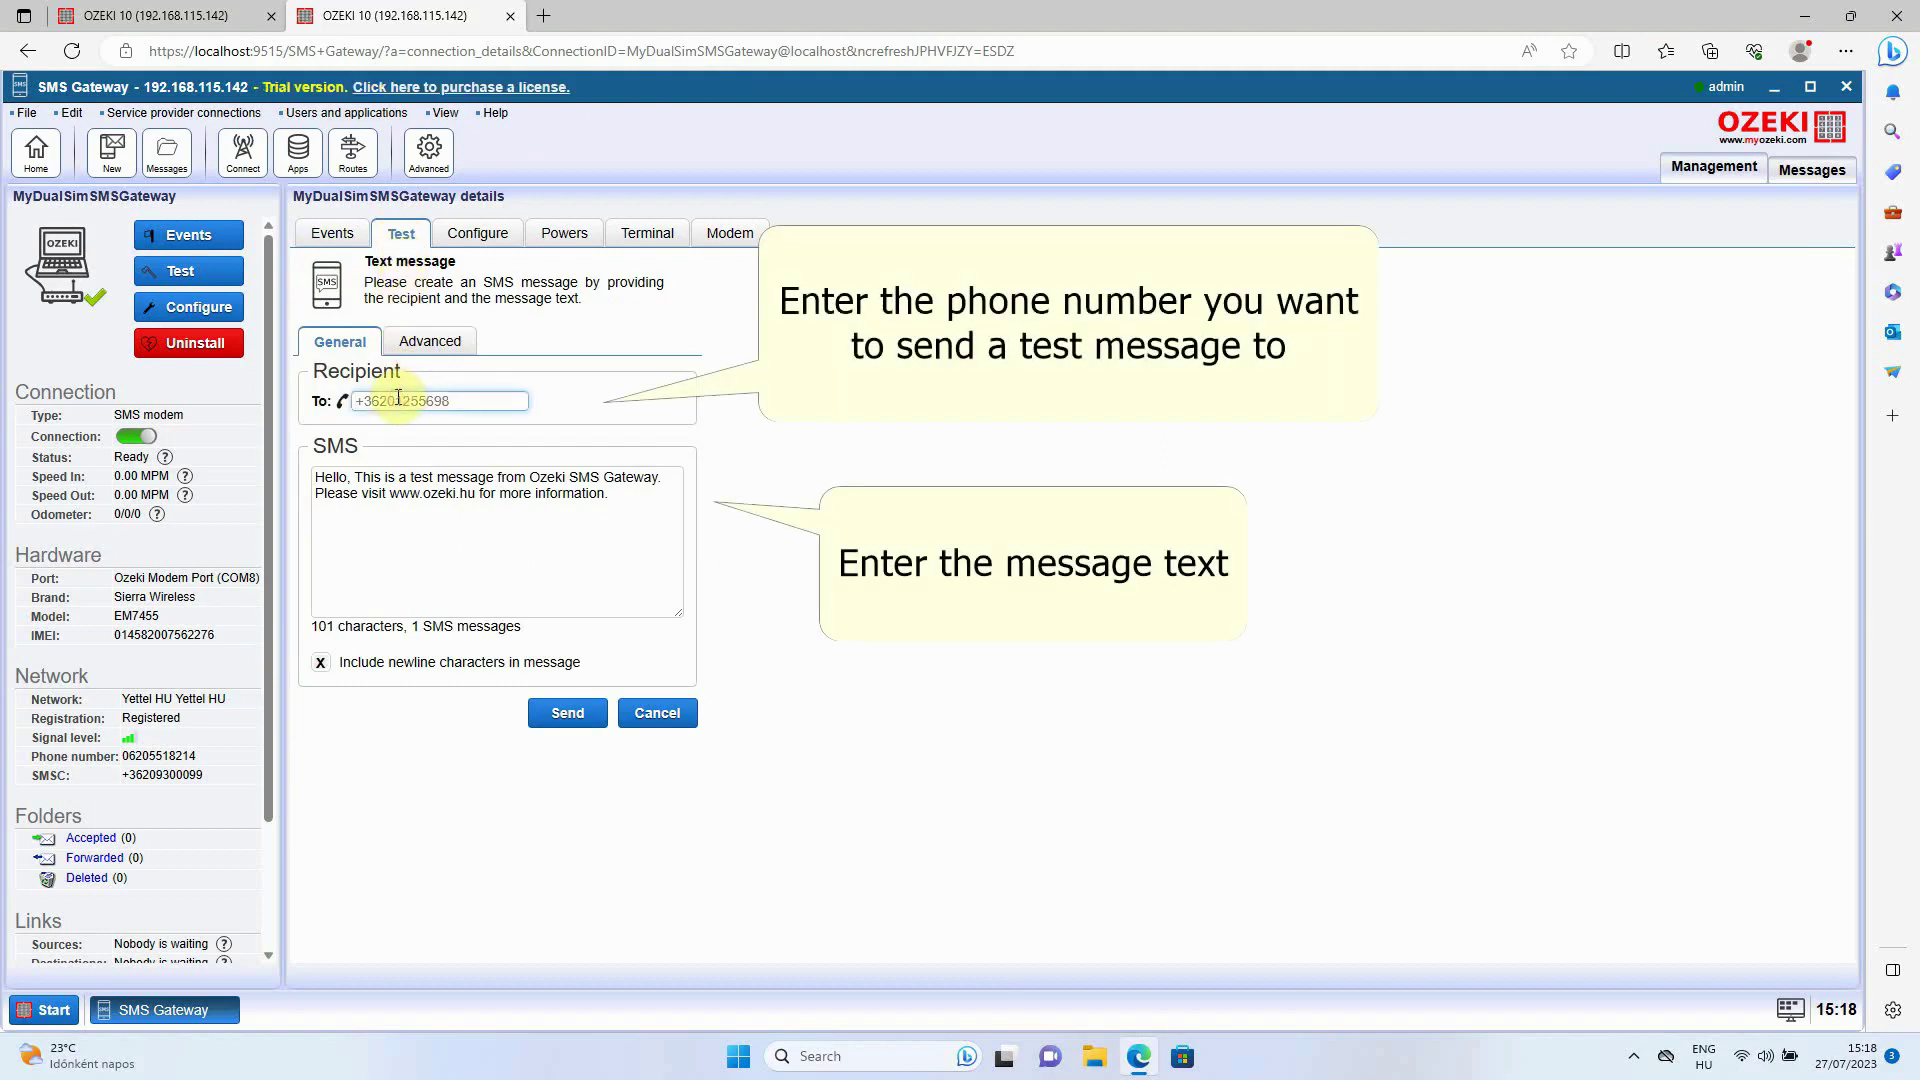
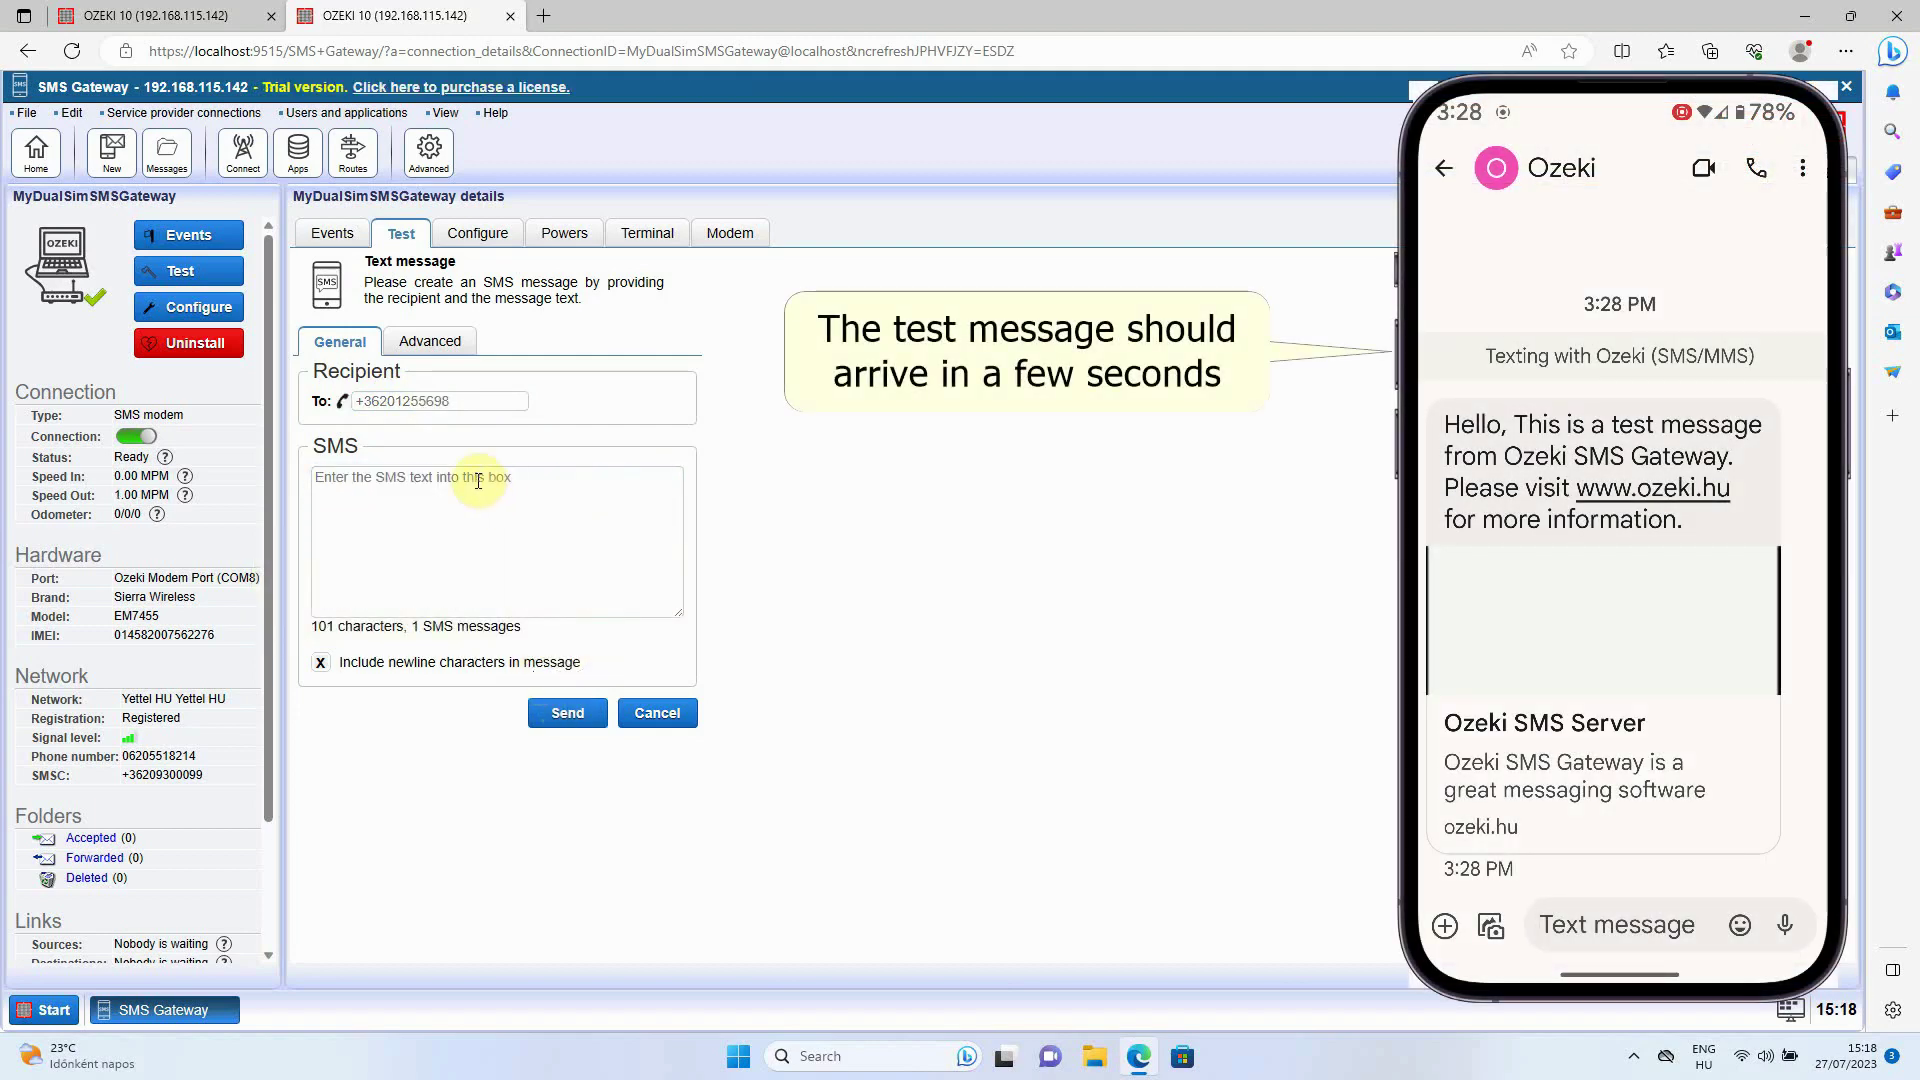
To send a test SMS, proceed to the Test tab and select the General tab. In this tab, you will find the Recipient and SMS groupboxes. To send the message, input the recipient's phone number into the "To:" textbox within the Recipient groupbox. Following that, type your desired test message into the "SMS" groupbox. This message will be sent as an SMS to the provided recipient's address. Feel free to write any content you wish. You can find this layout depicted in Figure 26.
Send the SMS
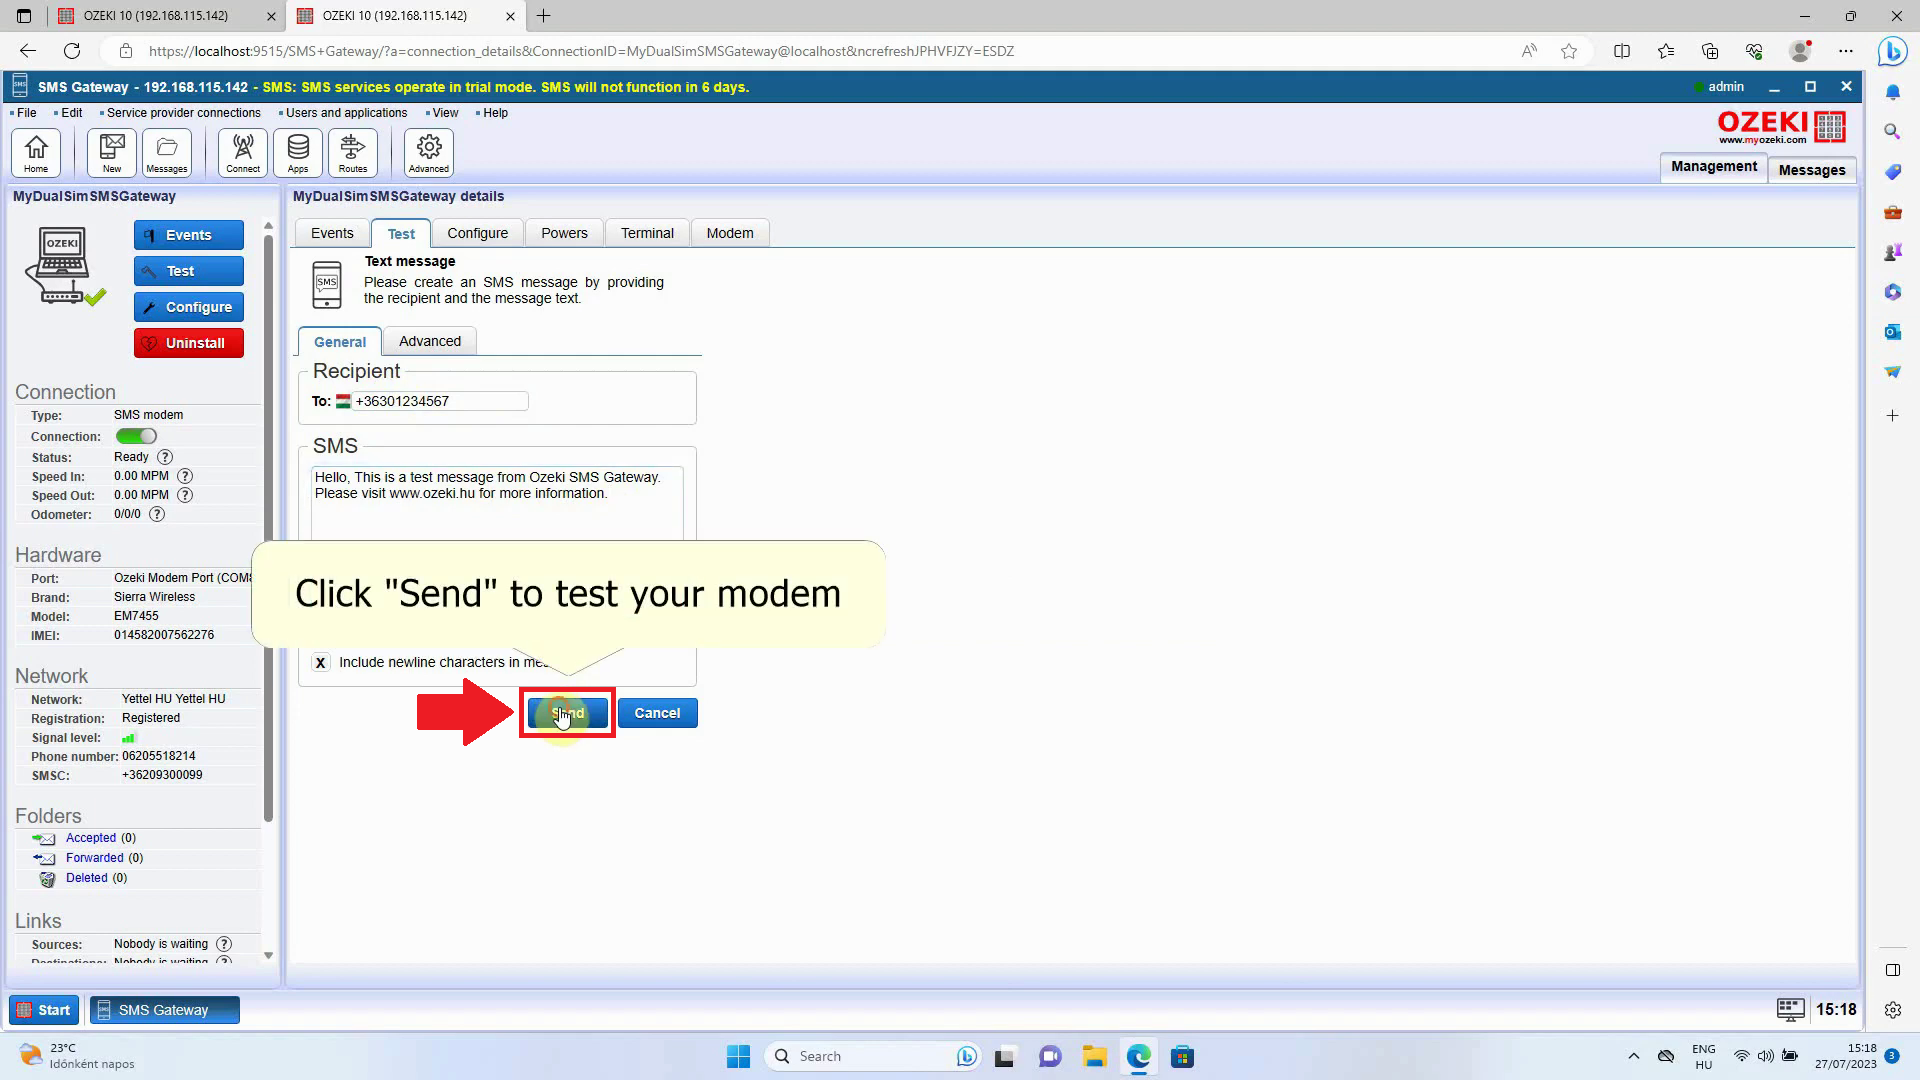
If you are ready to send the SMS message, just click on the Send button (Figure 27).
Check the test message
If all the steps were followed correctly, the test message will be successfully received by the recipient, which you can confirm by checking the test phone. This message functions just like any other regular SMS, demonstrating that your setup of the Ozeki SMS Gateway and Ozeki Modem is ready for your intended use. You can refer to Figure 28 for visual guidance.
Summary
This comprehensive guide showcases the effective functioning between the Ozeki SMS Dual SIM Modem and Ozeki SMS Gateway. This combination allows you to send messages conveniently from your computer, contributing to the expansion of your company's reach. This setup is particularly advantageous for automated or bulk messaging purposes. By following the outlined steps and acquiring the essential hardware and software components, you'll be fully equipped to initiate SMS communication directly from your computer.
More information
- How to receive an SMS Message with a modem using AT commands
- How to send an SMS with a GSM modem using AT commands
- SMS Protocol explained
- Introduction to SMS PDU Mode
- How to use an SMS modem on a virtual machine
- Ozeki 4G SMS Modem
- Ozeki 4G SMS Modem Dual Sim
- Ozeki SMS Gateway One
- Ozeki SMS Gateway PLC
- Compare SMS devices

 Sign in